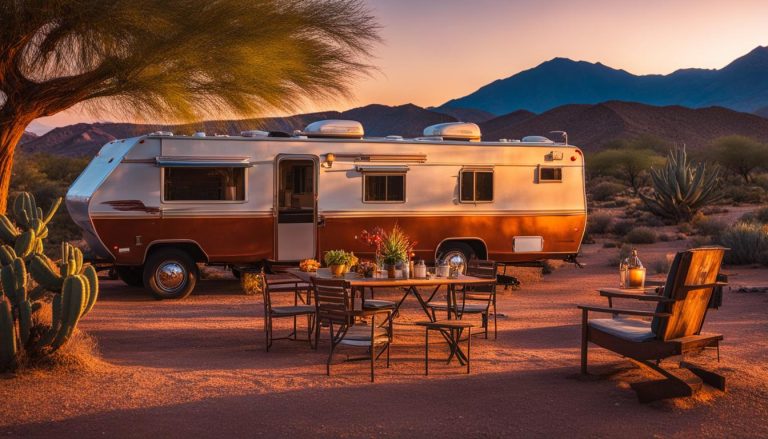
Ultimate Guide: How to Hook Up RV Easily
gorvlifestyle.com and its partners may earn a commission if you purchase a product through one of our links
In this ultimate guide, we will walk you through the step-by-step process of hooking up your RV to power, water, sewer, and other essential connections. Whether you’re a beginner or an experienced RVer, this guide will provide you with all the information you need to ensure a seamless RV setup for stress-free adventures on the open road.
Key Takeaways:
- Follow the correct order of hooking up your RV (electric, water, sewer).
- Use the appropriate RV power cord and consider using a surge protector for electrical connections.
- Connect to the water supply using a potable water hose and a water pressure regulator.
- Properly hook up your RV to the campground’s sewer system using a sewer hose and sewer hose support.
- If you want TV entertainment, hook up your RV to the campground’s cable or satellite system.
Understanding RV Power Connections
Before you can start enjoying the comforts of your RV, you need to hook up to the power source at your campsite. This section will guide you through understanding the RV electrical hook up process, selecting the right RV power cord, and the importance of using a surge protector.
When it comes to RV electrical hook up, having the correct power cord is essential. Depending on your RV’s electrical system, you may require either a 30 amp or 50 amp power cord. It’s crucial to match the amperage of the cord with the appropriate electrical hookup available at your campsite. Investing in the right RV power cord ensures a safe and efficient power connection for your RV.
Additionally, it’s highly recommended to use a surge protector for your RV’s electrical system. A surge protector helps safeguard your RV’s appliances, electronics, and electrical components from power surges and voltage fluctuations. It offers peace of mind by protecting your investment and preventing potential damage caused by unpredictable electrical issues at campsites.
Benefits of Using a Surge Protector for RVs:
- Protects RV’s electrical system from power surges
- Prevents damage to appliances and electronics
- Offers peace of mind during storms and power fluctuations
- Long-lasting investment for the longevity of your RV
By understanding the importance of RV power connections, selecting the appropriate RV power cord, and using a surge protector, you can ensure a safe and reliable power supply for your RV adventures.
Connecting to the Water Supply
Access to clean water is essential for a comfortable RV experience. To connect to the water supply at your campsite, you’ll need a potable water hose and a water pressure regulator to maintain the proper water pressure in your RV’s plumbing system. Don’t forget to sanitize the water spigot before connecting your hose for added cleanliness.
When it comes to connecting your RV to the campground’s water supply, there are a few key considerations to keep in mind. Let’s break it down:
| Item | Description |
|---|---|
| Potable Water Hose | A potable water hose is designed specifically for drinking water and is free of harmful chemicals or contaminants. It’s important to use a hose that is designated for potable water to ensure the water you consume in your RV is safe and clean. Look for hoses labeled as “drinking water safe” or “potable water safe.” |
| Water Pressure Regulator | A water pressure regulator helps control the water pressure coming into your RV. Excessive water pressure can cause damage to your plumbing system and appliances, so it’s important to use a regulator to ensure the pressure stays within a safe range. Attach the regulator to the campground’s water spigot before connecting your potable water hose. |
| Sanitizing the Water Spigot | Before connecting your potable water hose, it’s a good idea to sanitize the campground’s water spigot. Use a sanitizing solution or wipes to clean the spigot and remove any dirt or bacteria that may be present. This step helps maintain the cleanliness of your RV’s water system and prevents contamination. |
After you have your potable water hose and water pressure regulator ready, follow these steps to connect to the water supply:
- Find the campground’s water spigot at your site.
- Sanitize the water spigot using a sanitizing solution or wipes.
- Attach the water pressure regulator to the campground’s water spigot.
- Connect one end of the potable water hose to the water pressure regulator.
- Connect the other end of the potable water hose to the RV’s water inlet.
- Make sure all connections are tight and secure.
- Open the campground’s water spigot slowly to allow water to flow into the RV’s plumbing system.
- Check for any leaks or water pressure issues.
- If everything looks good, you’re ready to use the water in your RV!
Remember to disconnect your potable water hose and water pressure regulator when you’re ready to leave the campsite. Properly coiling and storing your hose in a clean and dry area will help prolong its lifespan. Keep your water pressure regulator in a secure location for future use.
By following these steps and using the right equipment, you can ensure a reliable and clean water supply for your RV adventures.
All About RV Sewer Connections
Properly hooking up your RV to the campground’s sewer system is crucial for maintaining a sanitary and odor-free environment. To ensure a smooth and hassle-free experience, you’ll need the right equipment: an RV sewer hose, sewer hose support, and proper valve management.
Start by connecting one end of the sewer hose to your RV’s wastewater outlet. Make sure it’s securely attached to prevent any leaks or spills. Then, connect the other end of the hose to the sewer drain at your campsite. It’s important to ensure a tight connection to avoid any mess or contamination.
Note: Always wear disposable gloves when handling your RV sewer equipment to protect yourself from potential bacteria or contaminants.
Next, it’s essential to use a sewer hose support to create a downward slope in the hose. This slope helps to establish a steady flow and prevent any blockages. You can find various types of sewer hose supports, including straight and accordion-style options. Choose one that suits your needs and provides reliable support for your sewer hose.
Tip: Position the sewer hose support in a way that allows for easy drainage and avoids any potential obstacles.
One crucial step in maintaining a functional and odor-free RV sewer system is to keep the black tank valve closed when not emptying the tanks. This prevents issues like pyramid plugs and unwanted odors from flowing back into your living space. Only open the black tank valve when you’re ready to dump the tanks.
Proper Maintenance and Precautions
“A well-maintained RV sewer system ensures a clean and comfortable camping experience.”
Proper maintenance and precautions are vital to keeping your RV sewer system in good condition. Here are a few additional tips:
- Regularly flush out your sewer hose and tank with clean water to remove any residue.
- Use RV-friendly toilet paper that dissolves easily to prevent clogs.
- Consider using RV sewer treatments or enzymes to control odors and break down waste.
- Inspect your sewer hose and connections regularly for any signs of wear or damage.
By following these guidelines, you can ensure a seamless and problem-free RV sewer hook up, allowing you to focus on enjoying your camping adventures without any plumbing issues or unpleasant odors.
Setting Up RV Cable and Satellite
If you want to enjoy TV entertainment in your RV, you’ll need to hook up your RV to the campground’s cable or satellite system. This allows you to catch up on your favorite shows or watch movies during your camping adventures. To set up your RV for cable or satellite, follow these steps:
- Locate the external TV jack on your RV. This is usually found on the outside of your RV, near where you plug in other utilities.
- Connect one end of a coaxial cable to the external TV jack. Make sure it is securely connected.
- Locate the campground’s cable or satellite hookup. This is usually a pedestal or box located near your RV site.
- Connect the other end of the coaxial cable to the campground’s cable or satellite hookup. Ensure a tight connection.
- Follow the instructions provided by the campground or refer to your RV’s owner’s manual for specific guidance on tuning your TV to access cable or satellite channels.
By following these steps, you’ll be able to set up your RV for cable or satellite TV and enjoy your favorite programs while on the road. Remember to bring a portable TV or satellite receiver if your RV does not have a built-in TV.

“Having access to cable or satellite TV in your RV adds an extra level of comfort and entertainment during your camping trips.”
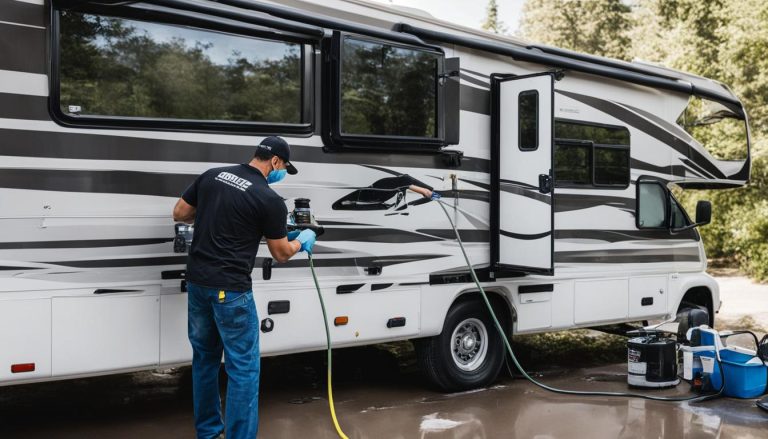
Tips for a Smooth RV Hookup Process
The RV hookup process can sometimes be overwhelming, especially for beginners. To ensure a smooth and hassle-free hookup experience, follow these RV hook up tips and best practices:
- Set your parking brake: Before you start the hookup process, always engage the parking brake on your RV. This will prevent any accidental movement or rolling while you connect your RV to the various utilities.
- Follow the correct order of hooking up: To avoid complications, it’s important to connect your RV in the correct order. Start with the electric hookup, followed by the water connection, and then the sewer hookup. This sequence ensures a seamless setup and minimizes the risk of any issues.
- Use the necessary adapters: Depending on the campsite’s electrical and water hookups, you may need adapters to connect your RV. Make sure to carry a variety of adapters to accommodate different RV hookup configurations.
- Always use a surge protector: Protect your RV’s electrical system from power surges by using a reliable surge protector. This essential device safeguards your RV’s appliances and electronics from potential damage and ensures a stable and safe power supply.
- Take your time to properly set up your RV campsite: Rushing through the setup process can lead to mistakes and unnecessary stress. Take your time to level your RV, extend the awning, and arrange your campsite essentials. This will create a comfortable and welcoming environment for your stay.
Expert Tip:
Invest in RV setup essentials, such as leveling blocks, wheel chocks, and sewer hose supports. These handy tools will streamline your setup process and ensure stability and convenience throughout your camping trip.
RV Setup Checklist
| Item | Description |
|---|---|
| Surge Protector | Protects your RV’s electrical system from power surges and fluctuations. |
| Leveling Blocks | Helps to level your RV on uneven surfaces for better stability and comfort. |
| Wheel Chocks | Prevents accidental rolling or movement of your RV once it’s parked. |
| Sewer Hose Support | Holds your sewer hose in place for efficient and hassle-free dumping. |
| Water Pressure Regulator | Maintains a safe and consistent water pressure in your RV’s plumbing system. |
By following these RV hook up tips and using the right tools, you’ll have a stress-free and enjoyable experience setting up your RV campsite. Take your time, stay organized, and make safety a priority to ensure a smooth start to your adventures on the road.
Common Mistakes to Avoid
To ensure a trouble-free RV camping experience, it’s important to be aware of common mistakes that beginners often make when hooking up their RV. By avoiding these errors, you can save yourself from potential problems and mishaps.
Leaving the Black Tank Valve Open
One of the most common mistakes is leaving the black tank valve open. It may seem convenient to keep it open to avoid the hassle of dumping the tanks, but it can lead to serious issues like clogs and unpleasant odors. Always keep the black tank valve closed except when dumping the tanks.
Not Using a Surge Protector
Electrical surges can cause damage to your RV’s electrical system. To protect your RV from power spikes and fluctuations, always use a surge protector. This simple device acts as a safeguard, ensuring that your RV’s electrical components are safe from any potential damage.
Forgetting to Turn Off Appliances before Connecting to Power
Before you connect your RV to a power source, it’s important to turn off all appliances and electronics inside. This prevents any power surges or disruptions when you plug in, protecting your appliances from potential damage. Always double-check that everything is switched off before connecting to power.
Not Properly Securing the Sewer Hose
A properly secured sewer hose is essential to prevent leaks and messes at the campground. Make sure to use the appropriate fittings and clamps to securely attach the sewer hose to both your RV and the campground’s sewer connection. This will help maintain a clean and sanitary environment throughout your stay.
By being mindful of these common mistakes, you can ensure a trouble-free RV hookup experience and enjoy your camping adventures without unnecessary issues.

Enjoying Your RV Adventures
Now that you’re all set up and ready to hit the road, it’s time to embark on your RV adventures. Whether you have a bucket list of national parks you want to explore, or you prefer camping by the beach, the freedom and flexibility of RV travel will allow you to experience the great outdoors like never before.
Imagine waking up to breathtaking sunrises over towering mountains, enjoying campfire gatherings with fellow RV enthusiasts, and indulging in outdoor activities right outside your RV door. With your properly hooked up RV, you’ll have all the comforts of home wherever you go.
From the majestic beauty of Yosemite National Park to the charming coastal towns along Highway 1, there is an RV camping destination for every type of traveler. Take your time, immerse yourself in the local culture, and create unforgettable memories as you traverse the open road.
FAQ
How do I hook up my RV to power?
Before you start, make sure you have the right RV power cord for your electrical system (30 amp or 50 amp). Use a surge protector to protect your RV’s electrical system from power surges.
How do I connect my RV to the water supply?
To connect to the water supply, use a potable water hose and a water pressure regulator to maintain the proper water pressure in your RV’s plumbing system. Remember to sanitize the water spigot before connecting your hose.
What do I need for RV sewer connections?
For proper sewer connections, you’ll need a sewer hose to connect your RV’s wastewater outlet to the sewer drain. Also, consider using sewer hose support to ensure a steady downhill flow.
How do I set up my RV for cable and satellite?
To set up cable or satellite in your RV, connect a coaxial cable from the external TV jack on your RV to the campground’s cable or satellite hookup. Follow the instructions provided by the campground or refer to your RV’s owner’s manual.
What are some tips for a smooth RV hookup process?
Set your parking brake before starting, follow the correct order of hooking up (electric, water, sewer), use the necessary adapters if needed, always use a surge protector, and take your time to properly set up your RV campsite.
What common mistakes should I avoid when hooking up my RV?
Avoid leaving the black tank valve open, not using a surge protector, forgetting to turn off appliances before connecting to power, and not properly securing the sewer hose.
How can I enjoy my RV adventures?
Now that you know how to hook up your RV, it’s time to hit the road and enjoy your RV adventures. Whether you’re exploring national parks, camping by the beach, or embarking on a cross-country road trip, your properly hooked up RV will provide you with all the comforts of home while you experience the great outdoors.