Connect Your RV Battery Easily: Expert Guide
gorvlifestyle.com and its partners may earn a commission if you purchase a product through one of our links
Proper battery care is essential for RV owners to ensure reliable power during their travels. Understanding how to hook up an RV battery, including its installation, wiring, and terminal connections, is crucial for a seamless electrical system. This expert guide will provide you with all the information you need to connect and maintain your RV battery effectively.
Key Takeaways:
- Knowing the different types of RV batteries, such as flooded lead-acid, sealed lead-acid (Gel and AGM), and lithium-ion, can help determine the best maintenance practices.
- Proper cleaning and maintenance of RV batteries, including regular cleaning of terminals and leads, is essential for optimal performance.
- If you have flooded lead-acid batteries, refilling with distilled water is necessary. However, sealed lead-acid and lithium-ion batteries require minimal maintenance.
- When storing RV batteries during the off-season, it’s important to disconnect leads, clean terminals, fully charge the battery, and store it in a cool, dry place.
- Proper charging and discharging techniques, such as stage-charging, should be followed to maintain maximum battery performance.
RV Battery Types (and Their Needs)
When it comes to choosing the right RV battery for your recreational vehicle, it’s essential to understand the different types and their unique needs. Deep cycle RV batteries are designed to provide steady power over an extended period, ensuring you have reliable electricity while on the road.
There are three main types of deep cycle RV batteries:
- Flooded lead-acid batteries
- Sealed lead-acid batteries (Gel and AGM)
- Lithium-ion batteries
Flooded lead-acid batteries: These traditional RV batteries are the most common and often the most affordable option. However, they require regular maintenance, including the need to check and refill the water levels with distilled water. Despite the maintenance requirements, flooded lead-acid batteries are known for their durability and reliability.
Sealed lead-acid batteries (Gel and AGM): These batteries are a more advanced and low-maintenance alternative to flooded lead-acid batteries. Sealed lead-acid batteries do not off-gas and are completely sealed, making them safer and more convenient. Both Gel and AGM batteries are maintenance-free, meaning you don’t have to worry about checking water levels or adding distilled water. They are also more resistant to vibration and shock compared to flooded lead-acid batteries.
Lithium-ion batteries: Considered the most low-maintenance option, lithium-ion batteries come with several advantages for RV owners. Firstly, they offer a higher energy density, allowing for longer-lasting power and a lighter battery weight. Additionally, lithium-ion batteries are fully sealed and require no maintenance. They also charge more efficiently and have a longer lifespan compared to other battery types.
Comparison of RV Battery Types
Here’s a comparison table highlighting the key differences between flooded lead-acid, sealed lead-acid (Gel and AGM), and lithium-ion batteries:
| Battery Type | Maintenance | Off-Gassing | Energy Density | Lifespan |
|---|---|---|---|---|
| Flooded lead-acid | Requires regular maintenance and water level checks | Yes | Lower | 5-7 years |
| Sealed lead-acid (Gel and AGM) | Maintenance-free, no water level checks | No | Medium | 3-5 years |
| Lithium-ion | Maintenance-free, no water level checks | No | Higher | 10+ years |
Understanding the different types of RV batteries and their needs can help you make an informed decision based on your specific requirements. Whether you prioritize low-maintenance options like sealed lead-acid or the long-lasting performance of lithium-ion batteries, choosing the right RV battery will ensure a reliable power supply during your adventures.
How to Clean RV Batteries
Cleaning RV batteries is an important part of maintenance to ensure optimal performance and longevity. Follow these steps to clean your RV batteries effectively:
Disconnect the Batteries
Before cleaning the batteries, it’s crucial to disconnect them from your RV’s electrical system. This will prevent any electric shock or damage during the cleaning process. Remember to always prioritize safety.
Mix a Cleaning Solution
Prepare a cleaning solution by mixing baking soda and water. This solution acts as a gentle yet effective cleanser for removing dirt, grime, and corrosion from the battery terminals.
Clean the Exterior and Underneath
Spray the cleaning solution onto the battery terminals, ensuring all areas are covered. Allow the solution to sit for about five minutes, allowing it to penetrate and loosen any buildup. While waiting, clean the exterior of the battery and the area underneath it, removing any debris or dirt.
Rinse and Scrub
After five minutes, rinse off the cleaning solution with clean water. Use a battery terminal cleaning brush to scrub the terminals and leads gently. The brush’s bristles will help remove any remaining dirt or corrosion, ensuring proper electrical connections.
Clean the Battery Leads
Before reinstalling the batteries, clean the battery leads as well. They may also accumulate dirt or corrosion, which can affect the electrical conductivity. Soak a clean cloth in the cleaning solution and gently wipe the battery leads to remove any buildup.
Remember to always wear protective gloves and eyewear while working with batteries and cleaning solutions. Safety should be your top priority throughout the process.
By regularly cleaning your RV batteries, you can maintain their performance and extend their lifespan. Follow these cleaning steps to ensure your batteries operate at their best.
How to Refill RV Batteries (Flooded Lead-Acid Only)
If you have flooded lead-acid batteries in your RV, it is important to regularly check their water level. Failure to maintain the proper water level can lead to reduced battery performance and potential damage.
To refill your flooded lead-acid batteries, follow these specific instructions:
- Start by checking the water level in each battery cell. Use a flashlight if needed to see the level clearly.
- If the water level is below the top of the lead plates, you need to refill it with de-ionized and distilled water. This type of water helps minimize impurities and maximize battery performance.
- Carefully remove the caps from the battery cells. Use caution to avoid spilling any battery acid.
- Using a funnel, slowly add the distilled water to each battery cell until the water level reaches just above the top of the lead plates. Take your time to avoid overfilling or spilling.
- After refilling each battery cell, securely reseal the caps to prevent any leaks or spills.
It is crucial to follow the specific instructions and refill warnings provided by the battery manufacturer. Different battery models may have slightly different requirements and precautions, so always refer to the manufacturer’s guidelines. Additionally, some batteries may require disconnecting them from the RV’s electrical system before refilling, while others may not. Again, consult the battery’s instructions for clarity on this matter.
Regularly checking and refilling your flooded lead-acid batteries with distilled water is an important maintenance task that helps ensure optimal battery performance and longevity.

Flooded Lead-Acid Battery Refill Instructions
| Step | Instructions |
|---|---|
| 1 | Check the water level in each battery cell. |
| 2 | If the water level is low, remove the caps from the battery cells. |
| 3 | Slowly add distilled water to each battery cell. |
| 4 | Fill each battery cell until the water level reaches just above the lead plates. |
| 5 | Reseal the caps securely. |
How to Store RV Batteries
Properly storing RV batteries is crucial for their longevity, especially during the off-season or when winterizing your RV. Follow these steps to ensure your batteries stay in optimal condition:
- Disconnect leads: Before storing the RV batteries, disconnect the positive and negative leads to prevent any potential drain on the battery.
- Remove the battery: Take out the battery from the RV and set it aside in a safe and well-ventilated area.
- Clean the terminals: Use a battery terminal cleaner or a mixture of baking soda and water to clean the battery terminals and leads thoroughly. This helps prevent any corrosion buildup.
- Fully charge the battery: Ensure that the battery is fully charged before storing it. This will help maintain its overall health during the storage period.
- Add distilled water: For flooded lead-acid batteries, check the water level and add distilled water if necessary. This step helps prevent the plates from drying out.
- Store in a cool, dry place: Find a cool and dry location to store the battery. The storage area should have a temperature range of 32°F to 80°F (0°C to 27°C).
- Check battery charge: Regularly monitor the battery charge every 30 days to ensure it stays at an optimal level. This step helps prevent self-discharge and ensures the battery remains in good condition.
By following these storage guidelines, you can prolong the life of your RV batteries and be ready for your next adventure.
Battery Storage Do’s and Don’ts
| Do’s | Don’ts |
|---|---|
| Disconnect leads | Leave the battery connected |
| Remove the battery from the RV | Store the battery in extreme temperatures |
| Clean the terminals and leads | Allow corrosion buildup on terminals |
| Fully charge the battery | Store a partially charged battery |
| Add distilled water (for flooded lead-acid batteries) | Overfill the battery with distilled water |
| Store in a cool, dry place | Store the battery near moisture or direct sunlight |
| Check battery charge every 30 days | Neglect checking the battery charge |
Make sure to follow these storage recommendations to keep your RV batteries in top condition and ready for your next adventure.

How to Charge and Discharge RV Batteries
Properly charging and discharging your RV batteries is crucial for maintaining their performance and extending their lifespan. By following these guidelines, you can ensure that your batteries are always ready to power your adventures on the road.
Avoid Overcharging and Discharging
To maximize the lifespan of your RV batteries, it’s important to avoid overcharging and discharging them excessively. Overcharging can damage the battery cells and shorten their overall lifespan, while discharging them below 50% of their capacity can reduce their performance and longevity.
Maintain Minimum Battery Voltage
It’s essential to maintain a minimum battery voltage of 10.5 volts to prevent irreversible damage to your RV batteries. Regularly check the battery voltage using a multimeter or battery monitor and recharge them when the voltage drops below the recommended level.
Stage-Charging for Optimal Results
Stage-charging is a recommended method for effectively charging your RV batteries. It involves three main charging stages: bulk charging, absorption charging, and float charging.
- Bulk Charging: In this initial stage, the charger delivers a high current to quickly recharge the battery until the voltage reaches a predetermined level.
- Absorption Charging: During this stage, the charger lowers the current while maintaining a constant voltage, allowing the battery to reach its full charge capacity.
- Float Charging: Once the battery reaches its full charge, the charger switches to a lower voltage to maintain the battery’s charge level without overcharging it. This stage helps prevent damage caused by overcharging.
Regular Maintenance and Monitoring
Make it a habit to regularly inspect your RV batteries for any signs of damage, corrosion, or leaks. Clean the battery terminals and leads using a battery terminal cleaning brush and a mixture of baking soda and water. Also, keep in mind that high temperatures can shorten the life of your batteries, so more frequent checks and maintenance may be necessary in hot climates.
| Charging Method | Advantages |
|---|---|
| Bulk Charging | Fast recharging |
| Absorption Charging | Optimal battery capacity |
| Float Charging | Prevents overcharging |
By following these charging and discharging practices and maintaining proper battery voltage, you can ensure that your RV batteries stay in top condition and provide reliable power throughout your journeys.
Upgrading and Replacing RV House Batteries
Upgrading and replacing your RV house batteries is a smart move to enhance the efficiency and reliability of your RV’s electrical system. By understanding the different types of RV batteries available, you can make an informed decision that suits your specific needs.
Keep an eye out for signs of a failing battery, such as dimming lights, slow appliances, voltage discrepancies, and electrolyte level anomalies. These indicators can help you identify when it’s time for an upgrade or replacement.
Prior to making the switch, it’s essential to prepare adequately. Start by documenting your current battery setup and gathering all the necessary tools and materials. This way, you’ll be well-prepared for a successful battery replacement.
When it comes to different battery types, each has its own advantages and disadvantages. Lead-acid, AGM, Gel, and lithium-ion batteries all offer unique features and capabilities. Among them, lithium-ion batteries stand out for their long-term value and exceptional performance.
FAQ
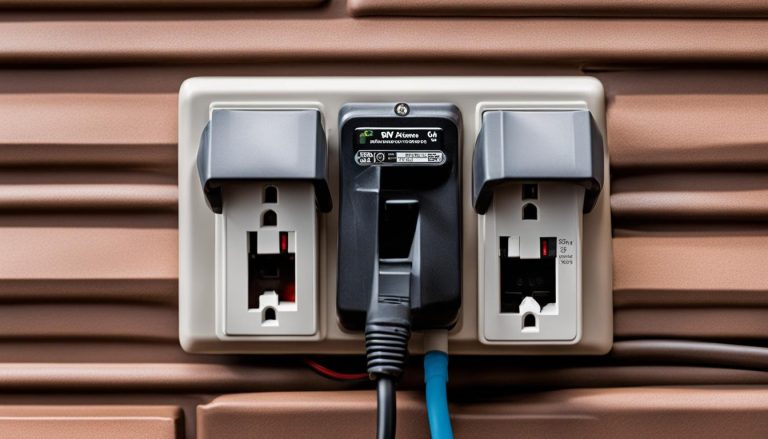
How do I hook up an RV battery?
To hook up an RV battery, start by connecting the positive terminal of the battery to the positive terminal of the RV’s electrical system. Then connect the negative terminal of the battery to the negative terminal of the RV’s electrical system.
What types of RV batteries are there?
The three main types of deep cycle RV batteries are flooded lead-acid, sealed lead-acid (Gel and AGM), and lithium-ion batteries.
How often should I clean my RV batteries?
It is recommended to clean your RV batteries regularly, at least every three months or whenever you notice dirt or corrosion buildup on the terminals.
Can I use tap water to refill my flooded lead-acid RV battery?
No, it is important to use distilled water to refill flooded lead-acid RV batteries. Tap water may contain impurities that could affect the battery’s performance.
How should I store my RV batteries during the off-season?
To properly store RV batteries during the off-season, disconnect the positive and negative leads, remove the battery, clean the terminals and leads, fully charge the battery, and store it in a cool, dry place within a temperature range of 32°F to 80°F.
How can I avoid overcharging or undercharging my RV battery?
To avoid overcharging or undercharging your RV battery, use stage-charging, which includes bulk charging, absorption charging, and float charging. This allows for optimal charging efficiency and ensures the battery remains fully charged without causing damage.
How do I know if it’s time to replace my RV house batteries?
Signs of a failing RV battery may include dimming lights, slow appliances, voltage discrepancies, and anomalies in the battery’s electrolyte level. If you notice these signs, it may be time to upgrade or replace your RV house batteries.