RV Siding Fix Guide: Repair It Yourself Easily
gorvlifestyle.com and its partners may earn a commission if you purchase a product through one of our links
Regularly inspecting and repairing your RV siding is essential to keep it protected from leaks, dents, scratches, and debris. Before jumping into a full replacement, consider if a simple fix using sealant can do the job. Different types of sealants such as silicone/polyurethane, polysulfide, and rubber offer UV and temperature resistance, water lockout capabilities, and weather strength.
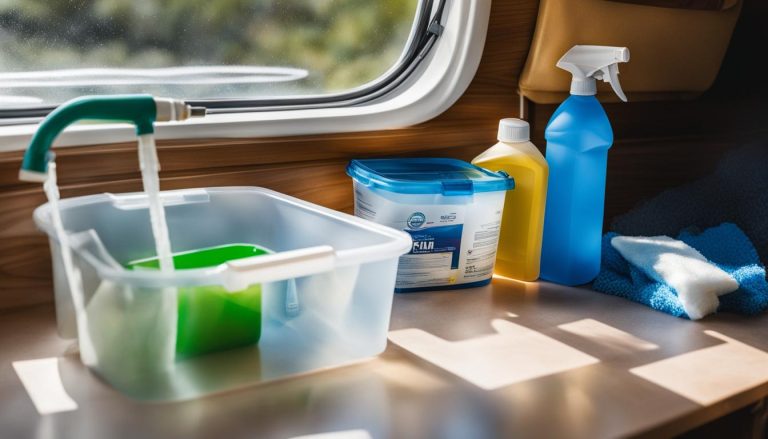
To begin the repair process, thoroughly clean the affected area and choose the appropriate sealant. Apply the sealant to the damaged area and allow it to cure according to the manufacturer’s instructions. In cases where the siding is beyond repair, replacement may be necessary. However, before proceeding, it’s important to determine the type of siding on your RV.
Key Takeaways:
- Regularly inspect and repair your RV siding to prevent further damage.
- Consider using sealant before opting for a full siding replacement.
- Different sealant types offer UV and temperature resistance, water lockout capabilities, and weather strength.
- Clean the affected area thoroughly before applying the selected sealant.
- When replacement is necessary, determine the type of siding on your RV before proceeding.
DIY RV Siding Repair: Steps to Take
When it comes to repairing your RV siding, taking matters into your own hands can save you money and give you a sense of accomplishment. By following these steps, you can restore your RV siding to its former glory and ensure a smooth and hassle-free journey.
Selecting the Right Materials
To begin your DIY RV siding repair project, it’s crucial to choose the appropriate materials based on the type of siding and the specific problem you’re facing. Whether you’re dealing with minor leaks, scratches, or dents, finding the right repair materials is essential for optimal results.
Common RV Siding Repairs:
- Sealing minor leaks with an appropriate sealant
- Filling scratches using a matching touch-up paint or filler
- Straightening dents using tools and techniques specific to your siding material
The Cleaning and Preparation Process
Before you start the repair process, thoroughly clean the damaged area and make sure it is dry. This ensures proper adhesion and allows the repair materials to work effectively. Use a gentle cleaner suitable for your siding type and follow the manufacturer’s instructions for best results.
Applying the Repair Materials
Follow the manufacturer’s instructions for applying the selected repair materials, such as sealants or fillers. Be sure to apply them evenly and according to the recommended thickness. Use a putty knife or applicator tool to level excess sealant or filler, ensuring a smooth and seamless finish.
Curing and Finishing Touches
Allow the repair materials to cure fully before subjecting your RV siding to any stress or exposure. This ensures the longevity and effectiveness of the repairs. Once cured, check the repaired area for any imperfections and make any necessary touch-ups to blend the repaired section with the surrounding siding.
If Extensive Damage Occurs
If the damage to your RV siding is more extensive and cannot be effectively repaired, it may be necessary to replace the siding. Consider replacing damaged sections with matching panels and secure them using nails or screws to ensure a secure and unified appearance.
Maintaining Your RV Siding
Regular maintenance and cleaning are essential to both prevent and address future damage to your RV siding. Clean the siding regularly using appropriate cleaners and techniques recommended by the manufacturer. Inspect your RV siding periodically for any signs of wear or damage and address them promptly to avoid further issues.
By following these steps and practicing best practices for RV siding repair, you can keep your RV looking great and protect it from potential damage. Remember that each RV is unique, and it’s essential to consider the specific materials and instructions provided by the manufacturer for the best results.
Repairing Aluminum RV Siding
Aluminum siding is commonly found in older RVs and Airstream trailers. If you notice small holes in your aluminum siding, don’t worry! You can easily patch them up with a few simple steps. Start by cutting a piece of aluminum sheet to fit over the damaged area. Clean the surface thoroughly and remove any flaps or loose parts of aluminum around the hole. (how to repair aluminum rv siding)
Apply epoxy to cover the hole smoothly, ensuring a secure seal. Let the epoxy dry according to the manufacturer’s instructions. Once dry, use sandpaper to smoothen the repaired area. This will ensure a seamless finish that blends with the rest of the siding. (aluminum siding repair parts)
For larger holes that cannot be patched, you may need to replace the entire panel with a new sheet of aluminum. This process requires careful measurements and precise installation. Take accurate measurements of the damaged area and purchase a replacement aluminum sheet that matches your RV’s siding. (repairing camper siding)
Once you have the replacement sheet, remove the damaged panel, and install the new one using nails or screws for secure attachment. Make sure to follow proper installation techniques to ensure a tight fit and a professional finish. Finally, remember to check the overall condition of your aluminum siding regularly to identify and address any potential issues. (how to repair rv siding)
Repairing aluminum RV siding is a DIY task that can save you time and money. With the right materials and a little patience, you can restore your RV’s siding to its former glory. Whether it’s patching small holes or replacing panels, taking care of your aluminum siding will help maintain the overall appearance and value of your RV. (how to repair rv siding, repairing camper siding)
| Benefits of Repairing Aluminum RV Siding | Steps for Repairing Aluminum RV Siding |
|---|---|
| 1. Cost-effective compared to full replacement. | 1. Measure the damaged area accurately. |
| 2. Preserves the original look and character of your RV. | 2. Purchase a matching replacement aluminum sheet. |
| 3. Prevents further damage and potential leaks. | 3. Remove the damaged panel carefully. |
| 4. DIY task that can be completed with basic tools. | 4. Install the new aluminum sheet with nails or screws. |
Expert Tip:
Before starting any repairs, ensure the surface is clean and free from debris. This will help the epoxy adhere properly and ensure a strong bond. Additionally, always use the appropriate safety equipment, such as gloves and eye protection, when working with repair materials and tools.
Tips for Successful RV Siding Repair
When embarking on a DIY RV siding repair project, it’s essential to approach it with the right techniques and strategies. By following these tips, you can ensure a successful repair that restores your RV’s siding to its former glory.
- Thorough Research: Before starting any repair, conduct thorough research to understand the specific techniques and materials required for your RV’s siding. This knowledge will help you make informed decisions throughout the repair process.
- Gather the Appropriate Materials: Ensure you have all the necessary materials on hand before starting the repair. This includes sealants, patching compounds, adhesives, tapes, and any other tools or products specific to your siding type.
- Avoid Low-Quality Alternatives: It’s tempting to opt for cheaper or alternative materials to save costs. However, using lower-quality alternatives can compromise the repair’s effectiveness and longevity. Stick to recommended products for the best results.
- Follow Manufacturer Instructions: Each repair product comes with specific instructions from the manufacturer. It’s crucial to follow these instructions carefully to ensure safety, effectiveness, and to prevent any unintentional damage during the repair process.
- Consider Siding Type: Different RVs have different types of siding, such as aluminum or fiberglass. Understanding your RV’s siding type helps in selecting the right materials and techniques suitable for that specific siding.
- Thoroughly Clean the Surface: Before starting repairs, clean the damaged area thoroughly to remove any debris, dirt, or contaminants. A clean surface ensures better adhesion and helps in achieving a seamless repair.
- Handle Materials with Care: When working with repair materials, handle them carefully to avoid causing further damage. Mishandling can lead to scratches, dents, or other issues that may require additional repairs.
- Match the Repaired Area: If the repair involves replacing a damaged section of siding, make sure to match the new siding with the existing one in terms of color, texture, and pattern. This ensures a seamless blend and maintains the overall appearance of your RV.
By following these tips and taking a meticulous approach to your RV siding repair, you can achieve excellent results and extend the lifespan of your RV’s exterior.

Testimonials
“Thanks to the tips provided in this RV siding repair guide, I was able to fix the dents and scratches on my RV’s aluminum siding. Now it looks as good as new!” – Cynthia B.
How to Fix Small Aluminum Holes in RV Siding
When it comes to repairing small aluminum holes in your RV siding, the process can be straightforward with the right steps. By following these guidelines, you can restore your RV’s siding to its former glory.
Preparation is key
Start by preparing a clean surface for the repair. Remove any loose debris and ensure the area is dry. This will ensure proper adhesion of the repair materials.
Secure any loose parts
If there are any parts or flaps of aluminum around the hole, press them down firmly to ensure a smooth surface for the repair.
Apply epoxy to cover the hole
Next, apply a suitable epoxy filler to cover the small hole. Make sure to apply enough epoxy to fully cover the hole and create a smooth surface.
Allow for drying and sanding
Let the epoxy dry according to the manufacturer’s instructions. Once dry, sand the repaired area gently until it is smooth and flush with the surrounding siding.
Addressing dents in the aluminum siding
If your RV’s aluminum siding has dents, you can fix them using a similar approach. Drill a small hole at the center of the dent, then use pliers to carefully pull the dent back into shape.
Once the dent is pulled out, remove any paint around the area and apply an auto-body filler. After scraping the surface level, sand it until smooth and paint it to match the rest of the siding.
Following these steps will help you successfully repair small aluminum holes and dents in your RV’s siding, restoring its appearance and structural integrity.

Continue reading to discover more tips and techniques for RV siding repair.
RV Siding Replacement Options
When your RV siding is beyond repair, replacement becomes necessary. Whether you have aluminum or fiberglass siding, it’s essential to choose the right replacement materials to ensure a seamless fit. Here are the steps to replace your RV siding:
- Identify the type of siding on your RV: Determine if you have aluminum or fiberglass siding, as the replacement process may differ.
- Match the color and pattern: Finding replacement siding that matches the existing color and pattern can make the installation process more straightforward and visually appealing.
- Remove the old panels: Take off the old siding panels one at a time, ensuring that you have adequate support to prevent any damage to your RV’s structure.
- Secure the new panels: Install the new siding panels using either nails or screws, depending on the manufacturer’s recommendations. Make sure to follow the specific instructions provided and ensure a secure attachment.
For detailed instructions on replacing your RV siding, consult your RV’s owner’s manual or reach out to a trusted RV repair specialist.
| Replacement Steps | Key Considerations |
|---|---|
| Identify the type of siding | – Aluminum or fiberglass – Different installation methods |
| Match the color and pattern | – Visual cohesion – Easier installation |
| Remove the old panels | – Take off one at a time – Ensure structural integrity |
| Secure the new panels | – Nails or screws – Follow manufacturer instructions |
Replacing your RV siding can give your vehicle a fresh look and protect it from further damage. If you’re uncertain about the replacement process or prefer professional assistance, reach out to an RV repair specialist who can guide you through the steps and ensure a successful siding replacement.
Expert Help for RV Siding Repair
If you’re not confident in your DIY skills or prefer professional assistance, there are specialized RV service and repair companies that can handle your siding repair needs. These experts are equipped with the knowledge and experience needed to address various RV siding repairs, including those on Airstream trailers. By entrusting your repair to professionals, you can ensure that the work is done to OEM standards, using the proper materials, resulting in a finished product that meets factory standards.
In addition to RV siding repair, these experts can assist you with a range of other RV repairs, including:
- Electrical and plumbing
- Fabrication
- Door and window repairs
- Awning and step repairs
- Interior repairs and updates
With their expertise in these areas, you can trust that your RV will receive the necessary care and attention it deserves. Whether you’re dealing with siding damage or require other repairs, professional RV service and repair providers have you covered.
Trust Coach Specialists for All Your RV Repair Needs
When it comes to professional RV repair services, trust the experts at Coach Specialists. Our team of experienced technicians is well-versed in handling a wide range of RV repairs, including aluminum siding repair, electrical and plumbing work, fabrication, door and window repairs, and awning and step repairs.
We pride ourselves on paying attention to detail and ensuring that every repair meets OEM standards. Whether you need collision repairs or interior updates, our skilled technicians use only the highest quality materials and techniques to deliver a finished product that matches factory quality.
As a trusted RV repair company, we understand the importance of providing exceptional services to our customers. That’s why we strive to deliver reliable and reliable repairs that not only meet your expectations but also exceed them. Whether you own an Airstream or any other type of RV, you can count on Coach Specialists to provide the expertise and services you need.
If you’re in need of professional RV repair services, look no further than Coach Specialists. Contact us today to schedule an appointment or learn more about our wide range of RV repair services. Trust the experts and ensure your RV is in top-notch condition for your next adventure.
FAQ
How do I repair RV siding?
For minor repairs, clean the affected area and apply a sealant. If the siding is damaged beyond repair, you may need to replace it. Determine the type of siding on your RV before proceeding.
What materials do I need for RV siding repair?
The materials you need will depend on the type of siding and the specific problem. Common repair materials include sealants, matching panels, nails or screws, aluminum sheet, epoxy, auto-body filler, and paint.
How do I repair small holes in aluminum RV siding?
To repair small holes, clean the surface, press down any flaps of aluminum, and apply epoxy to cover the hole. Let the epoxy dry, sand the area, and ensure it is smooth.
Can I replace RV siding myself?
Yes, you can replace RV siding yourself. Start by identifying the type of siding on your RV and find matching panels. Remove the old panels one at a time and install the new panels using nails or screws for secure attachment.
Should I hire a professional for RV siding repair?
If you are not confident in your DIY skills or prefer professional help, it is advisable to hire a professional RV service and repair company. They have the necessary knowledge and experience to handle various RV siding repairs.
How do I choose the right RV repair company?
When choosing an RV repair company, look for one with experience in RV siding repair, such as Coach Specialists. They should use OEM standards and materials, pay attention to detail, and provide a finished product that meets factory quality.