Easy Guide: How to Put Up RV Awning in Steps
gorvlifestyle.com and its partners may earn a commission if you purchase a product through one of our links
Welcome to our easy guide on how to put up an RV awning! Whether you’re a new RV owner or just looking for a refresher, we’ve got you covered. Putting up an RV awning is a simple process that can greatly enhance your outdoor experience while camping. By following a few easy steps, you’ll have your awning set up in no time.
Key Takeaways:
- Loosen the rafter knobs and release the travel locks to prepare for awning installation.
- Roll out the awning using an awning rod and hook the black pull strap.
- Slide the rafters up the awning arms and lock them into place.
- Raise the awning to the desired height using the handles on each arm.
- Regularly clean and maintain your RV awning to prolong its lifespan.
Preparing for Awning Installation
Before you begin installing your RV awning, it’s important to properly prepare the area and have the necessary tools ready. Follow these steps to ensure a smooth and hassle-free awning setup.
Step 1: Park and Level Your RV
Park your RV in a suitable location and ensure it is level. This will provide a stable foundation for the awning installation process.
Step 2: Clear the Area
Remove any obstacles or debris that could hinder the awning setup. Clear the surrounding space to allow for easy access and operation of the awning.
Step 3: Check Travel Locks and Ratchet Mechanism
Verify that the travel locks on both awning support arms are released. Additionally, make sure the ratchet mechanism is in the correct position for installation.
Step 4: Gather the Necessary Tools
Have an awning rod and black pull strap readily available for use during the installation process. These tools will help you roll out and secure the awning.
Opening the Awning
Once you’ve prepared your RV and cleared the area of any obstructions, it’s time to open the awning and create a comfortable outdoor space. Follow these simple steps to extend your RV awning:
- Use the awning rod to roll out the awning, ensuring that the black pull strap is securely hooked.
- Slide the rafters up the arms of the awning and lock them into place.
- Tighten the rafter knobs to secure the rafters, providing additional stability to the awning.
- Next, raise the awning to your desired height using the handles on each arm. This will allow you to adjust the shade and ensure the fabric is taut.
- Make sure the awning is high enough to clear the door, preventing any obstructions when entering or exiting your RV.
With these simple steps, you can effortlessly open your RV awning and enjoy the benefits of an extended outdoor living space.
Tips for Opening an RV Awning
“Before extending your awning, ensure that the rafter knobs are loosened, and the travel locks are released. This will prevent any unwanted resistance during the opening process.”
Closing the Awning
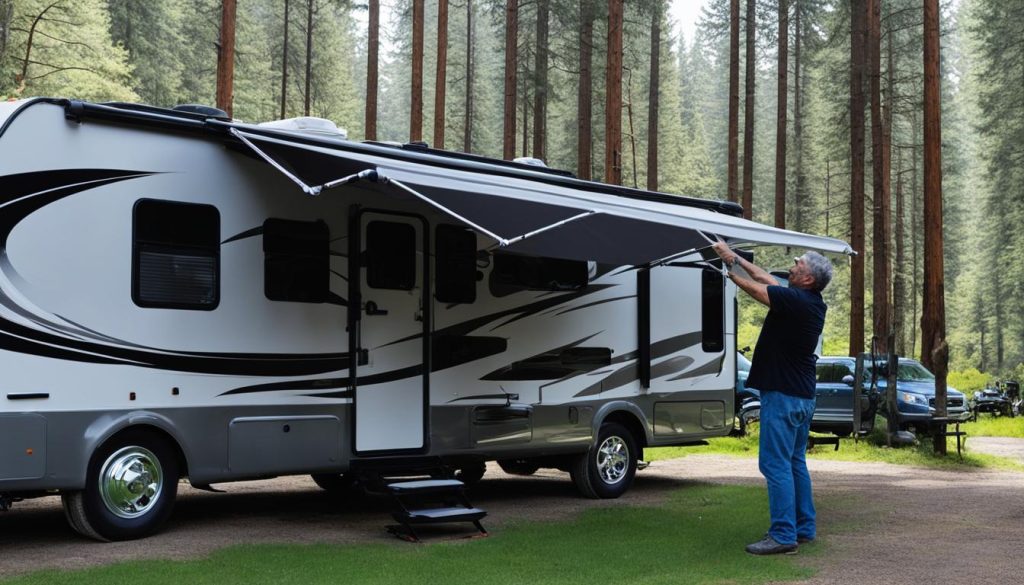
When it’s time to pack up your RV, closing the awning is a breeze. Just follow these simple steps:
- Lower the awning to its lowest position by lowering the handles on each outer awning arm. This will bring the awning fabric closer to the ground.
- Slide the rafter arms down to the bottom of the outer awning arms. This will ensure that the awning is fully retracted.
- Switch the locking lever to the roll-up position. This will hold the awning in place as you roll it up.
- Using the awning rod, start rolling up the awning from one end to the other. Make sure to roll it evenly to prevent any wrinkles or damage to the fabric.
- Once the awning is rolled up, secure it by fastening the straps provided. This will ensure that the awning remains securely closed during transit.
And there you have it! By following these steps, you can easily retract and close your RV awning, making it ready for your next adventure.
Tips for Closing Your RV Awning:
- Always ensure that the awning is fully lowered and the rafter arms are properly slid down before attempting to close it.
- Take your time when rolling up the awning, making sure it is done evenly to avoid any strain on the fabric.
- Inspect the awning for any loose or damaged parts before closing it. Repair or replace any damaged components as needed.
- Secure the straps tightly to prevent the awning from unrolling during transit.
Maintaining the Awning
Regular cleaning and maintenance of your RV awning is essential to ensure its longevity and functionality. By taking proper care of your awning, you can enjoy years of shade and protection during your adventures. Here are some important steps to help you maintain and care for your RV awning:
1. Inspect and Remove Debris
Before retracting your awning, carefully inspect it for any signs of damage or wear. Look for tears, holes, loose seams, or bent components. If you notice any issues, address them promptly to prevent further damage. Additionally, remove any debris, leaves, twigs, or dirt that may have accumulated on the awning fabric.
2. Cleaning the Awning Fabric
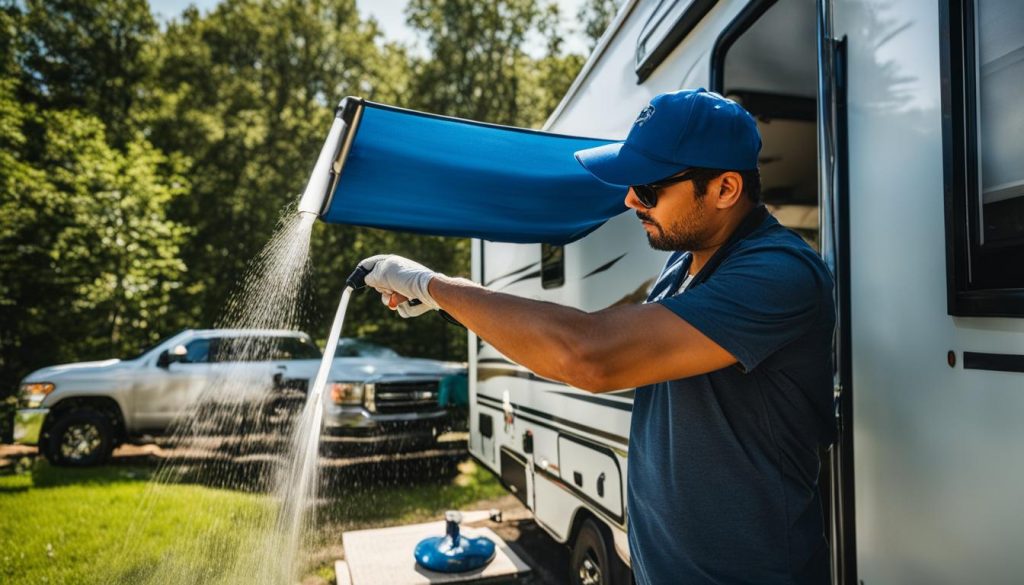
To keep your awning clean and free from stains, it’s important to regularly wash the awning fabric. Use an approved cleaner specifically designed for RV awnings. Avoid using harsh chemicals or abrasive brushes that could damage the fabric. Instead, opt for a soft-bristle brush or sponge to gently scrub both sides of the awning fabric. This will help remove dirt, grime, and mildew buildup.
3. Thoroughly Rinse and Dry
After cleaning the awning, rinse it thoroughly with water to remove any remaining soap or cleaning solution. Make sure to rinse both the top and bottom surfaces of the fabric. Once rinsed, allow the awning to air dry completely before retracting it. This will help prevent mold and mildew growth, which can pose a health hazard and result in unpleasant odors.
4. Keep the Awning Dry and Covered
To further protect your RV awning, make sure to keep it dry and covered when not in use. Moisture and prolonged exposure to the elements can cause damage and reduce the lifespan of the awning fabric. Consider using an awning cover or storing the RV in a covered area to shield the awning from rain, snow, and direct sunlight.
“Regular cleaning and maintenance of your RV awning is crucial to prevent premature deterioration and ensure optimal performance.”
5. Professional Inspection
While regular maintenance can go a long way in preserving your awning, it’s recommended to have it professionally inspected at least once a year. An experienced technician can assess the condition of your awning, identify any underlying issues, and provide necessary repairs or replacements.
| RV Awnings Best Practices | Don’ts | Do’s |
|---|---|---|
| Regularly inspect awning for damage | Use harsh chemicals | Use approved cleaner |
| Remove debris before retracting | Scrub aggressively with abrasive brushes | Gently scrub with soft-bristle brush |
| Thoroughly rinse and dry awning | Allow moisture to accumulate | Ensure complete air drying |
| Keep awning dry and covered | Expose awning to prolonged sun or rain | Use an awning cover or store RV in a covered area |
Tips and Precautions
Setting up your RV awning doesn’t have to be a hassle. Follow these tips for an easy and hassle-free awning installation:
1. Before extending the awning, always loosen the rafter knobs and release the travel locks. This allows for smooth and safe extension without any obstructions.
2. When raising the awning, make sure it is high enough to clear the door of your RV. This prevents any damage and ensures convenient access.
3. Avoid opening the awning in windy or stormy conditions. Strong gusts can put excessive strain on the awning, leading to potential damage.
4. Secure the awning strap to keep it out of the way and prevent tripping hazards. This ensures a tidy and safe setup.
5. Before traveling, always remember to retract and secure the awning. This prevents any damage during transit and ensures a hassle-free journey.
By following these simple tips, you can enjoy an easy and stress-free RV awning installation, allowing you to make the most of your outdoor living space.
FAQ
How do I prepare for RV awning installation?
Before installing your RV awning, make sure your RV is parked and leveled properly. Clear the area of any obstructions that may interfere with the awning. Ensure that the travel locks are released and the ratchet mechanism is in the proper position. Have an awning rod and black pull strap ready for use.
How do I open my RV awning?
To open your RV awning, use the awning rod to roll out the awning by hooking the black pull strap. Slide the rafters up the awning arms and lock them into place. Tighten the rafter knobs to secure the rafters. Raise the awning to the desired height using the handles on each arm. Ensure that the awning fabric is taut and the awning is high enough to clear the door.
How do I close my RV awning?
When it’s time to pack up your RV, retracting the awning is simple. Lower the awning to its lowest position by lowering the handles on each outer awning arm. Slide the rafter arms down to the bottom of the outer awning arms. Switch the locking lever to the roll-up position and roll up the awning using the awning rod. Ensure that the fabric is evenly rolled and securely fastened.
How do I maintain my RV awning?
Regular cleaning and maintenance of your RV awning will help prolong its lifespan. Inspect the awning for any damage and remove debris before retracting it. Clean both sides of the awning fabric using an approved cleaner and a soft-bristle brush. Rinse the awning thoroughly and let it dry completely before retracting. Keep the awning dry and cover it when not in use to prevent mold and mildew growth.
What tips and precautions should I follow when setting up my RV awning?
When setting up your RV awning, always loosen the rafter knobs and release the travel locks before extending it. Use caution when raising the awning and ensure that it is high enough to clear the door. Avoid opening the awning in windy or stormy conditions. Secure the awning strap to keep it out of the way. Remember to retract and secure the awning before traveling to prevent damage.

