RV Solar Setup Guide: How to Install Solar Panels on RV
gorvlifestyle.com and its partners may earn a commission if you purchase a product through one of our links
Installing solar panels on your RV is a great way to power your adventures off-grid. Solar panels are silent, low-maintenance, and can pay for themselves over time. In this guide, we will walk you through the step-by-step process of installing solar panels on your RV, including choosing the right mounting method and connecting the panels to your RV’s battery.
Key Takeaways:
- Installing solar panels on your RV allows you to power your adventures off-grid.
- Solar panels are silent, low-maintenance, and can pay for themselves over time.
- Choosing the right mounting method is crucial for a successful RV solar panel installation.
- The charge controller is an essential component that ensures the safety and monitoring of your RV solar panel system.
- Properly connecting the charge controller and battery is crucial for the efficient operation of your RV solar panel system.
Choosing the Right Mounting Method for RV Solar Panels
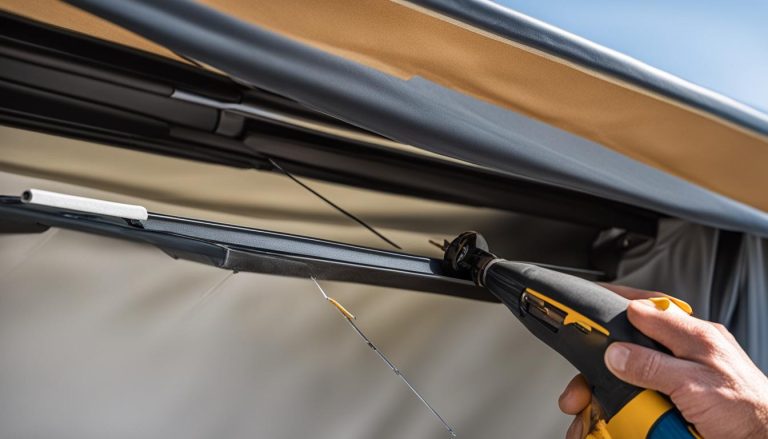
Before you begin installing solar panels on your RV, it’s important to choose the right mounting method.
There are a few options available, including using screws or adhesives to attach the panels to the roof. The type of panels you’ve chosen, the shape of your RV’s roof, and your personal preference will determine the best mounting method for your installation.
Popular options for mounting RV solar panels include:
- Z brackets
- Tiltable mounting brackets or frames
- Corner brackets
| MOUNTING METHOD | DESCRIPTION |
|---|---|
| Z brackets | These brackets provide a secure and versatile mounting option. They allow for easy installation and removal of the panels. |
| Tiltable mounting brackets or frames | These brackets or frames allow you to adjust the angle of the panels for optimal sunlight exposure. They are ideal for maximizing energy efficiency. |
| Corner brackets | These brackets are designed to fit into the corners of your RV’s roof. They offer a strong and stable mounting solution. |
When using a drilling option, it’s important to use sealant to prevent water leaks. Proper sealing ensures the longevity and effectiveness of your RV solar panel installation.
Remember, choosing the right mounting method is crucial for a successful RV solar panel installation. Take into account the type of panels, the shape of your RV’s roof, and your specific needs to determine the best option for you.
Testimonials
“I went with tiltable mounting brackets for my RV solar panel installation, and I’m extremely happy with the results. Being able to adjust the angle of the panels has significantly increased their energy output.” – Sarah R.
“I opted for Z brackets for mounting my RV solar panels, and it was a breeze to install them. The panels feel secure and I can easily remove them if needed. Highly recommend!” – David M.
Installing the Charge Controller for your RV Solar Panel System
The charge controller is an essential component of your RV solar panel system. It not only ensures the safety of your battery but also allows you to monitor the state of your solar panel installation. The charge controller should be placed close to the battery and in plain sight for easy monitoring. There are different types of charge controllers available, ranging from basic models that monitor battery load and voltage to more advanced ones that offer temperature sensing and smartphone connectivity.
When installing the charge controller, follow these steps:
- Identify a suitable location near the battery for the charge controller. This could be inside the RV or in a battery compartment.
- Ensure that the area is well-ventilated and protected from moisture and extreme temperatures.
- Securely mount the charge controller using the appropriate hardware for your chosen location.
- Connect the charge controller to the battery using appropriately sized cables and connectors.
- Verify that the positive (+) and negative (-) terminals of the charge controller are correctly connected to the corresponding terminals of the battery.
- Once the connections are secure, power on the charge controller and check for any error codes or indicators.
- Refer to the manufacturer’s instructions to configure the charge controller settings based on your specific installation and battery type.
By installing the charge controller correctly, you can ensure the efficient operation and longevity of your RV solar panel system.
Benefits of Installing an Advanced Charge Controller
Investing in an advanced charge controller for your RV solar panel system can provide several additional benefits:
- Smartphone Connectivity: Some advanced charge controllers offer smartphone connectivity, allowing you to monitor and manage your solar panel system remotely.
- Temperature Sensing: Certain charge controllers have temperature sensors that adjust the charging voltage based on the ambient temperature, optimizing battery performance and longevity.
- Load Control: Advanced charge controllers can prioritize the power supply to different devices or appliances, preventing overloads and maximizing energy usage.
- Efficiency Optimization: These charge controllers use advanced algorithms to maximize the conversion efficiency of solar energy into usable power, ensuring optimal performance under different conditions.
Investing in a high-quality charge controller will not only ensure the safe operation of your RV solar panel system but also provide greater control and efficiency for your off-grid adventures.
Connecting the Charge Controller and Battery in your RV Solar Panel System
Once you have selected and installed the appropriate charge controller for your RV solar panel system, it’s time to connect it to your battery. This step is crucial to ensure the proper functioning and effective utilization of your solar power setup.
To connect the charge controller and battery, follow these simple steps:
- First, gather the necessary materials, including a stranded copper wire, a screwdriver, and wire connectors. Make sure the wire is thick enough to handle the current flowing between the battery and charge controller.
- Next, identify the negative terminal on the battery. It is usually marked with a “-” symbol. Attach one end of the copper wire to the negative terminal of the battery.
- Locate the negative terminal on the charge controller, which is typically labeled as “NEG” or “-“. Connect the other end of the copper wire to this terminal. Ensure that the connection is secure.
- Repeat the same process for the positive terminal of the battery and the charge controller. The positive terminals are usually marked with a “+” symbol.
- Double-check that all connections are tight and properly secured. Loose connections can lead to reduced efficiency and potential damage to your solar panel system.
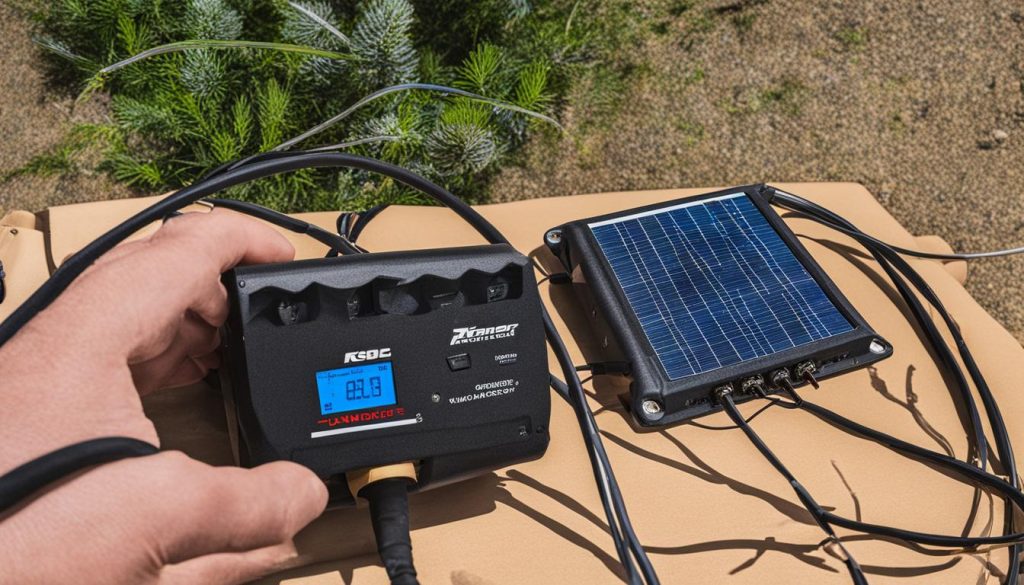
Once you have completed the connections, it’s time to turn on the charge controller to enable monitoring of the battery’s load. Refer to the manufacturer’s instructions to ensure you follow the specific procedures for your particular charge controller model.
Remember to always prioritize safety when working with electrical connections. If you are unsure or uncomfortable performing the installation yourself, it is recommended to seek professional assistance.
Troubleshooting Common Issues
If you encounter any problems or issues during the connection process, here are a few troubleshooting tips:
- Check the polarity of the connections. Ensure that the positive and negative terminals are properly aligned.
- Inspect the wires for any damage or exposed copper. Replace any damaged wires to maintain the integrity of the system.
- Verify the voltage compatibility between the charge controller and battery. Mismatched voltages can cause malfunctions or even damage the components.
- Consult the manufacturer’s manual or reach out to customer support for further assistance if you are unable to resolve the issue.
| Issue | Possible Cause | Solution |
|---|---|---|
| The charge controller does not power on. | Incorrect wiring or faulty connection. | Review the connection steps and verify all wire connections. If the issue persists, consult a professional for further assistance. |
| The charge controller displays an error code. | System overload, improper battery settings, or faulty charge controller. | Check the load on the system, adjust the battery settings if necessary, or contact the manufacturer for guidance. |
| Low battery capacity or slow charging. | Inadequate solar panel size or positioning, damaged battery. | Assess the solar panel capacity and positioning. Consider upgrading or adjusting the panel setup for optimal charging. If the battery is damaged, it may need to be replaced. |
Wiring the Solar Panels to the Charge Controller in your RV Solar Panel System
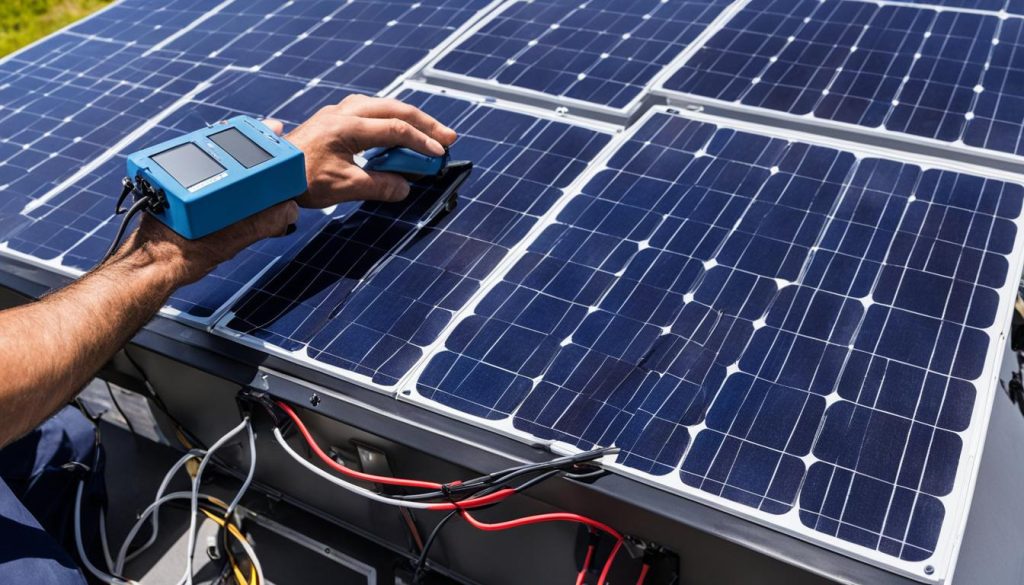
Now that you have chosen the right mounting method and installed the charge controller, it’s time to wire the solar panels to the charge controller in your RV solar panel system. The wiring process will depend on the number of panels you have.
If you have a single panel, the process is simple. Start by connecting the positive and negative cables of the panel to the corresponding terminals on the charge controller. Make sure the positive cable is connected to the positive terminal and the negative cable to the negative terminal.
| Panel | Positive Cable | Negative Cable |
|---|---|---|
For multiple panels, you have two options: series connection and parallel connection.
- In a series connection, the positive cable of the first panel is connected to the negative cable of the second panel, and so on. The positive terminal of the last panel is then connected to the positive terminal of the charge controller. This setup combines the voltages of the panels, increasing the overall voltage of the system.
- In a parallel connection, the positive cables of all the panels are connected together and connected to the positive terminal of the charge controller. Similarly, the negative cables are connected together and connected to the negative terminal of the charge controller. This setup combines the amperages of the panels, increasing the overall current of the system.
The type of connection you choose will depend on the distance between the panels and the charge controller, as well as the specifications of your specific RV solar panel system. Be sure to consult the manufacturer’s instructions for recommendations on the optimal wiring configuration.
Wiring your solar panels to the charge controller is a crucial step in the installation process. It allows the charge controller to regulate the flow of electricity from the panels to the battery, ensuring efficient charging and optimal performance of your RV solar panel system.
Adding an Inverter to Power RV Appliances
If you want to power 120-Volt AC appliances in your RV, you will need to add an inverter to your solar panel system. An inverter converts the 12-Volt DC power generated by the solar panels into 120-Volt AC power. To install an inverter, connect it to the terminals of your RV’s battery with large battery cables. It’s important to add a fuse or circuit breaker between the inverter and the battery for safety reasons. Consult the inverter’s manual for specific wiring instructions and recommendations.
Benefits of Adding an Inverter to Your RV Solar Panel System
By adding an inverter to your RV solar panel system, you can enjoy the convenience of using 120-Volt AC appliances while you’re on the road. Here are some benefits of incorporating an inverter:
- Power household appliances: With an inverter, you can power your microwave, coffee maker, toaster, and other small kitchen appliances as if you were at home.
- Charge electronics: Inverters allow you to charge your smartphones, laptops, tablets, and other electronic devices while traveling, keeping you connected and entertained.
- Run power tools: If you’re working on a DIY project during your RV adventures, an inverter enables you to use power tools to get the job done.
Inverter Sizing Guide
When choosing an inverter for your RV, it’s important to select the right size to meet your power needs. Here’s a general guide to help you determine the appropriate inverter size:
| Appliance | Power Consumption (Watts) | Recommended Inverter Size (Watts) |
|---|---|---|
| Microwave | 700 – 1,500 | 1,500 |
| Coffee Maker | 600 – 1,200 | 1,500 |
| Toaster | 800 – 1,800 | 2,000 |
| TV | 50 – 400 | 500 |
Keep in mind that these are just general recommendations and your specific power requirements may vary. It’s always a good idea to consult the manufacturer’s specifications for your appliances and electronics to ensure compatibility with your chosen inverter.
Quote: “Adding an inverter to your RV solar panel system opens up a whole new world of possibilities, allowing you to enjoy the comforts of home while exploring the great outdoors.” – RV enthusiast
Understanding How RV Solar Panels Work
RV solar panels work by harnessing the power of the sun and converting it into usable electricity. Solar cells within the panels absorb the sun’s energy, which is then converted into direct current (DC) electricity. This DC electricity is then stored in the RV’s battery, where it can be used to power various components within the RV.
Solar panels are made up of multiple photovoltaic (PV) cells, which are typically made of silicon. These cells have a built-in property known as the photovoltaic effect, which allows them to convert sunlight into electricity. When sunlight strikes the PV cells, the photons in the light energy excite the electrons in the silicon, creating an electrical current.
The electrical current produced by the PV cells is in the form of DC electricity. However, most RV appliances and electronics operate on 120-Volt AC (alternating current) power. To make the DC electricity produced by the solar panels compatible with these appliances, an inverter is used to convert the DC power into AC power.
An inverter is an essential component of an RV solar panel system if you want to power 120-Volt AC appliances. It converts the 12-Volt DC power from the battery into 120-Volt AC power, allowing you to use regular household appliances in your RV. It’s important to note that the size of the inverter should match the power requirements of the appliances you wish to operate.
“RV solar panels work by converting the sun’s energy into electricity, which can be used to power various components within the RV.”
With an understanding of how RV solar panels work, you can now make informed decisions about your RV solar panel system. You’ll be able to choose the right number of panels, size your battery bank accordingly, and select the appropriate inverter for your power needs.
Benefits of RV Solar Panel Systems
- Freedom to camp off-grid: RV solar panels allow you to venture off the beaten path and camp in remote locations without relying on electrical hookups.
- Quiet and eco-friendly power: Solar panels generate electricity without any noise or emissions, making them a clean and sustainable energy source.
- Reduced reliance on generators: Solar panels can significantly decrease the need to run noisy and fuel-consuming generators, saving you money and reducing your environmental impact.
- Long-term cost savings: While the upfront cost of installing solar panels may seem high, they can pay for themselves over time by reducing or eliminating the need to pay for campground or generator usage fees.
Example Solar Panel Specifications
| Solar Panel | Wattage | Voltage | Dimensions | Weight |
|---|---|---|---|---|
| SunPower Flexible Solar Panel | 100W | 12V | 41.7 x 21.3 x 0.1 inches | 4.4 lbs |
| Renogy Monocrystalline Solar Panel | 200W | 12V | 47.3 x 21.3 x 1.4 inches | 16.5 lbs |
| LHQ-HQ Polycrystalline Solar Panel | 300W | 12V | 64.6 x 39.1 x 1.6 inches | 53.9 lbs |
Table: Example solar panel specifications.
Determining the Number of Solar Panels Needed for your RV
When it comes to installing solar panels on your RV, it’s important to determine the right number of panels for your power needs. Calculating this requires considering your daily watt-hour usage and the energy output of the solar panels.
To calculate your watt-hour usage, estimate the power consumption of your devices and appliances and multiply it by the number of hours you use them. This will give you an estimate of the total watt-hours consumed in a day.
On average, a 100-watt solar panel can provide approximately 350 watts of power per day. By dividing your total daily watt-hour usage by 350, you can determine the number of 100-watt panels needed for your RV.
It’s also important to consider the capacity of your battery bank. Your batteries store the energy generated by the solar panels, so ensure that they have sufficient capacity to meet your power needs during periods of low sunlight.
FAQ
How do I choose the right mounting method for RV solar panels?
The best mounting method for your RV solar panels will depend on factors such as the type and shape of your panels, the shape of your RV’s roof, and your personal preference. Popular options include Z brackets, tiltable mounting brackets or frames, and corner brackets. It’s important to use sealant to prevent water leaks when using a drilling option.
What is a charge controller and how do I install it for my RV solar panel system?
A charge controller is an essential component that ensures the safety of your battery and allows you to monitor the state of your solar panel installation. It should be placed close to the battery and in plain sight for easy monitoring. There are different types of charge controllers available, ranging from basic models to more advanced ones with temperature sensing and smartphone connectivity.
How do I connect the charge controller and battery in my RV solar panel system?
Connecting the charge controller and battery is a straightforward process. Use a stranded copper wire to connect the negative terminal of the battery to the negative terminal of the charge controller, and the positive terminal of the battery to the positive terminal of the charge controller. Make sure the wires are properly marked for polarity. Turn on the charge controller to enable monitoring of the battery’s load.
How do I wire the solar panels to the charge controller in my RV solar panel system?
Wiring the solar panels to the charge controller can be done in different ways depending on the number of panels you have. For a single panel, simply connect its positive and negative cables to the corresponding terminals on the charge controller. For multiple panels, you can choose between series and parallel connections based on the distance between the panels and the charge controller.
How do I add an inverter to power 120-Volt AC appliances in my RV?
To power 120-Volt AC appliances, you’ll need to add an inverter to your RV solar panel system. An inverter converts the 12-Volt DC power generated by the solar panels into 120-Volt AC power. Install the inverter by connecting it to the terminals of your RV’s battery with large battery cables. Be sure to add a fuse or circuit breaker between the inverter and the battery for safety reasons.
How do RV solar panels work?
RV solar panels capture the sun’s energy using solar cells and convert it into usable electricity. The panels absorb the sun’s energy, which is then converted into direct current (DC) electricity. This DC electricity is stored in the RV’s battery and can be used to power lights, appliances, and electronics. An inverter is used to convert the DC power into alternating current (AC) power if you want to power 120-Volt AC appliances.
How do I determine the number of solar panels needed for my RV?
The number of solar panels needed for your RV will depend on your power requirements. To determine the number of panels, calculate your daily watt-hour usage by estimating the power consumption of your devices and multiplying it by the number of hours used. Solar panels typically provide an average of 350 watts of power per day per 100-watt panel. Consider the capacity of your battery bank to store the energy generated by the panels as well.

