RV Awning Fabric Replacement Made Easy
gorvlifestyle.com and its partners may earn a commission if you purchase a product through one of our links
Replacing the fabric on your RV awning may seem daunting, but with a little research and the right tools, it can be a straightforward DIY project. In this guide, we will walk you through the step-by-step process of installing new awning fabric on your RV. From measuring your awning to purchasing the right fabric and completing the installation, you’ll have a fresh new look for your RV in no time.
Key Takeaways:
- Installing new awning fabric on your RV can be a DIY project with the right tools and knowledge
- Measure your RV awning accurately before purchasing new fabric
- Consider the type of fabric that suits your needs, such as vinyl or acrylic
- Gather all the necessary tools and equipment before starting the replacement process
- Properly remove the old fabric and clean the awning frame before installing the new fabric
Measuring Your RV Awning
Before ordering new awning fabric, it’s crucial to measure your RV awning accurately. Proper measurements ensure that you order the correct size fabric for a seamless installation. Follow these steps to measure your RV awning:
- Retract the awning fully to expose the fabric.
- Take out your measuring tape and marker for precise measurements.
- Measure the length of the fabric by starting from one end and extending it to the other. Mark the measurement.
- Measure the width of the fabric by starting from one side and extending it to the other. Mark the measurement.
- Double-check your measurements to ensure accuracy.
Accurate measurements are essential to ensure that the new awning fabric fits perfectly and functions properly. Take your time and be thorough in measuring your RV awning to avoid any sizing issues.
Once you have the precise measurements, you can confidently order the correct size fabric for your awning replacement.
Example measurement:
Length: 14 feet
Width: 8 feet
Choosing the Right RV Awning Fabric
When purchasing new awning fabric for your RV, it’s important to consider the type of fabric that best suits your needs. Two popular choices are vinyl fabric and acrylic fabric, both known for their durability and resistance to environmental elements such as UV rays, wind, and rain. These high-quality materials are designed to withstand the harsh outdoor conditions and provide long-lasting protection for your RV.
Vinyl fabric is a synthetic material that offers excellent durability and water resistance. It is known for its strength and ability to resist tears and abrasion. Vinyl fabric is also easy to clean and maintain, making it a practical choice for RV owners.
On the other hand, acrylic fabric is a solution-dyed material that offers vibrant colors and excellent UV resistance. It provides exceptional color retention and won’t fade or degrade under prolonged exposure to sunlight. Acrylic fabric is also breathable, allowing air to circulate underneath the awning and preventing the buildup of moisture.
When choosing between vinyl fabric and acrylic fabric, consider your specific needs and preferences. If you prioritize durability and ease of maintenance, vinyl fabric may be the ideal choice for you. If you value vibrant colors and superior UV resistance, acrylic fabric would be a great option. Ultimately, both materials offer high-quality solutions for your RV awning fabric replacement needs.
Additional Features and Considerations
In addition to the fabric type, you might also want to consider additional features that can enhance the functionality and comfort of your RV awning. Some fabric options come with built-in LED lights, allowing you to illuminate your outdoor space and create a cozy ambiance during nighttime. Other fabrics offer privacy screens, providing you with extra shade and shielding you from prying eyes.
Remember, when choosing the right fabric for your RV awning, prioritize high-quality materials that can withstand the elements and provide long-lasting protection. Consider your needs, preferences, and any additional features that can enhance your outdoor experience.
| Fabric Type | Durability | Resistance to UV Rays | Resistance to Wind and Rain |
|---|---|---|---|
| Vinyl Fabric | Excellent | Yes | Yes |
| Acrylic Fabric | Excellent | Excellent | Excellent |
Tools Needed for RV Awning Replacement
Before you begin the process of replacing your RV awning, it’s essential to gather all the necessary tools and equipment. Having everything you need on hand will make the replacement process smoother and more efficient.
Here are the tools you’ll need:
- Screwdriver
- Pliers
- Ladder
- Utility knife
- Awning rail lubricant
- Awning cord
- Drill
- Safety gear (gloves, eye protection, and a dust mask)

Make sure you have a screwdriver with various interchangeable tips to accommodate different types of screws you may encounter during the replacement process. Pliers will come in handy for removing and attaching certain components of the awning. A ladder will allow you to reach the awning comfortably, ensuring your safety throughout the process.
When it comes to cutting and trimming the new fabric, a utility knife will be your best tool. Additionally, applying awning rail lubricant will help the fabric slide smoothly through the awning rail as you install it. The awning cord will assist you in aligning and tensioning the fabric properly.
A drill may be necessary for certain models that require drilling or fastening specific parts during installation. Lastly, it’s crucial to prioritize your safety by wearing appropriate gear, including gloves to protect your hands from sharp edges, eye protection to shield your eyes from debris, and a dust mask to prevent inhaling any particles.
Ensure you have all the tools and safety gear mentioned above before beginning the replacement process. This way, you’ll be well-prepared to tackle the project with ease and efficiency.
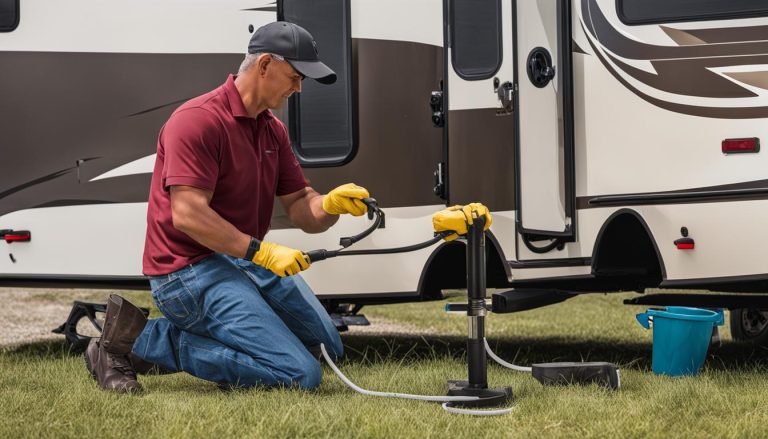
Removing the Old RV Awning Fabric
Before you can install the new fabric on your RV awning, you’ll need to remove the old fabric. This process involves retracting the awning fully and taking a few precautions to ensure a smooth removal.
Here’s what you need to do:
- Start by fully extending the awning to expose the fabric.
- Remove the end caps at each end of the awning. This will give you access to the fabric and its attachment points.
- Using pliers and a utility knife, carefully detach the fabric from the awning rail and roller tube. Take your time to avoid any damage to the fabric or awning frame.
- Once you’ve completely removed the fabric, it’s a great opportunity to clean the awning frame and roller tube. Simply use a soft cloth and mild soap to wipe away any dirt or grime. This will ensure a clean surface for the new fabric installation.
Removing the old fabric may require some manual dexterity and attention to detail. Take your time and be gentle to avoid any unnecessary damage.
By following these steps, you’ll have the old fabric removed and a clean awning frame ready for the installation of the new fabric.
Installing the New RV Awning Fabric
Now that you have removed the old fabric and prepared your RV awning, it’s time to install the new awning fabric. Follow these step-by-step instructions to ensure a successful installation:
- Begin by attaching the new fabric to the roller tube using a pop rivet gun. This will securely hold the fabric in place.
- Next, insert the fabric into the awning rail, guiding it along the channel until it is properly seated. Make sure the fabric is evenly distributed and aligned with the rail.
- Now, insert the fabric into the awning arms. Gently slide it into the channel, ensuring it is fully inserted and taut. This will provide stability and support to your awning.
- Reattach the end caps to the roller tube, tightening the screws securely. This will secure the fabric and prevent it from slipping or coming loose.
- Finally, it’s time to test the awning operation. Extend and retract the awning a few times to ensure that the new fabric is properly installed and that the awning operates smoothly.
By following these steps, you can successfully install the new fabric and give your RV awning a fresh, updated look. Take your time and double-check each step to ensure a professional installation.

Remember, proper installation is crucial for the longevity and functionality of your RV awning. If you encounter any difficulties during the process, don’t hesitate to consult the manufacturer’s instructions or seek professional assistance.
Cost of RV Awning Fabric Replacement
When it comes to replacing the fabric on your RV awning, one important consideration is the cost. The overall price of RV awning fabric replacement can vary depending on several factors:
- The size of your awning
- The type of fabric you choose
- The location where the replacement is done
Generally, you can expect the cost to range from $200 to $800 or more. However, it’s essential to note that these figures are approximate and can differ based on specific circumstances.
To ensure you get the best deal possible, it’s recommended to shop around and compare prices from different vendors. This allows you to find the most competitive price for your RV awning fabric replacement needs.
Enjoy a Fresh Look for Your RV with New Awning Fabric
Replacing the awning fabric on your RV is a DIY project that can give your vehicle a fresh new look. With the right measurements, tools, and materials, you can easily complete this task and transform the appearance of your RV. Follow the step-by-step guide outlined in this article for a successful installation.
To ensure a smooth installation, take your time and carefully measure your RV awning. Accurate measurements are crucial for ordering the correct size fabric. Gather all the necessary tools, such as a screwdriver, pliers, ladder, utility knife, and safety gear, before you begin the installation process.
Expert advice for a successful DIY installation is to enlist the help of a friend. Having an extra pair of hands can make the installation much easier, especially when attaching the new fabric to the roller tube and inserting it into the awning rail and arms. Working together will streamline the process and help you achieve a professional-looking result.
Revamping your RV with new awning fabric can be a rewarding project that allows you to personalize your vehicle and create a fresh, inviting outdoor space. Take pride in your DIY skills and enjoy the process of giving your RV a stylish makeover. Happy travels!
FAQ
How do I measure my RV awning?
Retract the awning completely and use a measuring tape to measure the length and width of the fabric. Measure from one end of the fabric to the other for the length, and from one side to the other for the width. Double-check your measurements before ordering new fabric.
What type of fabric is best for an RV awning?
Vinyl and acrylic fabrics are popular choices due to their durability and resistance to UV rays, wind, and rain. These fabrics are made from high-quality materials and are weather-resistant for long-lasting performance.
What tools do I need to replace my RV awning fabric?
You will need a screwdriver, pliers, ladder, utility knife, awning rail lubricant, awning cord, drill, and safety gear such as gloves, eye protection, and a dust mask.
How do I remove the old fabric from my RV awning?
Fully extend the awning, remove the end caps, and carefully detach the fabric from the awning rail and roller tube using pliers and a utility knife. Clean the awning frame and roller tube before installing the new fabric.
How do I install the new fabric on my RV awning?
Start by attaching the new fabric to the roller tube using a pop rivet gun. Then, insert the fabric into the awning rail and arms, making sure it is fully inserted into the channel. Reattach the end caps and test the operation of the awning to ensure the fabric is properly installed.
How much does it cost to replace RV awning fabric?
The cost can vary depending on factors such as the size of the awning, the type of fabric used, and the location where the replacement is done. Generally, the cost can range from $200 to $800 or more. It is recommended to shop around and compare prices from different vendors.
Can I replace my RV awning fabric myself?
Yes, replacing the awning fabric on your RV is a DIY project that can be done with the right tools and materials. Follow a step-by-step guide, take your time, and seek help from a friend if needed to ensure a successful installation.
How can I give my RV a fresh new look with new awning fabric?
By replacing the awning fabric, you can instantly give your RV a fresh new look. Follow a step-by-step guide, use high-quality materials, and enjoy the process of revamping your RV for your next adventure.