Install Your RV AC Unit Easily: Step-by-Step Guide
gorvlifestyle.com and its partners may earn a commission if you purchase a product through one of our links
If your RV air conditioner is not cooling properly, it may be time to replace it. Replacing the unit yourself can save you money on installation costs. Before starting the installation process, determine if you need to replace the entire unit or just specific parts. To replace the unit, you will need to purchase a new rooftop unit and a compatible ceiling assembly. Consult with an RV professional to determine the best replacement package for your needs.
Key Takeaways:
- Replacing your RV air conditioner can save money on installation costs.
- Determine if you need to replace the entire unit or just specific parts.
- Purchase a new rooftop unit and compatible ceiling assembly.
- Consult with an RV professional for guidance.
- Proper installation ensures optimal cooling performance.
Do I Need to Replace the Whole RV A/C?
Depending on the issue with your current RV air conditioner, you may be able to replace only certain parts instead of the entire unit. This can be a more cost-effective option, especially if the rest of the unit is in good condition. However, it’s important to consider the age of your RV air conditioner and the likelihood of other components failing in the near future.
If your RV air conditioner is old and nearing the end of its lifespan, replacing the entire unit may be a better long-term investment. By installing a new AC unit, you can enjoy improved energy efficiency, enhanced cooling performance, and the peace of mind that comes with a reliable system. Additionally, replacing the whole unit eliminates the risk of further breakdowns and the need for multiple repairs.
Assessing the Cost:
When deciding between replacing the entire RV air conditioner or just certain parts, it’s essential to evaluate the cost implications. Replacing individual parts may seem like a more economical choice upfront, but consider the potential for future repairs and the overall lifespan of the unit.
If you opt to replace specific parts, you’ll need to source the right components and consider the labor costs involved in the repair process. Additionally, keep in mind that older parts may be harder to find and more expensive compared to newer models.
On the other hand, investing in a new AC installation eliminates the risk of future breakdowns and ensures optimal performance. While the initial cost may be higher, the long-term benefits, including improved energy efficiency and lower maintenance requirements, can outweigh the upfront investment.
Ultimately, the decision to replace the whole RV air conditioner or specific parts depends on the condition of your current unit, your budget, and your long-term goals for the system.
Parts Needed for RV Air Conditioner Replacement
When replacing your RV air conditioner, it’s important to have the right parts on hand. The two main components you’ll need are the rv rooftop unit and the ceiling assembly. Let’s take a closer look at these parts and their importance in the replacement process.
RV Rooftop Unit
The rv rooftop unit is the main cooling unit of your RV air conditioner system. It is responsible for cooling the air before distributing it throughout your vehicle. When choosing a new rooftop unit, make sure it is compatible with your RV model and has the appropriate cooling capacity for your needs.
Ceiling Assembly
The ceiling assembly is the part that connects the rooftop unit to the indoor cooling system. It includes the air vents and controls for directing the airflow. There are two types of ceiling assemblies available: ducted and non-ducted.
In a ducted system, the cold air is distributed through a network of ducts, allowing for even air distribution throughout your RV. This is the most common type of ceiling assembly.
On the other hand, a non-ducted system does not have ductwork. Instead, it relies on the open air space inside your RV to distribute the cooled air. Non-ducted systems are generally used in smaller RVs or for specific purposes, such as cooling a specific area.
Compatibility and Consultation
It’s important to note that in some cases, the old ceiling assembly may be compatible with the new rooftop unit. However, it’s best to consult with an RV professional to determine the specific parts needed for your RV air conditioner replacement. They can provide you with expert advice based on your RV model and specific requirements.
Having the right parts for your RV air conditioner replacement ensures a smooth installation process and optimal performance. Now that you know about the rv rooftop unit, ceiling assembly, and the different types of systems available, you’re ready to move on to the next steps of replacing your RV air conditioner.
Steps to Remove the Old AC Unit
Removing the old RV air conditioner involves several steps. Follow this guide to safely remove your old AC unit:
- Start by removing the air conditioner shroud on the roof. Carefully unscrew and lift off the shroud, setting it aside.
- Next, go inside your coach and locate the ceiling assembly. This is the unit that connects to the rooftop AC.
- Disconnect the electrical wiring by carefully unplugging the connectors. Take note of the wiring connections to ensure correct reinstallation later.
- Now, remove the retaining flange bolts that secure the ceiling assembly. Use a wrench or screwdriver to loosen and remove each bolt.
- Once the bolts are removed, gently separate the foam gasket from the roofing surface. Take care not to damage the gasket or the roof during this process.
- Inspect the roof for any old sealants or excess roof coating. Remove them using a putty knife or scraper.
By following these steps and taking caution, you can remove the old AC unit without any issues. Ensure that you keep track of all the removed parts for easier installation of your new RV Air Conditioner.
Safety Tip:
Always exercise caution and follow safety guidelines when working with electrical components or climbing on the roof of your RV. If you’re unsure about any step or uncomfortable with the process, it’s recommended to consult with a professional.
Now that you have successfully removed the old AC unit, it’s time to move on to the next step of the installation process: placing the new air conditioner.

Parts Removed during RV AC Unit Removal
| Part Name | Quantity |
|---|---|
| Air conditioner shroud | 1 |
| Ceiling assembly | 1 |
| Retaining flange bolts | Varies |
| Foam gasket | 1 |
| Old sealants or excess roof coating | — |
Correctly Placing the New Air Conditioner
Now that you have removed the external plastic shroud from the new RV air conditioner unit, it’s time to position it properly on the rooftop. This step is crucial for ensuring optimal performance and efficiency. Follow these steps to correctly place the new AC unit:
- First, make sure the rooftop surface is clean and free of any debris or obstacles. This will provide a stable and secure foundation for the unit.
- Next, align the foam gasket that came with the new air conditioner unit with the opening on the rooftop. The foam gasket helps create a tight seal, preventing any air leaks and ensuring efficient cooling.
- Gently lower the unit onto the rooftop, ensuring that it aligns perfectly with the opening and the foam gasket.
- Once the unit is in place, secure it by tightening the flange bolts. Make sure not to overtighten them, as it may damage the unit or the rooftop surface.
- After securing the unit, apply a high-quality sealant around the edges to provide extra protection against water leaks and seal any gaps.
Now that the new RV air conditioner is securely in place on the rooftop, it’s time to focus on the indoor installation.
Note: If you are unsure about any of the installation steps or need assistance, it is recommended to consult with an RV professional or refer to the manufacturer’s installation guide for your specific air conditioner model.
Indoor Installation: Ceiling Assembly, Ducts, and Electrical
For the indoor installation of your new RV air conditioner, follow these steps to ensure a proper and functional setup:
- Start by installing the ceiling assembly inside your coach. Align it with the corresponding opening and secure it tightly using the provided screws or mounting brackets.
- Next, connect the ducts to the ceiling assembly. Make sure the duct connections are secure and properly sealed to prevent any air leaks.
- After connecting the ducts, it’s time to connect the electrical wiring. Ensure that the power is completely turned off before handling any electrical connections. Connect the wires according to the manufacturer’s instructions, making sure to match the corresponding colors.
- As you connect the electrical wires, make sure to insulate each connection properly using electrical tape or wire nuts. This will prevent any potential electrical issues and ensure the safety of your RV’s electrical system.
Once you have completed the indoor installation, it’s crucial to test the newly installed air conditioner to ensure everything is functioning correctly.
“Properly placing the new RV air conditioner is essential for its efficient operation and longevity. Follow the recommended installation steps diligently to maximize performance and enjoy a cool and comfortable RV experience.”
Now that you have successfully completed the placement of the new RV air conditioner, it’s time to learn about additional tips for maintaining its optimal performance and ensuring a comfortable environment inside your RV. Refer to the next section to discover valuable insights and helpful suggestions.
| Placement Tips | Benefits |
|---|---|
| Choose a shaded area on the rooftop for AC installation | Reduces the workload on the air conditioner by minimizing exposure to direct sunlight |
| Use window coverings | Provides additional insulation, reducing heat gain and the need for excessive cooling |
| Properly insulate the ducts and connections | Prevents air leaks and ensures efficient airflow throughout the RV |

Additional Tips for RV Air Conditioners
Maintaining your RV air conditioner is crucial to ensure optimal performance and longevity. Here are some additional tips to help you keep your AC unit in top shape:
1. Clean the Foam Air Filter Regularly
One of the essential maintenance tasks for your RV air conditioner is keeping the foam air filter in the ceiling assembly clean. Over time, the filter can become clogged with dust and debris, reducing airflow and efficiency. Clean the filter regularly by gently washing it with mild soap and water. Allow it to dry completely before reinstalling.
2. Be Mindful of Voltage Fluctuations
When camping in RV parks or using external power sources, be aware of voltage fluctuations that can impact your AC unit’s performance. Low voltage can strain the compressor and lead to reduced cooling capacity. Consider using a Hughes Autoformer Voltage Regulator to stabilize the incoming voltage and protect your AC unit from damage.
3. Reduce the Workload on Your AC Unit
To prevent excessive strain on your RV air conditioner, take steps to reduce its workload. Park in shaded areas whenever possible to minimize direct exposure to sunlight. Use window coverings, such as blinds or curtains, to block out heat and keep the interior cool. Additionally, consider using fans or portable air conditioners to distribute cool air more efficiently throughout your RV.
4. Consider Insulating Your RV
Proper insulation can help maintain a comfortable temperature inside your RV and reduce the workload on your air conditioner. Check for any air leaks around windows, doors, and vents, and use weatherstripping or caulk to seal them. Additionally, consider using reflective insulation on the roof and windows to minimize heat absorption.
5. Schedule Professional Maintenance
While regular maintenance tasks can be done by RV owners, it’s essential to schedule professional maintenance for your RV air conditioner at least once a year. A qualified technician will thoroughly inspect and clean the unit, check for any leaks or issues, and perform any necessary repairs.
| Maintenance Tasks | Frequency |
|---|---|
| Clean the foam air filter | Every 30 days |
| Inspect and clean coils | Every 6 months |
| Check and tighten electrical connections | Annually |
| Inspect and clean condensate drain | Annually |
By following these additional tips and maintaining your RV air conditioner properly, you can enjoy cool comfort throughout your travels and prolong the lifespan of your AC unit.
Safety Precautions and Considerations
When it comes to installing an RV air conditioning unit, ensuring your safety is of utmost importance. Before beginning any work with electrical components, it’s crucial to take the necessary precautions to protect yourself and prevent any accidents or injuries.
Safety Tips for RV AC Installation:
- Always disconnect all power sources before starting any installation or maintenance work.
- Wear appropriate safety gear, including gloves and safety glasses, to protect yourself from any potential hazards.
- If you’re not comfortable working with high voltage power, consider hiring a qualified electrician to handle the electrical aspects of the installation.
- Take your time and follow the installation instructions provided by the manufacturer carefully.
- Ensure that the work environment is safe and free from any potential tripping hazards or objects that could cause accidents.
- Handle the RV AC unit with care during the installation process to avoid any personal injuries or damage to the unit.
Remember, the safety of yourself and others should always be the top priority. If you have any concerns or doubts about your ability to complete the installation safely, it’s best to seek professional assistance.
By following these safety tips and considering hiring an electrician if needed, you can ensure a smooth and secure RV AC installation process without compromising your well-being.
| Safety Tips | Hiring an Electrician |
|---|---|
| Disconnect all power sources before starting | Consider hiring a qualified electrician if not comfortable with high voltage |
| Wear appropriate safety gear | Ensure the electrical aspects are handled by a professional |
| Follow installation instructions carefully | Seek professional assistance if unsure |
| Keep the work environment safe | Ensure personal safety and prevent damage |
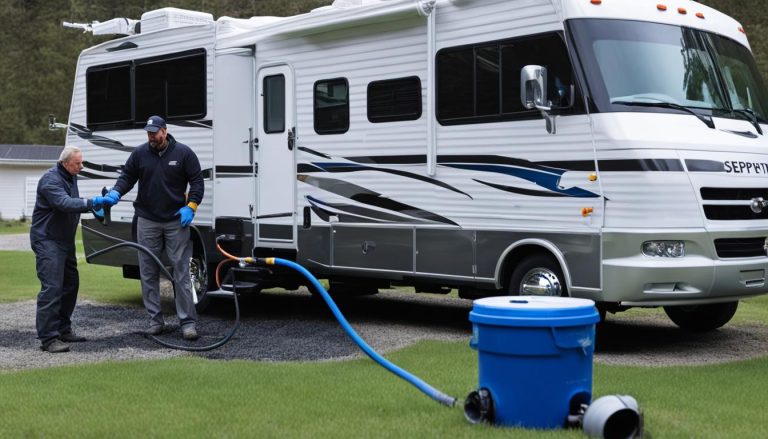
Image related to Safety Precautions and Considerations:
Conclusion
Installing an RV air conditioning unit can be a straightforward and cost-effective DIY project. By following our step-by-step guide and taking the necessary precautions, you can save money on installation costs and enjoy a comfortable journey. However, it’s important to note that if you’re unsure about any aspect of the installation process, it’s always best to consult with an RV professional to ensure a successful installation.
Remember, proper maintenance is key to the optimal performance of your RV AC unit. Regularly clean the foam air filter in the ceiling assembly to keep the airflow unrestricted. Additionally, be mindful of voltage fluctuations in RV parks as low voltage can affect the efficiency of your AC unit. Consider investing in a Hughes Autoformer Voltage Regulator for added protection.
To reduce the workload on your AC unit and improve its longevity, park your RV in shaded areas whenever possible and use window coverings to block out direct sunlight. This will help lower the temperature inside your RV and reduce the strain on your air conditioner.
In conclusion, with the right knowledge and precautions, installing an RV air conditioning unit can be a rewarding DIY project. By following our step-by-step guide, consulting with professionals when needed, and properly maintaining your unit, you can enjoy a cool and comfortable journey on the road.
FAQ
How do I install an RV AC unit?
To install an RV AC unit, start by determining if you need to replace the entire unit or just specific parts. Purchase a new rooftop unit and a compatible ceiling assembly. Remove the old unit by taking off the air conditioner shroud, disconnecting wiring, and removing the retaining flange bolts. Install the new unit by placing the foam gasket on the roof, installing the ceiling assembly, and connecting the ducts and electrical wiring. Test the AC unit after installation to ensure it is working correctly. Consider consulting with an RV professional for specific instructions.
Do I need to replace the whole RV A/C unit?
It depends on the issue with your current RV air conditioner. If only certain parts need replacing, such as the compressor or fan motor, you may be able to replace those individually. However, if the unit is old and likely to have other components fail, it may be more cost-effective to replace the entire unit. Consider the investment of a new AC installation versus the cost of replacing individual parts.
What parts do I need for RV air conditioner replacement?
When replacing an RV air conditioner, you will need to purchase two main parts: the rooftop unit and the ceiling assembly. The ceiling assembly comes in two types, ducted and non-ducted, depending on the cold air distribution in your coach. In some cases, the old ceiling assembly may be compatible with the new rooftop unit. Consult with an RV professional to determine the specific parts needed for your RV.
How do I remove the old RV AC unit?
Start by removing the air conditioner shroud on the roof and the ceiling assembly inside your coach. Disconnect the electrical wiring and remove the retaining flange bolts. Carefully separate the foam gasket from the roofing surface and remove any old sealants or excess roof coating. Take caution when removing the old unit to avoid damaging the roof or the AC unit itself.
How do I correctly place the new RV AC unit?
To install the new RV air conditioner, remove the external plastic shroud from the unit and place it on the rooftop, aligning the foam gasket with the opening. Inside the coach, install the ceiling assembly and connect the ducts and electrical wiring. Make sure all connections are secure and properly insulated to avoid any electrical issues. Test the air conditioner after installation to ensure it is working correctly.
Any additional tips for RV air conditioners?
To maintain optimal performance, keep the foam air filter in the ceiling assembly clean. Be mindful of voltage fluctuations in RV parks, as low voltage can impact AC performance. Consider using a Hughes Autoformer Voltage Regulator to ensure your AC unit works at its best. Park in shaded areas and use window coverings to reduce the workload on your AC unit.
What safety precautions and considerations should I keep in mind?
When working with electrical components, ensure all power sources are disconnected and the work environment is safe. Follow proper safety precautions and consider hiring a qualified electrician if you are not comfortable working with high voltage power. It’s important to handle the RV AC unit carefully during installation to avoid any personal injury or damage to the unit.
Any conclusion for RV AC unit installation?
Installing an RV air conditioning unit can be a DIY project with the right knowledge and precautions. By following the step-by-step guide and consulting with an RV professional when needed, you can save money on installation costs and ensure a comfortable trip. Remember to properly maintain your AC unit for optimal performance and consult your owner’s manual for any specific instructions.