Install a Mini Split in Your RV: Easy Guide
gorvlifestyle.com and its partners may earn a commission if you purchase a product through one of our links
Adding a mini split to your RV can greatly improve your comfort while on the road, especially if you enjoy off-grid camping or boondocking. In this easy guide, we will walk you through the step-by-step process of installing a mini split in your recreational vehicle, providing you with tips and insights for a successful DIY installation. Whether you’re looking to upgrade your current air conditioning system or seeking a more energy-efficient solution, a mini split can significantly enhance your RV experience.
Before we jump into the installation process, let’s take a closer look at what a mini split is and why it’s a popular choice among RV enthusiasts.
Key Takeaways:
- Installing a mini split in your RV can greatly improve your comfort, especially during off-grid camping and boondocking.
- This easy guide will walk you through the step-by-step process of installing a mini split in your recreational vehicle.
- A mini split offers a more energy-efficient solution compared to traditional RV air conditioning units.
- Understanding what a mini split is and its benefits will help you make an informed decision for your RV.
- Choosing the right mini split unit and considering additional installation items are crucial for a successful installation.
What is a Mini Split?
Before diving into the installation process, it’s important to understand what a mini split is. A mini split is a heat pump system that consists of an outdoor unit called the condenser and an indoor unit called the evaporator. These units are connected by refrigerant lines and an electric line. Mini splits are known for their energy efficiency and the ability to both heat and cool spaces. They are widely used around the world, but less common in the United States.
A mini split functions similarly to a traditional split air conditioning system but on a smaller scale. It is capable of providing both heating and cooling to a specific space without the need for ductwork. This makes it an ideal choice for RVs, where space is limited, and ductwork installation is usually not feasible. By utilizing refrigerant lines, a mini split can transfer heat from one area to another, maintaining a comfortable temperature inside the RV.
The condenser is the outdoor unit of a mini split system. It houses the compressor, condenser coil, and fan. The compressor is responsible for compressing and circulating the refrigerant. The condenser coil releases heat from the refrigerant into the outdoor air, allowing it to cool down. The fan blows air over the condenser coil to facilitate the heat dissipation process.
The evaporator is the indoor unit of a mini split system. It contains the evaporator coil, expansion valve, and blower. The evaporator coil absorbs heat from the indoor air, cooling it down. The expansion valve controls the flow of refrigerant into the evaporator coil, regulating the cooling process. The blower circulates the conditioned air throughout the RV, ensuring even cooling or heating.
Refrigerant lines connect the condenser and evaporator, allowing the refrigerant to flow between them. These lines consist of copper tubing, which is resistant to corrosion and capable of handling the refrigerant’s pressure. The size and length of the lines depend on the specific mini split unit and the distance between the condenser and evaporator.
Energy efficiency is one of the key advantages of mini splits. Unlike traditional RV air conditioning units, which rely on a lot of power and are not always the most efficient, mini splits consume less energy while providing superior comfort. This is due to their advanced technology and the lack of energy losses associated with ductwork. With a mini split, you can save on energy costs while enjoying a comfortable temperature in your RV.
Why Install a Mini Split in Your RV?
There are several reasons why you might want to install a mini split in your RV. One of the main reasons is for rv off-grid camping, also known as dry camping or boondocking. Mini splits are more energy efficient than traditional RV air conditioning units, allowing you to run them for longer periods of time without draining your power supply. They also take up less space than rooftop units, leaving room for more solar panels on your RV’s roof. Additionally, mini splits offer the ability to both heat and cool, providing comfort throughout the year.
By installing a mini split in your RV, you can experience the freedom and self-sufficiency of off-grid camping. Traditional RV air conditioning units consume a significant amount of energy, making them impractical for extended periods of dry camping. However, mini splits are designed with energy efficiency in mind, allowing you to keep your RV cool even in remote locations where power availability may be limited.
Furthermore, mini splits are a space-efficient cooling and heating solution. Unlike bulky rooftop units, mini splits are compact and can be easily mounted on a wall or ceiling. This saves valuable space inside your RV, giving you more room for storage or additional amenities. With space at a premium in an RV, a mini split provides an effective cooling and heating solution without sacrificing comfort or convenience.
Benefits of Installing a Mini Split in Your RV:
- Energy efficiency for off-grid camping
- Extended running time without draining power supply
- Space-efficient design for more solar panels
- Ability to both heat and cool your RV
- Improved comfort and convenience on your camping trips

Installing a mini split in your RV not only enhances your camping experience but also promotes your self-sufficiency and environmental consciousness. With its energy-efficient operation, you can enjoy the comforts of temperature control while minimizing your impact on the environment. Whether you’re boondocking in remote wilderness or exploring national parks, a mini split ensures that you have the power and comfort you need to make your RV adventures truly memorable.
Choosing the Right Mini Split for Your RV
When it comes to selecting a mini split unit for your RV, it’s crucial to opt for a reliable brand that offers optimal performance and durability. One brand that stands out in the market is Fujitsu Halcyon, known for its exceptional quality and innovative features.
The Fujitsu Halcyon series provides a wide range of BTU sizes, making it suitable for various RV sizes and cooling needs. The 9000 BTU unit is a popular choice among RV owners due to its versatility and efficiency.
Here are some key specifications of the Fujitsu Halcyon 9000 BTU unit:
- SEER Rating: 16
- Cooling Current: 7.5 amps (with a maximum of 13 amps)
- Heating Current: 7 amps (with a maximum of 13.5 amps)
- Energy Efficiency: The Fujitsu Halcyon unit is designed to be highly energy efficient, helping to reduce power consumption during cooling and heating.
The Fujitsu Halcyon series is known for its quiet operation, ensuring a peaceful and comfortable environment inside your RV. It offers reliable and consistent cooling and heating, making it ideal for all seasons and weather conditions.
Choosing a high-quality mini split like the Fujitsu Halcyon ensures that you receive efficient cooling and heating while maximizing power consumption. This reliable brand will not only enhance your RV experience but also provide long-term durability and reliability.

Additional Items for Installation
In addition to the mini split unit, there are several other items you will need for a successful installation. These additional items are crucial for ensuring proper functionality and efficiency of your RV’s mini split system.
Line Set
The line set is an essential component of the installation process. It consists of copper tube lines that enable the proper cycling of refrigerant between the condenser and evaporator units. The line set ensures efficient heat transfer and optimal cooling or heating performance.
Control Wire
The control wire is responsible for connecting the evaporator and condenser units. It allows for the seamless communication and control of the mini split system, ensuring that it functions as intended.
Vacuum Pump and Vacuum Gauge
A vacuum pump and vacuum gauge are highly recommended for the installation process. These tools are used to evacuate the condenser lines, removing any air or moisture that may be present. They also enable testing for leaks to ensure the system operates reliably.
AC Power Supply
To power the condenser unit, you will need a reliable AC power source. This can be achieved by connecting an open breaker in your AC circuit breaker panel and using Romex wire to supply the necessary electricity.
Stainless Steel Wall Bracket
A stainless steel wall bracket provides a secure mounting option for the condenser unit. It ensures stability and protects the unit from potential damage, such as vibration or accidental impacts.
Exit Hole for Water Drain
An exit hole for water drain is necessary to allow for proper drainage of condensate. This ensures that any excess moisture is effectively removed from the system, preventing potential water accumulation or damage.
Optional Items
In addition to the essential items mentioned above, there are a few optional items that you might consider for your installation:
- A mounting bracket specifically designed for the condenser unit can provide additional support and stability.
- A fitting for the water drain can help streamline the drainage process, ensuring that water is effectively directed away from the installation area.
By ensuring that you have all the necessary additional items for installation, you can confidently proceed with your mini split installation in your RV. These items are crucial for creating a reliable and efficient cooling and heating system that will enhance your comfort on the road.
Installation Considerations
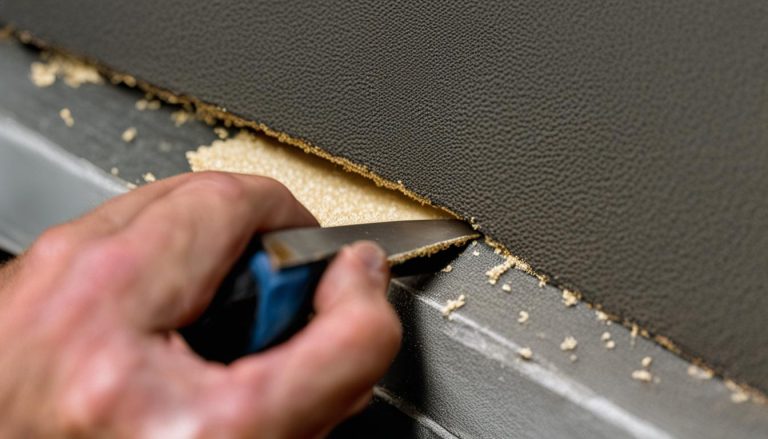
When installing a mini split in your RV, it’s important to carefully consider several factors to ensure a successful installation. One crucial consideration is the placement of the condenser unit. It should be positioned in a way that protects it from road debris and minimizes wind wear and tear. Additionally, the condenser should be securely attached to the RV to prevent any movement while on the road.
The placement of the evaporator unit is also crucial. It should be positioned in a location that allows for sufficient clearance and airflow. This ensures optimal performance and efficiency of the mini split system. Proper airflow is essential for the unit to cool or heat the RV effectively and evenly.
Another important aspect of the installation is the routing of the refrigerant lines. You have the option to route them either outside on the roof or inside the walls. The choice will depend on your preference and the design of your RV. Whichever route you choose, it’s important to ensure that the lines are properly insulated and protected to prevent any damage or leaks.
Lastly, consider the installation environment. Factors such as humidity, dust, and pollen can affect the performance of the mini split system. It’s important to choose a location that is relatively free from these elements to ensure the longevity and efficiency of the unit. Regular maintenance and cleaning can also help preserve the performance of your mini split system.
FAQ
What is a mini split?
A mini split is a heat pump system consisting of an outdoor unit called the condenser and an indoor unit called the evaporator. They are connected by refrigerant lines and an electric line, providing both heating and cooling capabilities.
Why should I install a mini split in my RV?
Installing a mini split in your RV is a great upgrade for off-grid camping. Mini splits are more energy efficient than traditional RV air conditioning units, allowing for longer use without draining power. They also take up less space and provide both heating and cooling options.
What is a recommended mini split brand for RVs?
The Fujitsu Halcyon series is a popular choice for RVs. The 9000 BTU unit offers a SEER rating of 16, quiet operation, and reliable energy efficiency.
What additional items do I need for the installation?
In addition to the mini split unit, you will need a line set for refrigerant cycling, control wire for connecting the evaporator to the condenser, a vacuum pump and gauge for evacuating lines and testing for leaks, and AC power supply for the condenser.
What should I consider during the installation process?
When installing a mini split in your RV, it’s important to consider the placement of the condenser for protection and solid attachment, the evaporator for clearance and airflow, routing of the refrigerant lines inside or outside, and the installation environment for factors like humidity and dust/pollen presence.