RV Toilet Repair Guide: Quick Fixes for You
gorvlifestyle.com and its partners may earn a commission if you purchase a product through one of our links
RV toilets are relatively simple appliances, but it’s important to know how to troubleshoot and fix any issues that may arise. One key part of an RV toilet is the seal, which can become clogged or cracked. To prevent clogs, avoid flushing paper towels and take action at the first sign of a clog. Applying toilet seal lubricant or vegetable oil can help maintain the seal. Additionally, hard water can cause lime buildup, so using CLR can solve this problem. Checking for leaks and cracks and addressing them promptly is also important for maintaining your RV toilet’s longevity.
Key Takeaways:
- Avoid flushing paper towels to prevent clogs.
- Apply toilet seal lubricant or vegetable oil to maintain the seal.
- Use CLR to treat lime buildup caused by hard water.
- Regularly check for leaks and cracks and address them promptly.
- Maintaining your RV toilet will ensure its longevity and proper functioning.
Troubleshooting a Malfunctioning Toilet
If your RV toilet is not flushing properly, or if the seal doesn’t hold water, there are a few common causes to consider. One issue could be a clog, which can be resolved by using a common household implement to clear the blockage. A faulty seal or valve can also cause problems, and applying toilet seal lubricant or vegetable oil can help address this issue. Additionally, if your RV toilet won’t stop running, it might be due to a faulty sprayer, which can be fixed by following some simple tips. By troubleshooting these common problems, you can ensure your RV toilet functions properly.
Common Causes and Solutions
- Problem: RV toilet won’t flush
- Solution: Clear any clogs using a plunger or toilet auger.
- Problem: RV toilet won’t hold water
- Solution: Check the seal and apply toilet seal lubricant or vegetable oil to improve its effectiveness.
- Problem: RV toilet won’t stop running
- Solution: Examine the sprayer and make sure it’s not stuck. Clean or replace if necessary.
By understanding these common issues and implementing the appropriate solutions, you can easily troubleshoot and resolve problems with your RV toilet. Maintaining a well-functioning toilet is essential for a comfortable and enjoyable RV experience.
Remember, a little troubleshooting can go a long way in keeping your RV toilet in proper working condition.
https://www.youtube.com/watch?v=q-bw9HLLa5I
Upgrading Your RV Toilet
If you’re considering upgrading your RV toilet, replacing it with a porcelain model can make your rig feel more like home. The process of replacing an RV toilet is relatively simple, and RV expert Dave Solberg provides a step-by-step guide.
First, remove the handle, shroud, and casing of the old plastic toilet. This will give you access to the water lines and allow you to make the necessary connections for the new toilet.
Upgrading your RV toilet can improve its functionality and appearance, and it’s a DIY project that you can easily tackle. So why not take the opportunity to enhance your RV’s bathroom experience?
By following the instructions and using the right tools, you’ll have a brand new toilet in no time. And the best part is, you’ll have peace of mind knowing that you’ve taken care of any potential issues.
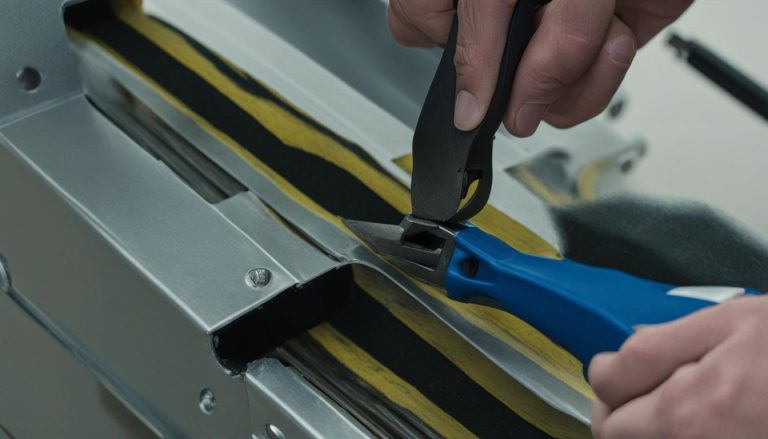
Replacing a Leaky Seal
A common issue with RV toilets is a leaky seal, which can cause water to leak out of the bowl. If the seal is dirty, it may be possible to clean it, but if it’s aged, torn, or dried out, it’s best to replace it. To replace the seal, you’ll need to remove the toilet and access the flush mechanism beneath the bowl. This can be done using a few simple hand tools. Once the old seal is replaced with a new one, you can reassemble the toilet and ensure that it holds water properly.
If you notice water leaking from your RV toilet, it’s important to address the issue promptly to prevent any further damage. A leaky seal can cause water damage to the floors and surrounding areas of your RV, leading to costly repairs. By following these step-by-step instructions, you can easily replace the seal and restore the proper functioning of your RV toilet.
Gathering the Tools
Before you begin the seal replacement process, gather the necessary tools:
- Adjustable wrench
- Screwdriver
- Putty knife
- New RV toilet seal
Having these tools ready will make the seal replacement process smoother and more efficient.
Removing the Toilet
Follow these steps to remove the RV toilet:
- Turn off the water supply to the toilet by shutting off the valve.
- Flush the toilet to empty the water from the bowl and tank.
- Disconnect the water hose and remove any remaining water from the tank.
- Use the screwdriver to remove the screws or bolts securing the toilet to the floor.
- Carefully lift the toilet straight up off the flange and set it aside.
Now that the toilet is removed, you can access the flush mechanism beneath the bowl and proceed with replacing the seal.
Replacing the Seal
Follow these steps to replace the RV toilet seal:
- Use the putty knife to scrape off any old sealant or remnants from the flange and bowl.
- Place the new seal over the flange, ensuring it is centered and properly aligned.
- Lower the toilet onto the new seal, making sure it sits securely on the flange.
- Tighten the screws or bolts to secure the toilet in place.
Once the seal is replaced and the toilet is reassembled, turn on the water supply, flush the toilet, and check for any leaks. If everything looks good, congratulations! You have successfully replaced the leaky seal in your RV toilet.

Remember to conduct regular checks and maintenance to prevent any future leaks or issues with your RV toilet. Keeping your toilet properly sealed will ensure a comfortable and hassle-free experience during your travels.
RV Toilet Maintenance Tips
Proper maintenance is key to keeping your RV toilet in good working condition. In addition to avoiding flushing items that can cause clogs, regular cleaning and care are important.
Here are some essential RV toilet maintenance tips to keep in mind:
- Use RV-friendly toilet paper: Opt for toilet paper specifically designed for RVs. This type of toilet paper is biodegradable and breaks down easily, reducing the risk of clogs.
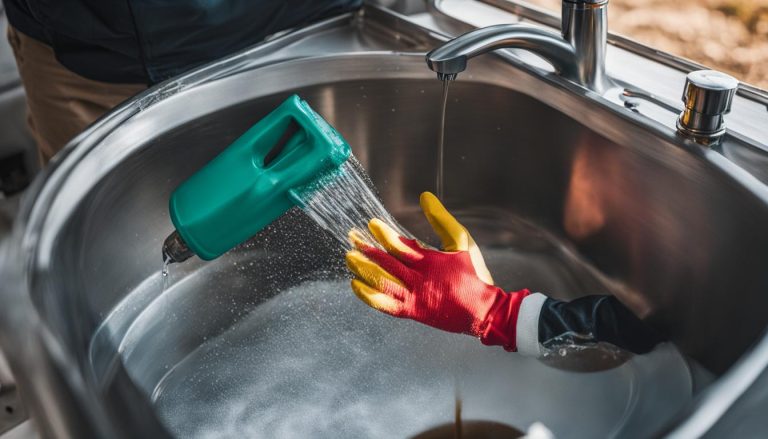
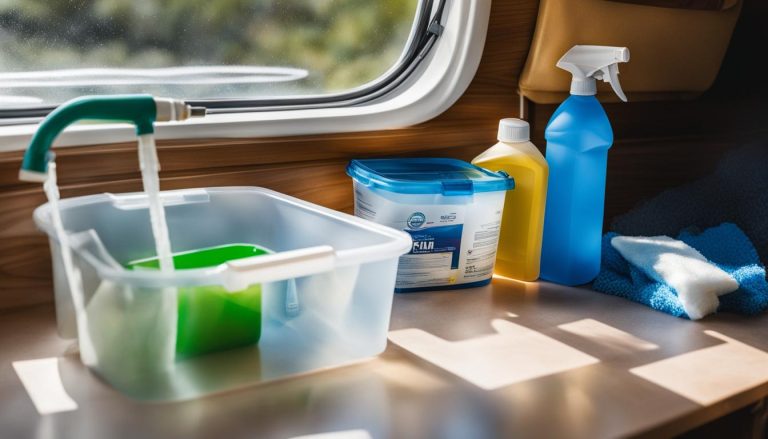
- Regularly clean the toilet and its components: Use RV-safe cleaning products to clean the toilet bowl, seat, and other components. This will help prevent odor and ensure everything functions properly.
- Check for leaks and cracks: Regularly inspect your RV toilet for any signs of leaks or cracks. Addressing these issues promptly can prevent further damage and more expensive repairs.
- Maintain the toilet seal: The toilet seal is an important component that keeps water in the bowl and prevents leaks. Applying toilet seal lubricant or vegetable oil regularly can help maintain the seal and prevent cracking.
By following these maintenance tips, you can ensure that your RV toilet stays in optimal condition, providing you with comfort and convenience on your travels.

Here are some additional tips for RV toilet care and cleaning:
- Avoid using harsh chemicals: Harsh chemicals can damage the seals and components of your RV toilet. Stick to RV-safe cleaning products that are specifically formulated for use in RVs.
- Flush the toilet regularly: Flushing the toilet regularly helps prevent stagnant water and odor. If your RV is parked for an extended period, make sure to flush the toilet at least once a week.
- Properly winterize your RV toilet: If you’ll be storing your RV during the winter months, it’s important to properly winterize the toilet to prevent freezing and damage. Follow the manufacturer’s instructions or consult an RV expert for guidance.
“Regular maintenance and care are essential for keeping your RV toilet in top shape.”
Preventing Common RV Toilet Problems
Understanding and implementing a few preventive measures can help you avoid common RV toilet problems. By following these simple tips, you can minimize the occurrence of RV toilet issues and ensure that your trips are stress-free.
Flush the Right Way: Remember to only flush appropriate materials down your RV toilet. Avoid flushing paper towels, wet wipes, or other items that can cause clogs. Stick to RV-friendly toilet paper to prevent unnecessary blockages that can lead to more serious issues.
Prompt Action: If you notice any signs of a clog, such as slow draining or water backing up, take action immediately. Ignoring a small clog can result in a more significant blockage and potential damage to your RV toilet system. Use a plunger or other appropriate tools to clear the clog before it becomes a major problem.
Maintain the Seal: The seal is a critical component of your RV toilet. Regularly apply toilet seal lubricant or vegetable oil to ensure it remains in good condition and prevent cracking. This simple maintenance step can go a long way in preventing leaks and other seal-related issues.
Tackle Lime Buildup: Hard water can cause lime buildup in your RV toilet, affecting its performance. Use CLR or other appropriate cleaning products to remove lime deposits periodically. This will help keep your toilet functioning optimally and prevent future problems.
Expert Tip: “Regularly inspecting your RV toilet for leaks, cracks, and other issues can help catch and resolve problems early on. By addressing these problems promptly, you can prevent more extensive damage and costly repairs.” – David Smith, RV Toilet Repair Specialist
Implementing these preventive measures will not only extend the lifespan of your RV toilet but also save you time, money, and unnecessary hassle during your travels. Take care of your RV toilet, and it will take care of you.
Common RV Toilet Issues and Their Solutions
| Common RV Toilet Issues | Solutions |
|---|---|
| Clogged Toilet | Use a plunger or other appropriate tools to clear the clog. Regularly maintain the seal to prevent clogs. |
| Leaky Toilet | Inspect and replace the seal if necessary. Contact a professional if the issue persists. |
| Running Toilet | Check the sprayer and make sure it is functioning correctly. Adjust or replace as needed. |
These are just a few examples of common RV toilet issues and their solutions. Remember to address any problems promptly and seek professional help if needed.
Expert Advice and Additional Resources
If you’re looking for expert advice and additional resources for RV toilet repair and maintenance, you’re in luck. Our premium membership provides exclusive access to a wide range of valuable content created by industry experts.
With your premium membership, you’ll gain access to a vast library of video tutorials, instructional demos, projects, and guides that cover all aspects of RV toilet repair and maintenance. Whether you’re a seasoned DIY enthusiast or a beginner looking to learn the basics, our comprehensive collection of RV toilet repair videos has got you covered.
And that’s not all! As a premium member, you can take advantage of special discounts on video downloads and participate in our Ask the Expert program, where you’ll have the opportunity to ask specific questions and receive personalized guidance from our team of RV toilet experts.
Don’t miss out on this invaluable opportunity to enhance your knowledge and keep your RV toilet in optimal condition. Take your RV toilet repair and maintenance skills to the next level with our premium content and resources. Sign up now and become an RV toilet expert today!
FAQ
How do I fix a clogged RV toilet?
To fix a clogged RV toilet, you can use a plunger or a plumbing snake to clear the blockage. Make sure to avoid flushing paper towels or other items that can cause clogs.
What should I do if my RV toilet won’t flush?
If your RV toilet won’t flush, check the flush valve and the water supply. Ensure that the water line is open and that there is proper water pressure. If necessary, clean or replace the flush valve to restore proper flushing.
How can I stop my RV toilet from running?
If your RV toilet won’t stop running, it may be due to a faulty sprayer. Try cleaning or replacing the sprayer to fix the issue. Additionally, make sure that the water level in the tank is not set too high.
How do I upgrade my RV toilet?
To upgrade your RV toilet, start by removing the handle, shroud, and casing of the old toilet. This will allow you to access the water lines and make the necessary connections for the new toilet. Follow a step-by-step guide or consult an RV expert for detailed instructions.
What should I do if my RV toilet is leaking?
If your RV toilet is leaking, check for a dirty or damaged seal. If the seal is dirty, clean it thoroughly. However, if it’s aged, torn, or dried out, it’s best to replace it. Remove the toilet and access the flush mechanism beneath the bowl to replace the seal.
How do I maintain my RV toilet?
To maintain your RV toilet, avoid flushing items that can cause clogs. Use RV-friendly toilet paper and regularly clean the toilet and its components with RV-safe cleaning products. Check for leaks and cracks regularly and address them promptly to prevent further damage.
How can I prevent common RV toilet problems?
To prevent common RV toilet problems, be mindful of what you flush and avoid flushing items that can cause clogs. Regularly apply toilet seal lubricant or vegetable oil to maintain the seal. Use CLR to treat lime buildup and address any issues promptly to prevent further damage.
Where can I find expert advice and additional resources for RV toilet repair and maintenance?
To find expert advice and additional resources for RV toilet repair and maintenance, consider accessing premium content from industry experts. Premium memberships provide access to video tutorials, instructional demos, projects, and guides. You can also take advantage of discounts on video downloads and participate in the Ask the Expert program.