RV Fresh Water Tank Cleaning Guide
gorvlifestyle.com and its partners may earn a commission if you purchase a product through one of our links
Regular maintenance of your RV’s fresh water tank is crucial for ensuring safe and clean water during your trips. Clean water is essential for drinking, showering, and washing dishes in your RV. In this comprehensive guide, we will provide you with step-by-step instructions on how to clean your RV’s fresh water tank effectively. We’ll also share valuable tips and best practices for proper maintenance to keep your water tank in optimal condition.
Key Takeaways:
- Regularly cleaning your RV’s fresh water tank is essential for maintaining clean and safe water.
- Sanitizing the tank eliminates bacteria, mold, and mildew that can cause odors and health risks.
- Cleaning the tank can be done using bleach or an RV tank sanitizer.
- Proper maintenance includes inspecting for leaks, using an RV water filter, and keeping the tank free from debris.
- Troubleshooting common issues such as foul odors and water discoloration is crucial for maintaining optimal tank condition.
Why Sanitize Your RV Fresh Water Tank?
Sanitizing your RV’s fresh water tank is important for several reasons. Over time, bacteria, mold, and mildew can grow in the tank and water lines, which can lead to unpleasant odors and health risks. Cleaning the tank regularly helps eliminate any contaminants and ensures that your water remains fresh and safe to use.
Proper sanitization of your fresh water tank is crucial to maintain the overall cleanliness and quality of your RV’s water system. By regularly cleaning your tank, you can prevent the growth of harmful bacteria and ensure that your water is free from any impurities. This not only promotes better health and hygiene, but also enhances your overall camping experience.
Regular sanitization of your RV’s fresh water tank is essential to maintain clean and safe water for your daily needs. By removing any potential contaminants, you can enjoy fresh-tasting water and prevent any health issues that may arise from contaminated water sources.
In this section, we will explore the importance of sanitizing your fresh water tank and the recommended steps to effectively clean and maintain it. Understanding the significance of this process will help you safeguard your health and well-being during all your RV adventures.
| Benefits of Sanitizing Your RV Fresh Water Tank |
|---|
| 1. Eliminates bacteria, mold, and mildew |
| 2. Prevents foul odors in the water |
| 3. Ensures clean and safe water for drinking and everyday use |
| 4. Reduces the risk of waterborne illnesses |
| 5. Maintains the overall integrity of your RV’s water system |
By regularly sanitizing your fresh water tank, you can ensure that you and your family have access to clean and safe water throughout your RV journeys. In the next section, we will delve into the step-by-step process of how to clean your RV’s fresh water tank, providing you with all the information you need to maintain a fresh and healthy water supply.
How to Sanitize Your RV Fresh Water Tank
Cleaning your RV’s fresh water tank is an important part of maintaining a safe and healthy water system. Regular cleaning helps remove any bacteria or contaminants that may have built up over time. In this section, we will guide you through the process of sanitizing your RV’s fresh water tank, ensuring that your water remains clean and fresh.
Gather Your Supplies
Before you start sanitizing your RV’s fresh water tank, make sure you have the necessary supplies on hand. This includes:
- A bleach solution or an RV tank sanitizer
- A clean hose
- A funnel
- A measuring cup
- A bucket
Step-by-Step Guide
Follow these steps to effectively sanitize your RV’s fresh water tank:
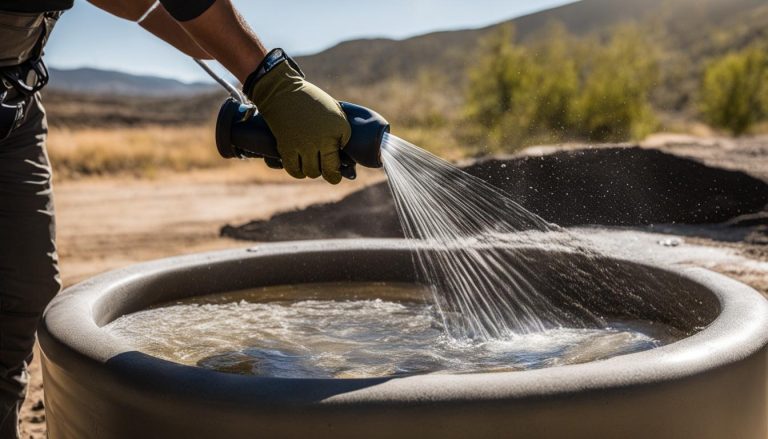
- Drain the tank: Start by emptying the fresh water tank completely. Open the drain valve and let all the water flow out. Ensure that the tank is completely empty before proceeding to the next step.
- Calculate the amount of bleach: To determine the amount of bleach needed, refer to your RV’s owner’s manual or the manufacturer’s recommendations. Typically, you will need to use about 1/4 cup of bleach per 15 gallons of water capacity in your tank. Measure the bleach accordingly using a measuring cup.
- Prepare the bleach solution: Dilute the bleach in a bucket of water. Stir the solution to ensure it is well mixed.
- Fill the tank: Attach a clean hose to a water source and use a funnel to pour the bleach solution into the RV’s fresh water tank. Fill the tank with enough water to ensure the solution reaches all areas of the tank.
- Circulate the solution: Turn on the water pump in your RV and open all faucets to allow the bleach solution to flow through the system. Let the solution circulate for at least 12 to 24 hours, ensuring that every part of the system is exposed to the bleach solution.
- Flush the tank: After the recommended time has passed, drain the tank once again. Rinse it thoroughly by filling it with clean water and draining it until the water runs clear.
Following these steps will help ensure that your RV’s fresh water tank is properly sanitized. Remember to always follow the manufacturer’s instructions and recommendations when sanitizing your tank. Additionally, it’s essential to clean and sanitize your tank regularly to maintain safe and clean water for your RV adventures.
Maintaining Your RV’s Fresh Water Tank
In addition to regularly sanitizing your fresh water tank, there are other maintenance tasks that should be done to keep your tank in optimal condition. By following these best practices, you can ensure that your RV’s fresh water system continues to provide clean and safe water during your travels.
Regular Inspections
Inspecting your fresh water tank and plumbing lines on a regular basis is crucial to identify any leaks or damage. Look for signs of corrosion, loose connections, or cracks in the tank. Additionally, check the condition of the valves and fittings to ensure they are functioning properly.
Using an RV Water Filter
Installing an RV water filter is an effective way to maintain the cleanliness of your fresh water tank. These filters help remove sediments, chemicals, and contaminants, ensuring that the water you use is free from impurities. Be sure to replace the filter regularly to maintain its effectiveness.
Removing Debris and Sediment
Regularly clean out your fresh water tank to remove any debris or sediment that may accumulate over time. This can be done by draining the tank completely and flushing it out with clean water. Pay special attention to the tank’s bottom and corners, where debris tends to settle.
Proper Storage and Winterization
When not in use, it’s important to properly store and winterize your RV’s fresh water tank. This involves draining all water from the tank and lines, adding antifreeze if necessary, and protecting the tank from freezing temperatures. Following the manufacturer’s instructions for winterization will help prevent damage to the tank.
By following these maintenance practices, you can ensure that your RV’s fresh water tank remains clean and functional, providing you with a continuous supply of safe water during your adventures.
| Best Practices for RV Water Tank Cleaning and Maintenance |
|---|
| Regularly inspect your fresh water tank and plumbing lines for leaks or damage. |
| Install an RV water filter to remove impurities from the water. |
| Periodically clean out the tank to remove debris and sediment. |
| Properly store and winterize the fresh water tank during the off-season. |

Troubleshooting Common Issues with RV Fresh Water Tanks
Sometimes, despite regular maintenance, issues can arise with your RV’s fresh water tank. In this section, we will discuss common issues that RVers may encounter, such as foul odors, water discoloration, and tank leaks. We will provide troubleshooting tips and solutions to help you resolve these issues and keep your fresh water tank in optimal condition.
1. Foul Odors:
If you notice a foul odor coming from your RV’s fresh water tank, it could be a sign of bacterial growth. To eliminate the odor, follow these steps:
- Drain the tank completely.
- Mix a solution of one-quarter cup of bleach for every 15 gallons of tank capacity.
- Fill the tank with the bleach solution and let it sit for at least 12 hours.
- Drain and flush the tank with clean water until the bleach odor is gone.
This process will help kill any bacteria causing the odor and leave your tank smelling fresh.
2. Water Discoloration:
If you notice that the water from your RV’s fresh water tank is discolored, it could be due to sediment or rust buildup. Here’s what you can do:
- Use a water filter designed for RVs to remove any sediment or impurities.
- Flush the tank by draining and refilling it several times.
- If the discoloration persists, consider replacing the tank or consulting a professional.
Regularly using a water filter can help prevent discoloration and ensure clean water for your RV.
3. Tank Leaks:
If you notice water leaking from your RV’s fresh water tank, it’s important to address the issue promptly. Follow these steps to troubleshoot tank leaks:
If the leak is coming from a connection or fitting, check for loose or damaged parts. Tighten or replace as necessary.
If the tank itself is leaking, it may need to be replaced. Consult a professional for assistance.
Fixing leaks promptly will help prevent further damage and ensure the proper functioning of your fresh water tank.
By troubleshooting these common issues and following the recommended solutions, you can keep your RV’s fresh water tank in optimal condition. Remember, regular maintenance and attention to any signs of trouble are key to ensuring a clean and reliable water supply during your travels.
| Issue | Troubleshooting Steps |
|---|---|
| Foul Odors | 1. Drain the tank 2. Mix bleach solution 3. Fill and let sit 4. Drain and flush with clean water |
| Water Discoloration | 1. Use RV water filter 2. Flush the tank multiple times 3. Consider tank replacement if issue persists |
| Tank Leaks | 1. Check connections and fittings 2. Tighten or replace as necessary 3. Consult a professional for tank replacement |

Conclusion: Keep Your RV’s Water Fresh and Safe
Regular cleaning and maintenance of your RV’s fresh water tank are essential to ensure that you have access to clean and safe water during your travels. By following the steps outlined in this guide and implementing the best practices for tank maintenance, you can enjoy fresh and safe water in your RV.
Remember to sanitize your tank regularly to eliminate bacteria, mold, and mildew that can grow over time. This will help prevent unpleasant odors and potential health risks associated with contaminated water. Inspecting your tank and plumbing lines for leaks or damage is also crucial in maintaining the integrity of your water system.
Address any issues promptly to keep your fresh water system in optimal condition. Utilize an RV water filter to ensure clean water and reduce sediment build-up. Keeping your tank and lines free from debris and sediment will further contribute to the quality and longevity of your water system. With these effective cleaning techniques and regular maintenance practices, you can confidently enjoy fresh and safe water while on your RV adventures.
FAQ
Why is it important to regularly sanitize your RV’s fresh water tank?
Regular maintenance of your RV’s fresh water tank is crucial to ensure safe and clean water for drinking, showering, and washing dishes. Bacteria, mold, and mildew can grow in the tank and water lines over time, leading to unpleasant odors and health risks. Cleaning the tank regularly helps eliminate contaminants and ensures fresh and safe water.
How do I clean my RV’s fresh water tank?
Cleaning your RV’s fresh water tank is a simple process that can be done using bleach or an RV tank sanitizer. First, drain the tank completely. Then, calculate the amount of bleach or sanitizer required based on the tank’s capacity. Mix the bleach or sanitizer with clean water and fill the tank. Let it sit for a specified period to sanitize, and then drain and rinse the tank thoroughly.
How often should I sanitize my RV’s fresh water tank?
It is recommended to sanitize your RV’s fresh water tank at least once every six months. However, if you notice any unusual odors, discoloration, or taste in the water, it is advisable to sanitize the tank immediately.
What are some tips for maintaining my RV’s fresh water tank?
Proper maintenance includes regularly inspecting the tank and plumbing lines for leaks or damage, using an RV water filter to ensure clean water, and keeping the tank and lines free from debris and sediment. It is also important to drain and flush the tank after each trip and to replace the tank’s anode rod if necessary.
What should I do if I encounter issues with my RV’s fresh water tank?
If you encounter issues such as foul odors, water discoloration, or tank leaks, there are troubleshooting steps you can take. These include flushing the tank and lines, checking for clogged filters, and repairing or replacing damaged parts. If the problem persists, it is best to consult a professional for further assistance.
How can I keep my RV’s water fresh and safe?
By following the steps outlined in this guide and implementing the best practices for tank maintenance, you can ensure fresh and safe water in your RV. Regularly sanitize your tank, inspect for leaks and damage, address any issues promptly, and use an RV water filter to keep your water clean.