Install Solar Panels on Your RV Easily
gorvlifestyle.com and its partners may earn a commission if you purchase a product through one of our links
Adding solar panels to your RV is a great way to harness the power of the sun and increase your energy independence while on the road. In this section, we will provide a comprehensive guide on how to install solar panels on your RV, including the necessary equipment and steps for a successful installation. We’ll cover topics such as choosing the right solar panels, mounting options, wiring, and connecting to your RV’s electrical system.
Key Takeaways
- Installing solar panels on your RV provides the benefit of harnessing solar power and increasing energy independence during your travels.
- Choosing the right solar panels for your RV involves considering factors such as efficiency, size, and compatibility with your RV’s electrical system.
- There are different mounting options for RV solar panels, including fixed mounting and flexible mounting, each with its advantages and considerations.
- Wiring and connecting the solar panels to your RV’s electrical system requires the installation of a solar charge controller to regulate the charging process.
- If you plan to power AC appliances and devices in your RV, you’ll need to add an inverter to your solar panel system.
Choosing the Right Solar Panels for Your RV
When considering solar panel installation for your RV, it’s crucial to choose the right panels that meet your specific needs. Here are some key factors to consider:
- Efficiency: Look for solar panels with high efficiency ratings. This indicates how effectively the panels convert sunlight into electricity. Higher efficiency panels will generate more power for your RV.
- Size: Consider the size of the solar panels and whether they will fit comfortably on your RV’s roof. Take into account any obstructions or space limitations that may affect the placement of the panels.
- Compatibility: Ensure that the solar panels are compatible with your RV’s electrical system. Check the voltage and wattage requirements to ensure a seamless integration.
- Durability: Look for panels that are designed specifically for RV use and can withstand the rigors of travel. The panels should be able to handle various weather conditions and resist damage from impacts or vibrations.
RV Solar Panel Kits
If you’re looking for a convenient and hassle-free solution, consider investing in an RV solar panel kit. These kits come with all the necessary components for a successful installation, including panels, mounting hardware, wiring, and sometimes even a solar charge controller. RV solar panel kits are designed to provide a seamless and straightforward installation process, making it easier for RV owners to harness the power of the sun.
When choosing an RV solar panel kit, make sure it includes panels that are suitable for RV use and meet your power requirements. Look for kits from reputable brands known for their quality and performance. Consider the wattage of the panels included in the kit and determine if it aligns with your energy needs.
“Investing in high-quality solar panels and an RV solar panel kit can significantly enhance your RVing experience by providing you with a reliable and eco-friendly source of power.”
With the right solar panels and kit, you can enjoy the benefits of clean and sustainable energy while on the road. Take the time to research and compare different options before making a decision. By selecting the best solar panels for your RV, you can enhance your energy independence and create a more environmentally friendly RVing experience.
Mounting Options for RV Solar Panels
When it comes to installing solar panels on your RV, you have different mounting options to choose from. Your decision will depend on your personal preferences and the type of panels you have. The two main options are fixed mounting and flexible mounting.
Fixed Mounting:
If you prefer a sturdy and permanent installation, fixed mounting is the way to go. This method involves drilling holes on the roof of your RV and using brackets to secure the panels in place. Fixed mounting provides a reliable and secure setup, ensuring that your panels stay in position even during travel.
Flexible Mounting:
If you’re looking for a more flexible and adaptable option, flexible mounting might be the best choice for you. This method utilizes adhesive tape to attach thin-film panels directly to the roof surface, eliminating the need for drilling. Flexible mounting allows the panels to conform to the shape of your RV, providing a sleek and seamless appearance.
When deciding between fixed and flexible mounting, consider your specific needs and the type of panels you have. Fixed mounting is ideal for those who prioritize stability and durability, while flexible mounting offers greater versatility and a streamlined aesthetic.
Benefits of Fixed Mounting:
- Sturdy and permanent installation
- Secure positioning, even during travel
- Reliable performance
Benefits of Flexible Mounting:
- Flexible and adaptable to the shape of your RV
- No drilling required
- Sleek and seamless appearance
Consider your RV’s specific requirements and your personal preferences when choosing the mounting option that works best for you. Ultimately, both fixed and flexible mounting methods can provide a reliable and efficient installation for your RV solar panel system.
Wiring and Connecting the Solar Panels
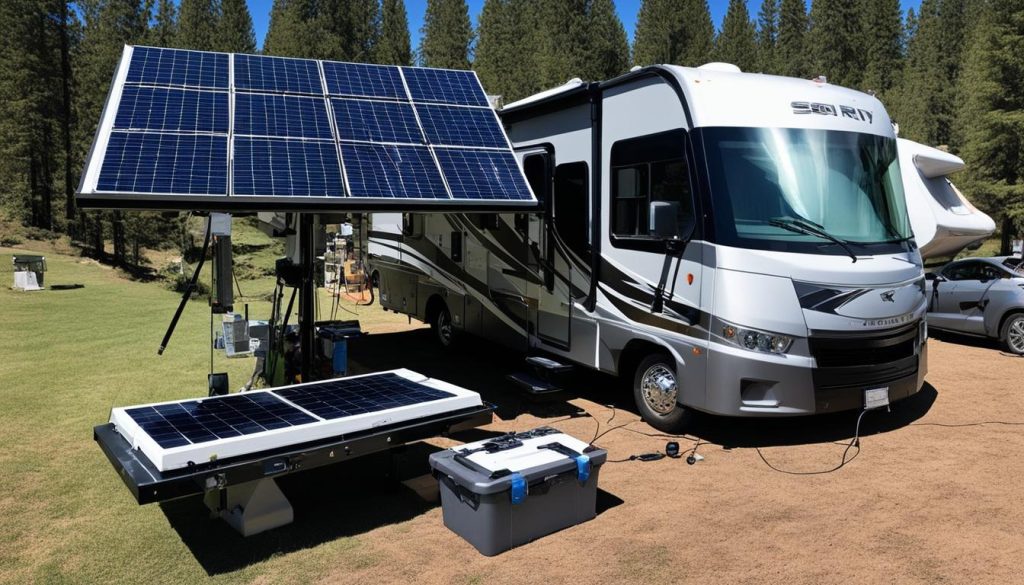
Once the panels are mounted on your RV roof, it’s time to wire and connect them to your RV’s electrical system. This crucial step ensures that the solar energy generated by the panels can be effectively utilized to power your RV.
- Install a Solar Charge Controller: To regulate the charging process and protect your RV’s batteries from overcharging, you need to install a solar charge controller. This device acts as a mediator between the solar panels and the batteries, ensuring the optimal flow of energy. Place the charge controller in a visible and easily accessible location within your RV.
- Connect the Charge Controller: Use stranded copper wire to connect the solar charge controller to your RV’s house battery. It is essential to ensure proper polarity during the wiring process to avoid any damage or malfunction. Consult the instructions provided with the charge controller for the specific wiring diagram.
- Size Wire and Fuse Ratings: It’s important to use the correct wire size and fuse ratings to ensure safe and efficient operation of your solar panel system. Improper wiring can lead to power loss, overheating, or even electrical hazards. Refer to the manufacturer’s recommendations and guidelines to determine the appropriate wire size and fuse ratings for your specific setup.
By following these steps and guidelines, you can confidently wire and connect your solar panels to your RV’s electrical system, allowing you to conveniently harness the power of the sun for your energy needs on the road.
| Benefits of Proper Wiring and Connection | Consequences of Improper Wiring and Connection |
|---|---|
| Efficient utilization of solar energy | Power loss and reduced system performance |
| Extended battery life | Risk of overheating or electrical hazards |
| Safe and reliable operation | Damage to RV’s electrical components |
Adding an Inverter for AC Power
If you plan to power AC appliances and devices in your RV, you’ll need to add an inverter to your solar panel system. An inverter converts the DC power generated by the solar panels into AC power, allowing you to use standard household appliances.
Install the inverter close to your RV’s house battery, using appropriate wire size and including a fuse or circuit breaker for safety. Consider the power rating of the inverter based on your energy needs. Keep in mind that using AC power will require more battery capacity, so ensure that your battery bank is sufficient to meet your power requirements.
To get the most out of your RV solar power setup, adding an inverter is essential for powering AC appliances and devices. Let’s dig into the details and explore how you can incorporate an inverter into your off-grid RV solar system.
“An inverter converts the DC power generated by the solar panels into AC power, allowing you to use standard household appliances.”
Choosing the Right Inverter
When selecting an inverter for your RV solar system, consider the following factors:
- Power Rating: Determine the amount of power you’ll need to run your AC appliances and choose an inverter with an appropriate power rating. Take into account the starting surge or peak power requirements of your devices.
- Pure Sine Wave vs. Modified Sine Wave: Pure sine wave inverters produce clean and stable AC power, suitable for sensitive electronics. Modified sine wave inverters are more affordable but may cause issues or reduced performance with certain devices.
- Size and Mounting: Ensure that the inverter fits well in your RV and can be securely mounted for safe operation.
| Inverter Brand | Power Rating | Waveform Type | Price Range |
|---|---|---|---|
| Brand A | 1000W | Pure Sine Wave | $300-$400 |
| Brand B | 2000W | Modified Sine Wave | $200-$300 |
| Brand C | 3000W | Pure Sine Wave | $400-$500 |
Table: Comparison of inverter brands and specifications for RV solar systems.
Once you’ve selected the right inverter, follow the manufacturer’s instructions for installation. It’s crucial to use appropriate wire size and include a fuse or circuit breaker in the wiring to protect your system from overloads or short circuits.
With the addition of an inverter, you’ll have the ability to power AC appliances and devices conveniently in your RV, making it a true off-grid solar system.
Optimizing Performance and Avoiding Mistakes
When it comes to optimizing the performance of your RV solar panel system, there are a few key considerations to keep in mind. Firstly, be aware of any potential obstacles or obstructions on your RV roof that may block sunlight, such as satellite dishes or air conditioning units. These can significantly impact the efficiency of your solar panels, so it’s important to plan their placement accordingly.
When designing the layout of your panels, make sure to leave enough space between them to maximize exposure to sunlight. This will ensure that each panel receives sufficient sunlight and can generate the maximum amount of energy possible. Additionally, consider the daily energy consumption of your RV. By accurately estimating your energy needs, you can size your solar panel system accordingly and ensure that it can meet your power requirements.
Regular monitoring of your system’s performance is essential to catch any issues or inefficiencies early on. This includes checking for any signs of damage or leaks in the roof, as these can affect both the functionality of your solar panels and the integrity of your RV. By following the proper installation and maintenance guidelines outlined in the RV solar panel installation guide, you can ensure the longevity and efficiency of your DIY solar RV installation. Remember, proper care and attention will help you get the most out of your RV solar panel setup for years to come.
FAQ
How can I add solar panels to my RV?
To add solar panels to your RV, you will need to choose the right panels for your needs, mount them on your RV roof, and wire and connect them to your RV’s electrical system. It’s important to follow the proper installation guidelines and consider factors such as panel efficiency, size, and compatibility with your RV.
What should I consider when choosing solar panels for my RV?
When choosing solar panels for your RV, consider factors such as their efficiency, size, and compatibility with your RV’s electrical system. Look for lightweight and durable panels designed specifically for RV use. Consider the power capacity of the panels based on your RV’s energy needs.
What are the mounting options for RV solar panels?
There are two main mounting options for RV solar panels: fixed mounting and flexible mounting. Fixed mounting involves drilling holes on the roof and using brackets to secure the panels, while flexible mounting uses adhesive tape to attach thin-film panels directly to the roof surface. Choose the best option based on your needs and the type of panels you have.
How do I wire and connect the solar panels to my RV’s electrical system?
To wire and connect the solar panels to your RV’s electrical system, install a solar charge controller that regulates the charging process and protects your RV’s batteries. Connect the charge controller to your RV’s house battery using stranded copper wire, following the provided instructions for the specific wiring diagram. Use the correct wire size and fuse ratings.
Do I need an inverter for AC power in my RV?
If you plan to power AC appliances and devices in your RV, you will need to add an inverter to your solar panel system. An inverter converts the DC power generated by the solar panels into AC power, allowing you to use standard household appliances. Install the inverter close to your RV’s house battery and consider the power rating based on your energy needs.
How can I optimize the performance of my RV solar panel system?
To optimize the performance of your RV solar panel system, consider potential obstacles or obstructions on the roof that may block sunlight. Plan the layout of your panels to maximize exposure to sunlight and leave enough space between them. Size your solar panel system according to your daily energy consumption and regularly monitor its performance and any potential damage or leaks.

