Wiring Guide: How to Wire a 30 Amp RV Outlet
gorvlifestyle.com and its partners may earn a commission if you purchase a product through one of our links
If you’ve got a 30-amp RV, knowing how to wire a 30 amp RV plug to replace a broken one can be super helpful. You might think this is an unnecessary skill to master because installing a 30-amp RV plug is best left to the pros. But what if you’re traveling when your RV’s power cord plug gets damaged? Today we’re covering how to replace a 30 amp RV plug anywhere, anytime, using a few basic tools that you’re (hopefully) carrying on your RV when you travel anyway.
Key Takeaways:
- Knowing how to wire a 30 amp RV outlet is essential for RV owners who may need to replace a broken plug while traveling.
- RV surge protectors primarily protect your RV’s electrical system, not the 30-amp plug itself.
- When wiring a 30-amp RV plug, you’ll need basic tools like wire strippers, screwdrivers, and a replacement plug.
- Following the correct wiring process is crucial to ensure the safe and proper installation of a 30-amp RV outlet.
- Installing an RV outlet at home requires careful consideration of location, protection, and adherence to electrical code guidelines.
Why You Should Know How to Replace Your RV’s 30-Amp Plug
It’s important to know your comfort and ability levels when tackling any DIY project, including replacing an RV’s 30-amp plug. This skill is essential for owners of 30-amp powered motorhomes and travel trailers, as there are several reasons why it’s important to know how to correctly replace your 30-amp RV plug.
- Consequences of a broken RV 30-amp plug: A broken plug can lead to power interruptions, affecting your RV’s essential functions. It can also be a safety hazard, potentially causing electrical fires or damage to your RV’s electrical system.
- Importance of replacing an RV 30-amp plug: By knowing how to replace a broken RV 30-amp plug, you can ensure a continuous and reliable power supply during your travels. This is especially crucial when you are in remote locations or on camping trips where professional help may not be readily available.
Knowing how to wire a 30 amp RV plug allows you to address these issues and ensure your RV’s power needs are met.
By being equipped with the knowledge and skills to replace your RV’s 30-amp plug, you can avoid the inconvenience and potential dangers associated with a broken plug. Additionally, you can maintain the longevity of your RV’s electrical system and safeguard against costly repairs.
Benefits of Replacing an RV 30-Amp Plug
| Benefits | Description |
|---|---|
| Continuous Power Supply | Ensure uninterrupted power for your RV’s essential functions. |
| Safety | Prevent electrical hazards and potential damage to your RV’s electrical system. |
| Reliability | Feel confident in the reliability of your RV’s power source, especially in remote locations. |
| Cost Savings | Avoid expensive repairs by maintaining your RV’s electrical system. |
Doesn’t My RV Surge Protector Keep My 30-Amp Plug Safe?
While RV surge protectors are important for safeguarding your RV’s electrical system, they primarily protect against power surges and electrical spikes. While they can offer some protection for your 30-amp RV plug, their main function is to protect the expensive electrical equipment inside your RV. Surge protectors cannot guarantee that heat generated by excessive power usage or loose connections will not damage your 30-amp plug. Therefore, it is still crucial to know how to wire a 30 amp RV plug to ensure its proper maintenance and replacement when necessary.
Ensure Comprehensive Protection for Your RV
Your RV surge protector plays a vital role in safeguarding your RV’s electrical system from power surges and spikes. It constantly monitors the incoming voltage to detect any irregularities and prevent them from reaching your electrical equipment. This helps to avoid potential damage to appliances, electronics, and other sensitive devices inside your RV. However, it’s important to note that surge protectors primarily focus on protecting your RV’s internal electrical components, and while they provide some level of protection for your 30-amp RV plug, they are not designed specifically for that purpose.
Why Wiring Your 30-Amp RV Plug Matters
Knowing how to wire a 30 amp RV plug is essential for maintaining the safety and functionality of your RV’s electrical system. By having the knowledge and skills to replace a damaged or faulty plug, you can ensure a reliable power connection when traveling or camping. Wiring your 30-amp RV plug correctly helps prevent damage caused by excessive power usage, loose connections, or other electrical issues that may go undetected by surge protectors. It also allows you to address any problems promptly and avoid potential hazards.
“Wiring your 30-amp RV plug correctly helps prevent damage caused by excessive power usage, loose connections, or other electrical issues that may go undetected by surge protectors.”
Protecting Your RV’s Electrical System and Beyond
While surge protectors provide valuable protection for your RV, it’s important to remember that they have limitations. Proper wiring of your 30-amp RV plug is necessary to ensure the overall health and longevity of your electrical system, including the plug itself. By mastering the skill of wiring your 30-amp RV plug, you can take an active role in protecting your investment and ensuring a safe and reliable RVing experience.
Tools Needed to Wire a 30-Amp RV Plug
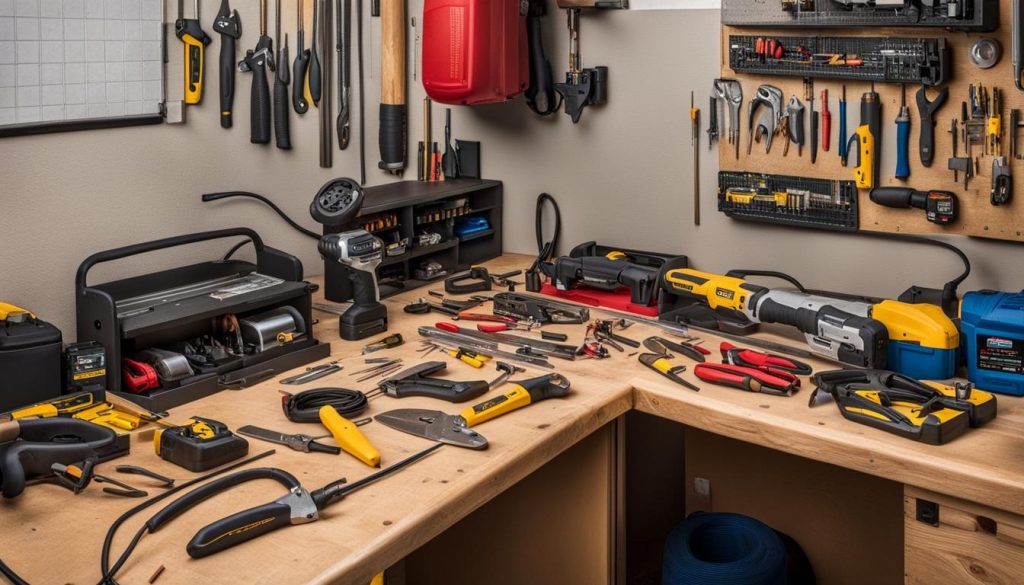
When it comes to wiring a 30-amp RV plug, having the right tools is essential. Here’s a list of the necessary equipment you’ll need to successfully replace an RV plug:
- Wire stripper: This tool is used to remove the insulation from the wires, ensuring proper connections.
- Flat blade screwdriver: You’ll need this tool to tighten terminal screws securely.
- Phillips screwdriver: It helps in removing and installing screws on the plug.
- Utility knife: This tool is used for cutting and trimming wires to the correct length.
- Wire cutter: It is necessary for cutting wires to the appropriate size.
- Marking pen: You’ll need to mark the wires for easy identification during the installation process.
- Measuring tape: To ensure accurate measurements when cutting and stripping wires.
- Replacement 30-amp plug (NEMA TT-30): You’ll need a new plug to replace the old or damaged one.
Having these tools within reach will make the process of replacing your RV plug much easier and ensure a successful installation.
Remember, safety should always be your top priority when working with electricity. Make sure to follow proper procedures, turn off the power supply, and consult a licensed electrician if needed.
How to Wire a 30 Amp RV Plug
Wiring a 30-amp RV plug is a straightforward process that can be easily accomplished with a few simple steps. By following this step-by-step guide, you’ll be able to replace your RV’s plug and ensure a reliable power connection for your outdoor adventures.
Gather the necessary tools:
Before you begin, make sure you have the following tools on hand:
- Wire stripper
- Flat blade screwdriver
- Phillips screwdriver
- Utility knife
- Wire cutter
- Marking pen
- Measuring tape
- Replacement 30-amp plug (NEMA TT-30)
Step 1: Disconnect the old plug
Start by cutting off the old plug from the RV’s power cord, ensuring all power sources are disconnected.
Step 2: Prepare the wires
Strip off approximately 1 inch of insulation from the end of each wire using a wire stripper. This will expose the copper wires underneath.
Step 3: Cut the wires
Refer to the instructions provided with your replacement plug to determine the correct lengths for each wire. Use a wire cutter to trim the wires accordingly.
Step 4: Strip the insulation
Strip off approximately 1 inch of insulation from the end of each wire, exposing the copper wires.
Step 5: Connect the wires
Follow the specific instructions provided with your replacement plug to connect each wire to the appropriate terminal. Typically, the wires will be connected to the designated screws or clamps on the plug.
Step 6: Secure the plug
Ensure all connections are secure and tightly fastened. This will prevent any loose wires or terminals that could cause electrical issues.
Step 7: Test the connection
Once the plug is fully secured, test the connection using a multimeter or RV electrical tester. This will verify that the wiring is correct and the plug is functioning properly.
Step 8: Finalize the installation
Once you have confirmed that the plug is wired correctly and functioning as intended, you can finalize the installation by properly securing the plug to the RV’s power cord using any provided clamps or screws.
Remember, it’s important to always refer to the specific instructions provided with your replacement plug to ensure proper wiring and installation. By following these steps and taking the necessary precautions, you’ll be able to successfully wire a 30 amp RV plug and enjoy reliable power during your outdoor adventures.
Considerations for Installing an RV Outlet at Home
Installing an RV outlet at home can provide convenience and flexibility for RV owners. Whether you want to park your RV in your driveway or have a dedicated space for it in your backyard, having a designated outlet can make it easier to power your RV and perform maintenance tasks. However, there are several considerations to keep in mind when installing an RV outlet at home to ensure a safe and functional setup.
Location and Protection
The location of the RV outlet is an important consideration to prevent damage and ensure safety. It should be mounted in a deep-lid weatherproof box to protect it from the elements. Additionally, the outlet should be positioned in a place where it is least likely to be damaged, such as away from trees, shrubs, or areas where vehicles may accidentally collide with it.
Correct Wiring
Proper wiring is crucial for the safety and efficiency of the RV outlet. It is essential to follow electrical code guidelines when installing the outlet. This includes using the appropriate wire size based on the distance between the outlet and the main electrical panel. Not using the correct wire gauge can result in voltage drop and potential electrical hazards.
Professional Help
If you are not experienced or confident in your electrical skills, it is advisable to consult a licensed electrician for the installation of the RV outlet. They have the knowledge and expertise to ensure that the wiring is done correctly and in compliance with electrical codes.
By considering these aspects during the installation process, you can create a safe and reliable RV outlet at home that allows you to enjoy your RV to the fullest.
Installing an RV outlet at home can provide convenience and flexibility for RV owners. Whether you want to park your RV in your driveway or have a dedicated space for it in your backyard, having a designated outlet can make it easier to power your RV and perform maintenance tasks. However, there are several considerations to keep in mind when installing an RV outlet at home to ensure a safe and functional setup.
The location of the RV outlet is an important consideration to prevent damage and ensure safety. It should be mounted in a deep-lid weatherproof box to protect it from the elements. Additionally, the outlet should be positioned in a place where it is least likely to be damaged, such as away from trees, shrubs, or areas where vehicles may accidentally collide with it.
Proper wiring is crucial for the safety and efficiency of the RV outlet. It is essential to follow electrical code guidelines when installing the outlet. This includes using the appropriate wire size based on the distance between the outlet and the main electrical panel. Not using the correct wire gauge can result in voltage drop and potential electrical hazards.
If you are not experienced or confident in your electrical skills, it is advisable to consult a licensed electrician for the installation of the RV outlet. They have the knowledge and expertise to ensure that the wiring is done correctly and in compliance with electrical codes.
By considering these aspects during the installation process, you can create a safe and reliable RV outlet at home that allows you to enjoy your RV to the fullest.
Choosing the Right Wire Size for a 30-Amp RV Outlet
When it comes to wiring a 30-amp RV outlet, choosing the right wire size is crucial to ensure the safe and efficient operation of your RV’s electrical system. The wire gauge for a 30-amp RV outlet will depend on the distance between the outlet and the main electrical panel. Using the appropriate wire size will prevent voltage drop and allow the circuit to handle the current capacity of a 30-amp outlet.
To determine the correct wire size for your RV outlet, consider the following guidelines:
- Distances up to 25 feet: For distances up to 25 feet, it is recommended to use a 10-gauge wire. This wire size provides sufficient capacity for the 30-amp circuit.
- Distances between 25 and 50 feet: If the distance between the outlet and the main panel is between 25 and 50 feet, an 8-gauge wire is advisable. This larger wire size compensates for the increased resistance over a longer distance.
- Distances between 50 and 100 feet: For distances between 50 and 100 feet, a 6-gauge wire should be used. This heavier wire size ensures that the power is delivered efficiently to the RV outlet.
- Distances over 100 feet: If the distance exceeds 100 feet, a 4-gauge wire is recommended. This larger wire size compensates for the increased voltage drop over a longer distance, ensuring optimal performance.
By selecting the appropriate wire size based on the distance between the outlet and the main panel, you can ensure that your RV’s electrical system operates safely and efficiently.
Wire Size for 30-Amp RV Outlet: Quick Reference Guide
| Distance (feet) | Wire Size |
|---|---|
| Up to 25 | 10-gauge |
| 25 – 50 | 8-gauge |
| 50 – 100 | 6-gauge |
| Over 100 | 4-gauge |
Safety Precautions and Tips for Wiring a 30-Amp RV Outlet
When it comes to working with electricity, safety should always be your top priority. Whether you’re a seasoned DIYer or a first-time RV owner, following proper precautions is essential to protect yourself and your RV. Here are some important safety tips for wiring a 30-amp RV outlet:
- Before starting any electrical work, make sure to turn off the power supply at the main breaker. This will help prevent any accidental electric shocks or other electrical dangers. It’s also a good idea to use a voltage tester to ensure that there is no electricity present before you begin.
- If you’re not confident in your electrical skills or if you’re unsure about any aspect of the wiring process, it’s always best to consult a licensed electrician. They have the expertise and experience to ensure that the job is done correctly and safely.
- Avoid plugging or unplugging the RV cord while it’s under load. This can cause arcing or sparks, which can be hazardous. Make sure to turn off all appliances and disconnect any power sources before attempting to plug or unplug the RV cord.
- Using a surge protector is highly recommended to protect your RV’s electrical system. A surge protector can help prevent power surges and voltage spikes, which can damage sensitive electronics in your RV.
- Before using the newly wired 30-amp RV outlet, it’s important to check the wiring using a multimeter. This will ensure that the outlet has been wired correctly and that there are no issues that could pose a safety hazard.
By following these safety tips and precautions, you can ensure that your RV outlet wiring is done safely and effectively. Remember, when it comes to electrical work, it’s always better to be safe than sorry. Happy RVing!
FAQ
How important is it to know how to replace a 30-amp RV plug?
Knowing how to replace a 30-amp RV plug is crucial for RV owners to address potential damage from overheating and use over time, as well as the possibility of a broken prong. It ensures proper maintenance and replacement when necessary to meet the RV’s power needs.
Does an RV surge protector protect the 30-amp RV plug?
While RV surge protectors primarily protect against power surges and electrical spikes, they cannot guarantee protection from heat generated by excessive power usage or loose connections. Wiring a 30-amp RV plug correctly is still essential for its maintenance and replacement.
What tools are needed to wire a 30-amp RV plug?
To wire a 30-amp RV plug, you will need tools like a wire stripper, flat blade screwdriver, Phillips screwdriver, utility knife, wire cutter, marking pen, measuring tape, and a replacement 30-amp plug (NEMA TT-30). These tools are necessary for cutting and stripping wires, connecting them to the plug terminals, and securing the plug in place.
What is the process of wiring a 30-amp RV plug?
Wiring a 30-amp RV plug involves steps like cutting off the old plug, preparing the wires by stripping off the insulation, following the instructions for the replacement plug to cut the wires to the correct lengths and strip the insulation, connecting the wires to the appropriate terminals, and securing everything in place. It is important to follow the specific instructions provided with your plug model.
What should I consider when installing an RV outlet at home?
When installing an RV outlet at home, consider the location and protection of the outlet to prevent damage and ensure safety. It should be mounted in a deep-lid weatherproof box and positioned where it is least likely to be damaged. Additionally, the wiring should be done correctly, following electrical code guidelines and using the appropriate wire size based on the distance between the outlet and the main panel.
How do I choose the right wire size for a 30-amp RV outlet?
The wire size for a 30-amp RV outlet depends on the distance between the outlet and the main electrical panel. It is recommended to use a 10-gauge wire for distances up to 25 feet, an 8-gauge wire for distances between 25 and 50 feet, a 6-gauge wire for distances between 50 and 100 feet, and a 4-gauge wire for distances over 100 feet. These wire sizes ensure that the circuit can handle the current capacity of a 30-amp outlet and prevent voltage drop.
What are the safety precautions and tips for wiring a 30-amp RV outlet?
When working with electricity, take proper safety precautions. Turn off the power supply at the main breaker and test to ensure there is no electricity present before starting any electrical work. If you’re not experienced or confident in your electrical skills, consult a licensed electrician. Other safety tips include avoiding plugging or unplugging the RV cord while under load, using a surge protector, and checking the outlet with a multimeter to ensure correct wiring before use.

