Sterilize Your RV Water Tank: Quick Guide
gorvlifestyle.com and its partners may earn a commission if you purchase a product through one of our links
To ensure your RV’s water is safe and clean, it’s important to regularly sterilize your RV water tank. Most RVs have three holding tanks for fresh water, gray water, and black water, but only the fresh water tank is responsible for providing safe water for drinking, showering, and washing dishes. Sanitizing your fresh water tank is a routine maintenance task that guarantees safe water on your adventures. This article will guide you through the process of sterilizing your RV water tank to keep your water supply pure and ready for use.
Key Takeaways:
- Regularly sterilizing your RV water tank is essential for ensuring safe and clean water on your adventures.
- The fresh water tank in your RV is responsible for providing safe water for drinking, showering, and washing dishes.
- Sanitizing your RV water tank is a routine maintenance task that guarantees safe water on your adventures.
- By following the proper steps and incorporating best practices, you can keep your RV water tank fresh and free from harmful bacteria.
- Remember to follow manufacturer recommendations and be mindful of the quality of water sources to maintain the integrity of your water supply.
How Often Should You Sanitize Your RV Water Tank?
Regularly sanitizing your RV water tank is crucial for ensuring the safety and cleanliness of your water supply while on the road. The frequency of sanitization depends on how often you use your RV water tank and the manufacturer’s recommendations. While some manufacturers suggest sanitizing the fresh water system after each use, most RVers find it sufficient to sanitize their tanks annually.
Many RV owners choose to sanitize their tanks in the spring when dewinterizing their RVs, as part of their regular maintenance routine. This ensures a fresh start to the camping season and guarantees clean water for drinking, showering, dishwashing, and laundry. However, if your RV has been unused for 2-4 weeks, it’s advisable to sanitize the water tank before using it again, regardless of the time of year.
Regular sanitization is essential to remove any buildup of bacteria, sediment, and other contaminants that may occur over time. By following a consistent sanitization schedule, you can have peace of mind knowing that your water supply is safe and free from harmful microorganisms.
Note: Individual manufacturer guidelines may vary, so it’s important to consult your RV owner’s manual for specific instructions on how often to sanitize your water tank.
| Frequency of Sanitization | Recommended |
|---|---|
| After each use | As per manufacturer’s recommendation |
| Annually | Most RVers sanitize their tanks in the spring during dewinterization |
| After 2-4 weeks of non-use | To ensure a clean water supply |
Remember, maintaining a regular sanitization schedule for your RV water tank is essential for enjoying safe and clean water on all your adventures. By following the manufacturer’s recommendations and establishing a routine, you can ensure the longevity and optimal performance of your RV’s fresh water system.
What Do You Need to Sanitize Your RV Water Tank?
Sanitizing your RV water tank doesn’t require any special tools. You can easily do it yourself with a few basic supplies. Here’s a list of items you’ll need:
- Measuring cup
- Funnel
- 5-gallon bucket or water storage container
- Potable water hose
- Non-scented bleach or RV tank sanitizer (avoid colored or scented bleach)
It’s important to use the right ratio of bleach to water to ensure safe sanitization.

“Keeping your RV water tank clean and sanitized is crucial for your health and enjoyment on the road.”
Having the necessary equipment for cleaning your RV water tank makes the sanitization process simple and efficient. By having a measuring cup, funnel, and a 5-gallon bucket or water storage container, you’ll be able to accurately measure and mix the sanitizing solution. A potable water hose is essential for refilling and flushing the tank after sanitization.
When it comes to sanitizing agents, non-scented bleach or an RV tank sanitizer are the recommended options. Avoid using colored or scented bleach, as they may leave residual odor or discoloration in the tank. Remember, using the right supplies ensures the effectiveness of the sanitization process and keeps your water tank free from harmful bacteria.
Proper Proportions for Sanitization
When using bleach, it’s important to maintain the correct ratio of bleach to water to ensure safe sanitization. The general recommendation is a quarter cup of bleach for every 16 gallons of water in the tank. This ratio strikes a balance between effective sterility and avoiding any harmful effects on your tank or plumbing system. Dilute the bleach in at least a gallon of water before adding it to the fresh water tank. This allows for even distribution of the solution throughout the tank and plumbing lines.
| Supplies | Quantity |
|---|---|
| Measuring cup | 1 |
| Funnel | 1 |
| 5-gallon bucket or water storage container | 1 |
| Potable water hose | 1 |
| Non-scented bleach or RV tank sanitizer | As per ratio |
Ensure you have all the necessary supplies before sanitizing your RV water tank. With these basic items, you’ll be well-equipped to maintain a clean and sanitized fresh water system, providing you with safe water for your RV adventures.
How to Sanitize Your RV Water Tank with Bleach
Sanitizing your RV water tank is an essential step in maintaining clean and safe water for your RV adventures. Using bleach is an effective method for sterilizing your RV fresh water tank. Follow these steps to sanitize your RV water tank with bleach:
- Park your RV in an area where water can safely drain out.
- Turn off the water heater and water pump.
- Drain the fresh water tank and plumbing lines.
- Calculate the amount of bleach needed based on the tank’s capacity. For every 16 gallons of water, you’ll need approximately 1/4 cup of bleach.
- Dilute the bleach in at least a gallon of water.
- Pour the bleach mixture into the freshwater tank.
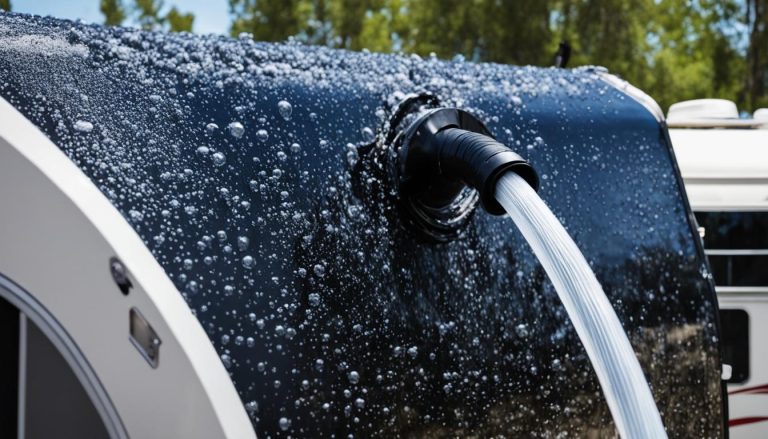
- Fill the tank with potable water.
- Run the faucets to circulate the bleach solution throughout the plumbing lines.
- Let the water sit for 12-24 hours to ensure proper sanitization.
- Drain the tank and refill it with fresh water.
- Flush the system to remove any residual bleach.
By following these steps, you can effectively sanitize your RV water tank and ensure clean and safe water for your travels.
Precautions:
When using bleach to sanitize your RV water tank, it’s important to take certain precautions:
- Use non-scented bleach or RV tank sanitizer. Avoid using colored or scented bleach as they may leave residue and affect the taste of water.
- Ensure proper dilution of bleach to water as per the manufacturer’s guidelines.
- Avoid contact with your skin or eyes when handling bleach. Always wear protective gloves and goggles.
- Make sure to thoroughly rinse the tank and plumbing lines after sanitization to remove any traces of bleach.
| Pros | Cons |
|---|---|
| Effective in killing bacteria and disinfecting the water tank. | May leave a temporary chlorine odor or taste in the water if not rinsed properly. |
| Readily available and affordable. | Requires proper handling and precautions when using bleach. |
| Can be easily done by RV owners. | Not suitable for individuals with bleach sensitivities or allergies. |

Alternative Methods for Sanitizing Your RV Water Tank
While bleach is the most commonly used method for sanitizing RV water tanks, there are alternative ways to achieve a clean and safe water supply. Some RVers prefer non-bleach methods, which are eco-friendly and equally effective in killing bacteria and disinfecting the water tank.
If you’re looking to explore alternative options for sanitizing your RV water tank, consider the following:
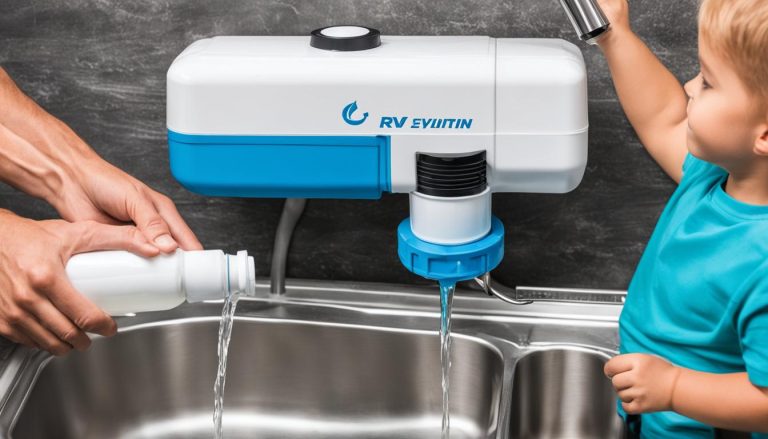
- Environmentally-friendly cleaning solutions: There are specific cleaning solutions available in the market that are designed to sanitize RV water tanks without using bleach. These solutions are formulated to be safe for the environment while effectively killing bacteria and eliminating any odors. Simply follow the instructions provided with the cleaning solution to ensure proper sanitization.
- RV tank sanitizers: Another option is to use RV tank sanitizers, which are specifically formulated to clean and disinfect RV water tanks. These sanitizers are available in liquid or tablet form, making them convenient to use. They are often designed to target a wide range of bacteria and microorganisms, ensuring a thoroughly cleaned water tank.
By utilizing these alternative methods, you can maintain a clean and safe RV water tank while minimizing your impact on the environment. Remember, regardless of the method you choose, it’s essential to follow the instructions provided by the manufacturer to ensure effective sanitization.
Keep in mind that while alternative methods can be just as effective as bleach, it’s crucial to regularly inspect and maintain your RV water tank to ensure the longevity of your system. In the next section, we’ll discuss best practices for maintaining a clean RV water tank to help you enjoy safe water during your travels.
Best Practices for Maintaining a Clean RV Water Tank
To maintain a clean and safe RV water tank, it’s important to follow some best practices. By incorporating these practices into your regular routine, you can ensure clean and safe water for all your RV adventures:
- Regularly flush the tank and plumbing lines: After each trip or period of storage, make sure to flush out your RV water tank and plumbing lines. This will help remove any contaminants and prevent the buildup of bacteria.
- Use a water filter: When filling your RV water tank, it’s a good idea to use a water filter to remove impurities. This will help ensure that the water you’re putting into your tank is clean and safe for use.
- Avoid using water sources that may be contaminated: Be cautious of the water sources you use to fill your RV water tank. If you’re uncertain about the quality of the water, it’s best to find another source or use bottled water.
- Store your RV with a partially filled water tank: To prevent stagnation and the growth of bacteria, it’s recommended to store your RV with a partially filled water tank. This will help keep the water fresh and reduce the chances of contamination.
- Regularly inspect the tank for signs of damage or leaks: Take the time to inspect your RV water tank for any signs of damage or leaks. This will help you catch any issues early on and prevent further problems down the line.
By following these best practices, you can ensure that your RV water tank stays clean and free from contamination. This will provide you with peace of mind knowing that you have access to safe and fresh water during your travels.
Additional Tips for RV Water Tank Maintenance
In addition to regular sanitization, there are several other important tips you can follow to keep your RV water tank fresh and well-maintained. By incorporating these practices into your routine, you can prolong the life of your tank and ensure clean, high-quality water during your travels.
1. Use Tank Cleaning Tablets or Solutions
Consider using tank cleaning tablets or solutions specifically designed for RV water systems. These products can help eliminate bacteria and remove any residue or build-up inside the tank. Follow the instructions provided with the cleaning tablets or solutions to ensure proper usage.
2. Install a Water Softener
To prevent mineral buildup and extend the lifespan of your RV water tank, installing a water softener is a great idea. A water softener helps reduce the hardness of water, which can minimize scale deposits and improve water flow throughout the system. Consult with a professional to determine the best water softening solution for your RV.
3. Insulate Your Tank and Plumbing Lines
In cold temperatures, freezing can occur and damage your RV water tank and plumbing lines. To prevent this, make sure to insulate your tank and plumbing lines properly. Use insulation materials designed for RVs and pay attention to vulnerable areas. This will help keep the water flowing freely and protect your system from potential damage.
4. Avoid Harsh Chemicals or Cleaning Agents
When cleaning your RV water tank, avoid using harsh chemicals or cleaning agents that may damage the tank or plumbing. Stick to cleaning solutions recommended for RV use. Gentle and mild cleaners are sufficient for regular maintenance and will not compromise the integrity of your water tank.
By following these additional tips for RV water tank maintenance, you can ensure a fresh and clean water supply throughout your adventures. Remember to prioritize regular sanitization, use the right products, and pay attention to the overall condition of your tank and plumbing system. With proper care, you’ll enjoy safe and refreshing water on all your RV journeys.
Conclusion
Regularly sterilizing your RV water tank is essential for ensuring safe and clean water while on the road. By following the steps outlined in this guide and incorporating best practices for maintenance, you can keep your RV water tank fresh and free from harmful bacteria. Remember to follow manufacturer recommendations and be mindful of the quality of water sources to maintain the integrity of your water supply.
Enjoy a worry-free camping experience with a properly sterilized and well-maintained RV water tank. Keep in mind that maintaining a clean water tank is not only important for your health, but also for the longevity of your RV’s plumbing system. By taking the time to sanitize your water tank regularly, you can prevent odors, improve water quality, and ensure a pleasant experience on all your adventures.
So, whether you’re a full-time RVer or just enjoy occasional trips, make cleaning your RV water tank a priority. By following the tips and methods discussed in this guide, you can have peace of mind knowing that you and your loved ones have access to safe and clean water wherever your RV takes you. So go ahead, get out there, and enjoy the open road!
FAQ
How often should you sanitize your RV water tank?
The frequency of sanitizing your RV water tank depends on how often you use it and the manufacturer’s recommendations. Most RVers sanitize their tanks annually, while others choose to sanitize them every time the RV has been unused for 2-4 weeks.
What do you need to sanitize your RV water tank?
To sanitize your RV water tank, you’ll need a measuring cup, funnel, 5-gallon bucket or water storage container, potable water hose, and non-scented bleach or RV tank sanitizer.
How to sanitize your RV water tank with bleach?
To sanitize your RV water tank with bleach, dilute the bleach in at least a gallon of water and pour the mixture into the freshwater tank. Fill the tank with potable water and run the faucets to circulate the bleach solution throughout the plumbing lines.
What are the alternative methods for sanitizing your RV water tank?
Some alternative methods for sanitizing your RV water tank include using environmentally-friendly cleaning solutions or RV tank sanitizers instead of bleach. These products can be just as effective in killing bacteria and disinfecting the water tank.
What are the best practices for maintaining a clean RV water tank?
Some best practices for maintaining a clean RV water tank include regularly flushing the tank and plumbing lines, using a water filter when filling the tank, avoiding using water sources that may be contaminated, storing the RV with a partially filled water tank, and regularly inspecting the tank for signs of damage or leaks.
What are some additional tips for RV water tank maintenance?
Some additional tips for RV water tank maintenance include using tank cleaning tablets or solutions designed for RV water systems, considering installing a water softener to prevent mineral buildup, keeping the tank and plumbing lines well insulated in cold temperatures, and avoiding using harsh chemicals or cleaning agents that may damage the tank or plumbing.