Sanitize Your RV Water Tank – Easy Steps Guide
gorvlifestyle.com and its partners may earn a commission if you purchase a product through one of our links
Proper sanitation of your RV water tank is crucial for ensuring clean and safe water during your travels. Most RVs have three holding tanks, but the fresh water tank is responsible for providing safe water for drinking, showering, and washing dishes. To maintain the integrity of your fresh water tank, regular draining and sanitization are necessary. This can be done using simple tools like bleach or an RV tank sanitizer. Sanitizing your RV water tank should be done at least once a year, before storing your RV for the season, or if the RV has been unused for 2-4 weeks.
Key Takeaways:
- Regularly sanitizing your RV water tank is essential for clean and safe water.
- Use bleach or an RV tank sanitizer to sanitize your water tank.
- Sanitize your RV water tank at least once a year or before storing your RV.
- If your RV has been unused for 2-4 weeks, it’s important to sanitize the water tank before use.
- Make sure to follow the proper steps for sanitizing your water tank to ensure effectiveness.
How Often Should You Sanitize Your RV Fresh Water Tank?
Proper maintenance of your RV’s water system is essential to ensure a clean and safe water supply during your travels. One crucial aspect of this maintenance is sanitizing your RV fresh water tank. The frequency at which you should sanitize your tank depends on several factors, including manufacturer recommendations and usage patterns.
Some RV manufacturers recommend sanitizing the fresh water tank “after each use” to maintain optimal cleanliness and water quality. However, many RV owners choose to sanitize their tanks once a year, typically in the spring when de-winterizing their RV for the camping season. This annual sanitization is considered sufficient for most RVers.
If your RV has remained unused for an extended period, such as 2-4 weeks, it is also advisable to sanitize the fresh water tank before using it again. This precaution ensures that any potential contaminants or bacteria that may have accumulated during the period of inactivity are eliminated, guaranteeing safe water for drinking, showering, dishwashing, and laundry while on the road.
Factors Affecting Sanitization Frequency
Several factors influence how often you should sanitize your RV fresh water tank:
- Usage frequency: If you frequently use your RV and regularly replenish your fresh water tank, sanitizing once a year may be sufficient. However, if you use your RV less frequently or store it for extended periods, more frequent sanitization may be necessary.
- Water quality: If you regularly camp in areas with questionable water quality or rely on non-potable water sources, more frequent sanitization may be advisable to ensure safe drinking water.
- Personal preference: Some RV owners prefer the peace of mind that comes with more frequent sanitization. If maintaining the utmost cleanliness is a priority for you, sanitizing your tank more often may be a good choice.
Ultimately, the decision of how often to sanitize your RV fresh water tank is up to you. By considering these factors and following manufacturer recommendations, you can ensure that your water system remains clean and your drinking water remains safe throughout your RV adventures.
| Factors | Sanitization Frequency |
|---|---|
| Usage frequency | Once a year for regular use |
| Water quality | Consider more frequent sanitization for questionable water sources |
| Personal preference | Choose a sanitization frequency that aligns with your cleanliness standards |
What Do You Need to Sanitize Your RV Fresh Water Tank?
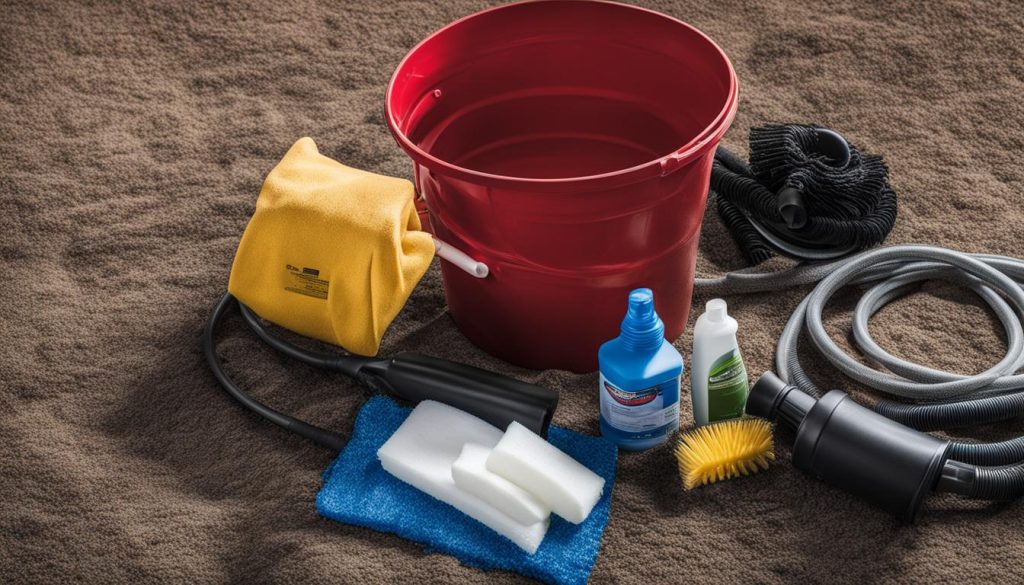
Sanitizing your RV fresh water tank is a simple process that requires a few basic tools and supplies. By having the necessary items on hand, you can easily maintain the cleanliness and safety of your RV’s water system. Here are the essential tools and supplies you’ll need:
- A measuring cup: This will help you accurately measure the amount of sanitizer or bleach you need to add to your water tank.
- A funnel: Using a funnel will make it easier to pour the sanitizer or bleach into the tank without spillage.
- A 5-gallon bucket or water storage container: This container will serve as a mixing vessel and can also be used to transport water if needed.
- A potable water hose: This hose is specifically designed for drinking water and will be used to fill and flush your RV’s water tank.
Now, let’s talk about your options for sanitizing your RV fresh water tank:
- Non-scented bleach: Bleach is a common and effective sanitizer for RV water tanks. It’s important to use non-scented bleach to avoid any unwanted flavors or odors in your water system. Remember, colored or scented bleach should never be used.
- RV tank sanitizer: If you prefer an alternative to bleach, you can use an RV tank sanitizer. These products are specially formulated for sanitizing RV water systems and are designed to be safe and effective.
Proper Sanitization with Bleach
If you choose to use bleach for sanitizing your RV water tank, it’s crucial to mix it with the correct amount of water to obtain the right ratio. This ensures that it is safe for all components of your RV’s water system, including the water pump.
Here’s a simple step-by-step guide for sanitizing your RV fresh water tank:
- Turn off your water heater and water pump.
- Drain the fresh water system, including the tank, plumbing lines, and the water heater.
- Calculate the amount of bleach you’ll need based on the tank capacity. The general recommendation is ¼ cup of bleach for every 15 gallons of tank capacity.
- Dilute the bleach in at least a gallon of water.
- Pour the bleached water mixture into the fresh water tank using a funnel or water tank filler.
- Fill the tank with potable water.
- Pump the water through the system, allowing the bleached water to run through every faucet and showerhead for 2-3 minutes.
- Let the water sit in the system for 12-24 hours to allow the bleach to sanitize the tank and plumbing lines.
- Drain the system and flush it with fresh water until the chlorine smell is gone.
It’s important to note that before using your RV’s water system for drinking or cooking, you should always flush it with fresh water to remove any residual bleach or sanitizer.
Remember, proper sanitization of your RV fresh water tank is essential for maintaining clean and safe water during your travels. By following these steps and utilizing the necessary tools and supplies, you can ensure that your RV’s water system remains in optimal condition.
| Tools and Supplies | Description |
|---|---|
| Measuring cup | Accurately measures sanitizer or bleach for the water tank |
| Funnel | Makes pouring sanitizer or bleach easier without spillage |
| 5-gallon bucket or water storage container | Used for mixing and transporting water |
| Potable water hose | Specifically designed for drinking water, used for filling and flushing the water tank |
| Non-scented bleach | Common and effective sanitizer for RV water tanks |
| RV tank sanitizer | An alternative to bleach, specially formulated for RV water systems |
How to Sanitize RV Fresh Water Tank with Bleach
The process of sanitizing your RV fresh water tank with bleach is relatively simple and can be done in a few easy steps:
-
Step 1: Turn off your water heater and water pump
Before sanitizing your RV water tank, make sure to turn off the water heater and water pump to prevent any potential damage or accidents.
-
Step 2: Drain the fresh water system
Completely drain the fresh water system, including the tank, plumbing lines, and water heater. This will remove any existing water and prepare the system for the sanitization process.
-
Step 3: Calculate the amount of bleach
Based on the capacity of your RV’s fresh water tank, calculate the amount of bleach needed for sanitization. Typically, you will need 1/4 cup of bleach for every 15 gallons of tank capacity.
-
Step 4: Dilute and pour bleach into the tank
Dilute the calculated amount of bleach in at least a gallon of water. Use a funnel or water tank filler to pour the bleach mixture into the fresh water tank. This will ensure even distribution of the bleach across the entire tank.
-
Step 5: Fill the tank and pump bleach through the system
Fill the fresh water tank with potable water and turn on the water pump. Allow the bleached water to run through every faucet and showerhead, ensuring that the entire RV water system is sanitized. Let the solution flow for 2-3 minutes to ensure thorough distribution.
-
Step 6: Let the bleach sit and drain the system
After pumping the bleached water, let it sit in the system for 12-24 hours to effectively kill any bacteria or contaminants. Then, drain the system, including the tank and plumbing lines.
-
Step 7: Flush with fresh water
Once the bleach solution is drained, flush the system with fresh water until the chlorine smell dissipates. This will remove any residual bleach and ensure your RV’s water system is ready for use.
Following these steps will help you effectively sanitize your RV fresh water tank with bleach and maintain clean and safe water during your travels.
If you need further assistance or detailed instructions, consult your RV owner’s manual or reach out to a professional RV service technician for guidance.
Tips for Sanitizing the Hot Water Tank
When sanitizing your RV water system, it’s important to include the hot water tank in the process. However, it’s crucial to note that you should avoid getting any sanitizing solution into the hot water heater. To ensure proper sanitization of the hot water tank, it is recommended to refer to your RV owner’s manual for specific instructions provided by the manufacturer.
While the procedure may vary depending on your RV’s make and model, here are some general tips to help you sanitize the hot water tank effectively:
- Before starting the sanitization process, make sure to turn off the water heater and water pump.
- Drain the entire fresh water system, including the hot water tank, plumbing lines, and the water heater.
- Fill the fresh water tank with the recommended sanitizing solution, following the instructions in your owner’s manual.
- Flush the system with the sanitizing solution, allowing it to run through every faucet and showerhead for a few minutes. This will ensure that the hot water tank is thoroughly sanitized along with the rest of the system.
- After the required contact time, drain and flush the entire system with fresh water until the sanitizing solution is completely eliminated.
It’s worth noting that properly sanitizing the hot water tank helps maintain clean and safe water for all your daily activities while traveling in your RV. By following these steps, you can ensure that your hot water tank is in optimal condition, providing you with reliable hot water throughout your adventures.
Maintenance Tips for RV Water Tank
In addition to regular sanitization, proper maintenance of your RV water tank is crucial for ensuring clean and safe water during your travels. Here are some helpful tips to keep your RV water tank in optimal condition.
1. Empty Your Gray Water Holding Tank
Before sanitizing or storing your RV, always ensure that your gray water holding tank is completely empty. This will prevent any contaminants in the tank from affecting the cleanliness of your water supply.
2. Inspect Hose Clamps Regularly
A common cause of water tank contamination is loose or damaged hose clamps on the freshwater tank’s filler tube. Regularly inspect these clamps to ensure they are tight and secure, and replace any damaged clamps immediately.
3. Use an RV Water Filter
To further ensure clean water in your RV, consider using an RV water filter when filling your tank. These filters can help remove impurities and improve the overall quality of the water you use in your RV.
4. Drive Your RV After Sanitization
After sanitizing your RV water tank, it is recommended to drive your RV around for a period of time. This allows the sanitizing solution to splash the sides and top of the tank, ensuring thorough sanitization.
5. Regularly Check for Leaks or Damage
Regularly inspect your water tank for any signs of leaks or damage. This includes checking for cracks, bulges, or any abnormalities in the tank’s structure. If you notice any issues, address them promptly to prevent further damage and maintain the integrity of your water tank.
By following these maintenance tips, you can keep your RV water tank clean and ensure a safe and enjoyable experience on your travels.
FAQ
How often should you sanitize your RV fresh water tank?
The frequency of sanitizing your RV fresh water tank depends on different factors. Some manufacturers recommend sanitization “after each use,” but most RV owners choose to sanitize their fresh water system once a year, usually in the spring, when de-winterizing their RV for camping season. Others opt to sanitize every time their RV has been unused for 2-4 weeks. Regular sanitization guarantees safe water for drinking, showering, dishwashing, and laundry while on the road.
What do you need to sanitize your RV fresh water tank?
The basic items you need are a measuring cup, funnel, 5-gallon bucket or water storage container, potable water hose, and either non-scented bleach or RV tank sanitizer. It’s important to note that colored or scented bleach should never be used. As long as the bleach is mixed with the correct amount of water to obtain the right ratio, it is safe for all components of your RV’s water system, including the water pump.
How to sanitize RV fresh water tank with bleach?
The process of sanitizing your RV fresh water tank with bleach is relatively simple. First, turn off your water heater and water pump. Drain the fresh water system, including the tank, plumbing lines, and water heater. Calculate the amount of bleach you’ll need based on the tank capacity. Dilute the bleach in at least a gallon of water and pour it into the fresh water tank using a funnel or water tank filler. Fill the tank with potable water and pump it through the system, allowing the bleached water to run through every faucet and showerhead for 2-3 minutes. Let the water sit in the system for 12-24 hours, then drain and flush the system with fresh water until the chlorine smell is gone.
How to sanitize the hot water tank in an RV?
It is recommended to include the hot water tank in the sanitization process. However, it’s important to note that you should not get sanitizing solution in the hot water heater. The procedure for sanitizing the hot water tank may vary depending on the RV manufacturer. It’s advisable to consult your RV owner’s manual for specific instructions on how to sanitize the hot water tank in your RV.
What are some maintenance tips for RV water tanks?
In addition to regular sanitization, there are a few maintenance tips you can follow to keep your RV water tank in optimal condition. First, always ensure that your gray water holding tank is empty before sanitizing or storing your RV. Regularly inspect the hose clamp on the freshwater tank’s filler tube to ensure it is tight. Consider using an RV water filter when filling your tank to ensure clean water. It is also advisable to drive your RV around for a period of time after sanitization to allow the solution to splash the sides and top of the tank, ensuring thorough sanitization. Regularly check for leaks or any signs of damage to your water tank and address them promptly.

