RV Slide Out Seal Replacement Guide
gorvlifestyle.com and its partners may earn a commission if you purchase a product through one of our links
Welcome to our comprehensive guide on how to replace RV slide out seals. Whether you’re experiencing water leaks, drafts, or general wear and tear, knowing how to properly replace and maintain your RV slide out seals is essential for preserving the integrity of your vehicle. In this guide, we’ll walk you through the different types of seals, the replacement process, and offer valuable tips to ensure a successful repair. So, let’s dive in and get your RV slide out seals back in top shape!
Key Takeaways:
- Regular maintenance is crucial for keeping RV slide out seals in good condition and preventing costly repairs.
- There are different types of RV slide out seals, including wiper seals and bulb seals, each serving a specific purpose.
- Replacing RV slide out seals requires careful removal of the old seals and proper alignment and attachment of the new ones.
- Identifying the type of seal, measuring dimensions, and understanding the installation method are important preliminary steps when replacing RV slide out seals.
- Using the right tools, such as adhesive remover, shop rags, and protective gear, is crucial for a successful seal replacement.
Common Issues with RV Slide Out Seals
Over time, RV slide out seals can experience various issues that can compromise the integrity of your RV and lead to costly repairs. Understanding the common problems that arise with RV slide out seals and knowing how to address them can help you maintain your RV’s functionality and prevent further damage.
1. Twist and Warping
One common issue with RV slide out seals is twist and warping. Continuous opening and closing of the slide out can cause the seals to twist or warp, resulting in gaps and inefficiency in sealing the slide out. This can allow water, debris, and drafts to enter your RV, leading to potential damage and discomfort.
2. Physical Damage
RV slide out seals are exposed to external elements, including debris, branches, and other objects that may come in contact with the slide out during travel or storage. These physical impacts can cause tears, cracks, or breaks in the seals, compromising their ability to create an effective barrier against the elements.
3. Accumulation of Debris
Another issue that can occur with RV slide out seals is the accumulation of debris. Leaves, dirt, and other particles can collect on the slide out, especially if it is stored outdoors or in areas with heavy foliage. The debris can create friction and put unnecessary strain on the seals, potentially causing them to wear down or become damaged over time.
4. UV Damage
Constant exposure to UV rays can cause the seals to degrade and crack. The sun’s rays can weaken the material of the seals, making them less flexible and less capable of creating an airtight seal. UV damage is particularly common in older RVs or those that spend extended periods exposed to direct sunlight without proper protection.
5. Lack of Regular Maintenance
One of the primary reasons for seal-related issues is the lack of regular maintenance. Failing to clean and lubricate the seals periodically can lead to dirt buildup, increased friction, and premature wear and tear. By neglecting proper maintenance, you risk reducing the lifespan of your RV slide out seals and inviting potential problems.
To address these issues and keep your RV slide out seals in optimal condition, it’s crucial to establish a regular maintenance routine. Cleaning the seals with mild detergent and water, inspecting them for any signs of damage, and lubricating them with a suitable RV seal conditioner can help prevent many common issues.
Types of RV Slide Out Seals and How They’re Installed
When it comes to RV slide out seals, there are different types available depending on the manufacturer and the specific design of your RV. The two most common types of RV slide out seals are wiper seals and bulb seals, each serving a unique purpose in keeping your slide room protected from the elements.
Wiper seals: These seals are designed to flex in or out, creating a tight barrier against water infiltration when your slide room is extended. By effectively sealing the gaps between the slide room and the RV walls, wiper seals prevent water from leaking inside, which can cause serious damage over time. Properly functioning wiper seals are crucial for maintaining a dry and comfortable living space.
Bulb seals: On the other hand, bulb seals compress against the slide when it’s closed, helping to create a secure and weatherproof seal. The rubber bulb on the seal adds an extra layer of protection by creating a tight barrier between the slide room and the RV walls. Bulb seals also contribute to sound insulation and energy efficiency, making them an important component of your RV’s overall performance.
The installation method for RV slide out seals varies depending on the type of seal and the manufacturer’s specifications. Seals can be installed using different methods, including glue-on, push-on, or peel-n-stick techniques. The specific installation process may also involve removing old adhesive residue and ensuring proper alignment and attachment of the new seal.
To give you a visual representation, here is a table highlighting the characteristics of wiper seals and bulb seals:
| Seal Type | Description | Installation Method |
|---|---|---|
| Wiper Seals | Flex in or out to prevent water infiltration | Glue-on, push-on, or peel-n-stick |
| Bulb Seals | Compress against the slide when closed | Glue-on, push-on, or peel-n-stick |
Figure 1: Comparison of RV Slide Out Seal Types

By understanding the various types of RV slide out seals available and how they are installed, you can ensure that you choose the right seals for your RV and properly maintain them for long-lasting performance. In the next section, we will provide you with a step-by-step guide on how to replace RV slide out seals, helping you keep your slide room in top condition.
Tips for Replacing RV Slide Out Seals
When it comes to replacing RV slide out seals, following a step-by-step guide can help ensure a successful and efficient seal replacement process. Here are some valuable tips to assist you:
- Identify the type of seal: Before you begin, determine the type of seal used on your RV slide out. This will help you gather the appropriate tools and materials for the replacement.
- Measure the dimensions: Accurate measurements of the seal’s length and width are crucial in obtaining the correct replacement. Use a measuring tape or ruler to get the exact dimensions.
- Determine the needed length: Evaluate the condition of the existing seal and identify how many feet of new seal you will require. This will help you purchase the right amount of replacement material.
- Understand the attachment method: Different RVs may have varied methods of attaching the slide out seals. Familiarize yourself with the specific attachment method applicable to your RV model.
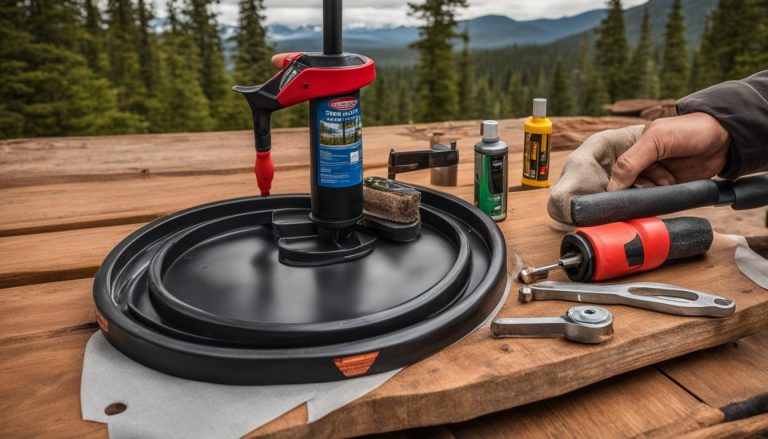
- Gather the necessary tools: To accomplish a seamless seal replacement, assemble the essential tools, including adhesive remover, shop rags, new adhesive (if necessary), eye and hand protection, and a tuck/scraper tool.
- Remove the old seal: Carefully remove the old seal by using the appropriate tools and techniques, ensuring you don’t cause any damage to the surrounding areas.
- Align and attach the new seal: Align the new seal accurately along the edge of the slide out and firmly attach it using the recommended attachment method (such as adhesive or nails).
- Document the process: Consider taking photos or documenting the replacement process. This can serve as a helpful reference for future seal replacements or repairs.
Remember!
Properly replacing your RV slide out seals is crucial for maintaining the integrity of your RV and preventing issues like water leaks and drafts. By following these tips and investing time into the replacement process, you can ensure a secure and effective seal replacement.
For visual reference, here’s an example of an RV slide out seal replacement guide:
| Step | Description |
|---|---|
| Step 1 | Identify the type of seal used on your RV slide out. |
| Step 2 | Measure the dimensions of the seal using a measuring tape or ruler. |
| Step 3 | Determine the amount of replacement seal needed based on the length of your slide out. |
| Step 4 | Understand the attachment method recommended for your RV model. |
| Step 5 | Gather the necessary tools for the replacement process, such as adhesive remover and shop rags. |
| Step 6 | Carefully remove the old seal using appropriate tools and techniques. |
| Step 7 | Align the new seal accurately along the edge of the slide out and firmly attach it using the recommended method. |
| Step 8 | Take photos or document the process for future reference. |

Proper Maintenance of RV Slide Out Seals
Regular maintenance is crucial for preserving the integrity of your RV slide out seals. By following a few simple steps, you can ensure their longevity and prevent costly repairs down the line.
To begin, regularly cleaning your slide out seals with a mixture of mild dish soap and water is highly recommended. This gentle solution effectively removes debris and prevents the accumulation of grime, helping to prevent deterioration over time.
In addition to cleaning, proper lubrication is essential to keep your seals in optimal condition. There are several cost-effective solutions available, such as RV seal lubricants. These specific lubricants are designed to provide lasting protection against friction and wear, extending the lifespan of your seals.
While there are different opinions on the use of silicone sprays for lubrication, many RV owners have found success with alternatives like pump products and even wiping the seals with baby powder. These cost-effective solutions have shown positive results in maintaining the functionality of slide out seals.
Lastly, it’s essential to regularly inspect your slide out seals for any signs of damage or wear. Timely repairs or replacement of damaged seals can save you from more significant and expensive repairs in the future. By incorporating these simple maintenance practices into your RV care routine, you can enjoy a leak-free and well-functioning slide out for years to come.
FAQ
How often should I replace my RV slide out seals?
The lifespan of RV slide out seals can vary depending on factors such as climate, maintenance, and usage. Generally, it is recommended to inspect the seals annually and replace them if they show signs of damage, such as cracking or warping.
Can I replace RV slide out seals myself?
Yes, with the right tools and instructions, it is possible to replace RV slide out seals yourself. However, if you are not comfortable with DIY projects or if the seals are under warranty, it is advisable to seek professional help.
How do I know if my RV slide out seals need replacement?
Signs that your RV slide out seals may need replacement include water leaks, drafts, visible cracks or damage, difficulty in opening or closing the slide out, or a significant decrease in insulation.
What type of seal adhesive should I use?
The type of seal adhesive you should use depends on the manufacturer’s recommendation and the type of seal you are replacing. Some commonly used adhesive options include RV sealants, weather-resistant adhesives, or specific sealant brands recommended by the RV manufacturer.
Should I clean and lubricate my RV slide out seals regularly?
Yes, regular cleaning and lubrication can help extend the lifespan of your RV slide out seals. Cleaning the seals with dish soap and water can remove debris and prevent deterioration. Lubricating the seals with RV seal lubricants or other recommended products can help maintain their flexibility and prevent them from drying out or cracking.