RV Toilet Replacement Guide – Quick & Easy Steps
gorvlifestyle.com and its partners may earn a commission if you purchase a product through one of our links
Replacing your RV toilet with a new one is a simple and straightforward process. With the right steps, you can easily upgrade your RV bathroom and enjoy the comfort of a new toilet. Whether you prefer a porcelain model or a composting toilet, we will guide you through the process to ensure a successful and hassle-free RV toilet replacement.
Key Takeaways:
- Replacing your RV toilet can be done easily with the right steps.
- Choose the right type of RV toilet that suits your needs and budget.
- Consider purchasing from reputable retailers online or locally.
- Properly remove the old toilet before installing the new one.
- Follow the installation steps to ensure a tight and leak-free fit.
Choosing the Right RV Toilet
Before replacing your RV toilet, it’s important to understand the different types of toilets available and choose the one that best suits your needs. There are various options to consider, each with its own features and benefits:
- Gravity flush RV toilet: This traditional type of RV toilet uses gravity to flush waste into the black water tank. It is simple, reliable, and easy to maintain.
- Macerating flush toilet: Designed for RVs lacking a direct connection to a black water tank, macerating flush toilets use a built-in macerator pump to break down waste and pump it into a holding tank.
- RV cassette toilet: A cassette toilet consists of a portable waste tank that can be easily removed and emptied. It is a convenient option for those who prefer frequent disposal of waste.
- Portable RV toilet: Ideal for boondocking or camping in remote areas, portable toilets are lightweight and compact. They often have an integrated water tank and waste tank for easy transportation.
- Composting toilet: Considered an eco-friendly option, composting toilets use natural processes to decompose waste into compost. They require little to no water usage and are suitable for dry camping or off-grid living.
By understanding the different types of RV toilets, you can choose the one that fits your preferences and budget. Factors such as water usage, portability, waste disposal method, and environmental impact should all be considered when making your decision.
“Choosing the right RV toilet is essential for a comfortable and convenient bathroom experience during your travels.”
For a visually appealing and comprehensive overview of the different types of RV toilets, refer to the table below:
| Type | Features | Benefits |
|---|---|---|
| Gravity flush toilet | Simple design Reliable flushing mechanism |
Easy to use and maintain |
| Macerating flush toilet | Built-in macerator pump No direct connection to black water tank required |
Flexible installation options |
| RV cassette toilet | Portable waste tank Easy removal and disposal |
Convenient for frequent waste disposal |
| Portable RV toilet | Lightweight and compact Integrated water tank and waste tank |
Ideal for boondocking or camping in remote areas |
| Composting toilet | Natural waste decomposition Little to no water usage |
Eco-friendly option Suitable for off-grid living |
Choose the RV toilet that aligns with your preferences, needs, and camping style to ensure a comfortable and functional bathroom experience on your RV adventures.
Purchasing an RV Toilet
When it comes to buying an RV toilet, you have multiple options available. Whether you prefer the convenience of local retailers or the vast selection offered by online platforms, finding the perfect RV toilet is just a few clicks away.
If you prefer the traditional shopping experience, local retailers such as RV dealerships and camping supply stores offer a wide range of RV toilets for you to choose from. They often have knowledgeable staff who can assist you with any questions you may have and provide personalized recommendations based on your specific needs.
On the other hand, shopping online provides the convenience of browsing through a variety of options from the comfort of your own home. Websites like Amazon, Camping World, and Thetford offer extensive selections of RV toilets, allowing you to compare different brands, models, and features to find the perfect fit for your RV bathroom.
Before making a purchase, make sure to consider important factors such as:
- Measurements: Ensure that the dimensions of the toilet fit your RV’s bathroom space.
- Color, Shape, and Materials: Choose a toilet that matches your aesthetic preferences and is made of durable materials.
- Flush Type: Decide whether you prefer a gravity flush toilet or a macerating flush toilet based on your individual needs.
Keep in mind that some RV toilets may need to be ordered, which may result in a longer delivery time. Plan accordingly and be prepared to wait a few weeks for your new toilet to arrive.

The Advantages of Buying an RV Toilet Online
Opting for online retailers brings several advantages. Firstly, you can access a wider selection of RV toilets, allowing you to choose from various brands, models, and price ranges. Additionally, online platforms often offer customer reviews and ratings, providing valuable insights from fellow RV enthusiasts to help you make an informed decision.
Moreover, online shopping allows you to compare prices and take advantage of discounts and special offers that may not be available in-store. You can also enjoy the convenience of doorstep delivery, saving you time and hassle.
| Benefits of Buying an RV Toilet Online | Benefits of Buying an RV Toilet from Local Retailers |
|---|---|
|
|
Removing the Old RV Toilet
Before installing a new RV toilet, it’s important to properly remove the old one. Follow these steps to ensure a smooth and successful removal process:
Step 1: Turn off the water pump and flush the toilet
To release any pressure in the water lines, start by turning off the water pump and flushing the toilet. This will help prevent any water or sewage from splashing during the removal.
Step 2: Prepare an area for the old toilet
Find a suitable area where you can place the old toilet temporarily. Use old rags or towels to protect the floor and prevent any mess or damage.
Step 3: Clean around the base of the old toilet
Thoroughly clean the area around the base of the old toilet. Remove any floor wax or silicone that might be present. This will ensure a clean surface for the installation of the new toilet.
Step 4: Drain the RV waste tank
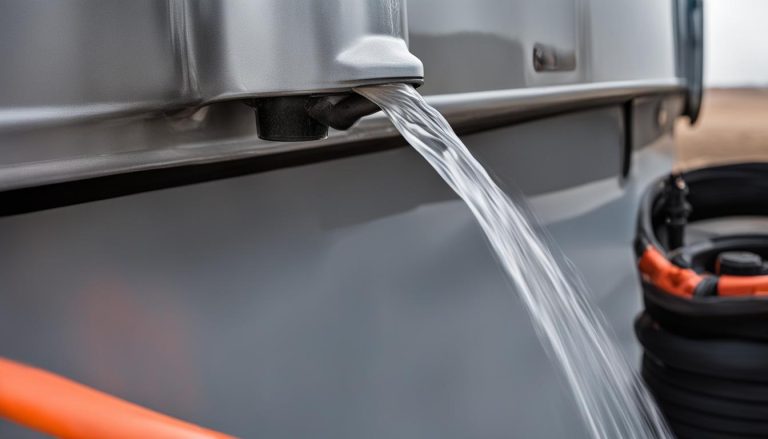
Before disconnecting any plumbing and hoses, it’s crucial to drain the RV waste tank completely. This will prevent any spillage or leaks during the removal process.
| Materials Needed: | Tools Needed: |
|---|---|
|
|
Note: Make sure to wear gloves and take necessary safety precautions while removing the old RV toilet.
With these steps, you’ll be ready to remove the old RV toilet and prepare for the installation of a new one. Stay tuned for the next section on installing the new RV toilet!
Installing the New RV Toilet
Installing a new RV toilet is a straightforward process that can be completed with a few simple steps. By following the proper installation procedures, you can ensure a seamless transition to your upgraded bathroom. Here’s a step-by-step guide to help you through the rv toilet installation process.
- Replace the Gasket: Start by replacing the gasket that creates a seal between the toilet and the floor. This gasket is essential for preventing leaks and ensuring a tight fit. Remove the old gasket and replace it with a new one that matches the dimensions of your new toilet.
- Position the New Toilet: Carefully place the new toilet on top of the flange or gasket ring. Ensure that the mounting holes on the toilet align with the holes on the flange or gasket ring.
- Secure the Toilet: Once the toilet is properly positioned, secure it in place using new nuts and bolts. Take care not to overtighten as this can damage the toilet or the floor.
- Connect the Water Hose: Reconnect the water hose to the toilet to restore the water supply. It’s important to ensure a secure connection to prevent any leaks.
- Check for Leaks: Turn on the water and check for any leaks around the base of the toilet and the water connection. If you notice any leaks, tighten the connections or replace any faulty parts.

With these steps, your new RV toilet will be properly installed and ready for use. Enjoy the convenience and comfort of your upgraded bathroom during your RV adventures!
RV Toilet Maintenance and Troubleshooting
Keeping up with regular maintenance is essential to ensure your RV toilet functions effectively and provides a comfortable bathroom experience during your travels. By following a few simple steps, you can keep your RV toilet in good condition and troubleshoot common issues that may arise.
First and foremost, regular cleaning is crucial for maintaining your RV toilet. Use a mild cleaner or specific RV toilet cleaner to ensure you don’t damage any components. Avoid using harsh chemicals or abrasive cleaners that can deteriorate the toilet’s seals or surfaces. Regular cleaning helps prevent buildup and keeps your toilet smelling fresh, ensuring a pleasant experience for you and your fellow travelers.
If you encounter any unpleasant smells or leaks, it’s essential to troubleshoot the problem promptly. Start by checking the toilet’s seal and connections. Over time, the seal between the toilet bowl and the floor may wear out or become damaged, leading to leaks or odors. Inspect the seal for any cracks, gaps, or signs of wear and tear. If you notice any issues, it’s important to replace the seal to prevent further damage or leaks.
Additionally, when troubleshooting, verify that all connections are secure and tight. Loose or faulty connections can also contribute to leaks or unpleasant smells. Check the water supply line, valves, and hoses for any signs of damage or misalignment. Tighten any loose connections and replace damaged parts as needed.
By regularly maintaining your RV toilet and addressing any issues promptly, you can ensure a clean and functional bathroom experience on your RV adventures. Remember to clean regularly, use appropriate chemicals, and troubleshoot any unpleasant smells or leaks to keep your RV toilet in excellent condition.
FAQ
How do I replace an RV toilet?
Replacing an RV toilet is a simple process. Start by turning off the water pump and flushing the toilet. Prepare an area to place the old toilet and remove any floor wax or silicone. Drain your RV waste tank and disconnect the plumbing and hoses. Install the new toilet by replacing the gasket, aligning the mounting holes, and securing it with nuts and bolts. Reconnect the water hose and check for leaks.
What types of RV toilets are available?
There are various types of RV toilets to choose from, including gravity flush toilets, macerating flush toilets, cassette toilets, portable toilets, and composting toilets. Each type has its own features and benefits, allowing you to select the one that suits your preferences and needs.
Where can I buy an RV toilet?
You can purchase an RV toilet from local retailers or online platforms such as Amazon, Camping World, Thetford, and more. Before making a purchase, consider the measurements, color, shape, materials, and flush type of the toilet. Some models may need to be ordered and may take a few weeks for delivery.
How do I remove the old RV toilet?
To remove the old RV toilet, turn off the water pump and flush the toilet. Prepare an area to place the old toilet, clean around the base, and drain the RV waste tank. Disconnect the plumbing and hoses leading to the black water tank. Once the connections are disconnected, the old toilet can be lifted and removed.
How do I install a new RV toilet?
Installing a new RV toilet involves several steps. Start by replacing the gasket that creates a seal between the toilet and the floor. Carefully place the new toilet on top of the flange or gasket ring, aligning the mounting holes. Secure the toilet with new nuts and bolts, ensuring a tight fit without over-tightening. Reconnect the water hose and turn on the water to check for any leaks.
How do I maintain and troubleshoot my RV toilet?
To keep your RV toilet in good condition, regular maintenance is necessary. This includes cleaning the toilet and using appropriate chemicals. If you encounter any issues such as unpleasant smells or leaks, troubleshooting steps can help identify and resolve the problem. By following proper maintenance practices and addressing any issues promptly, you can ensure that your RV toilet functions effectively and provides a comfortable bathroom experience during your travels.