RV Awning Replacement Guide – DIY Made Easy
gorvlifestyle.com and its partners may earn a commission if you purchase a product through one of our links
Replacing an RV awning can give your RV a fresh new look and improve its functionality. Whether you need to replace the fabric, remove the roller tube, or replace the motor and supports, this guide will provide you with step-by-step instructions on how to replace an RV awning on your own. Say goodbye to worn-out awnings and hello to a rejuvenated RV!
Before we dive into the details, let’s establish some key takeaways:
Key Takeaways:
- Replacing an RV awning can be a DIY project that saves you time and money.
- Choose the right awning type and features for your RV.
- Follow specific steps for replacing the fabric, roller tube, and motor and supports.
- Inspect other components while replacing the awning for potential issues.
- Follow best practices to ensure a successful replacement and avoid common mistakes.
Now that we have our key takeaways, let’s start by exploring how to choose the right awning for your RV in Section 2.
Choosing the Right Awning
Before you start the replacement process, it’s important to choose the right awning for your RV. There are different types of awnings available, each with its own features and benefits.
Main Types of RV Awnings
- Manual crank awnings: These awnings are operated by a hand crank and are a popular choice for RV owners. They are affordable and easy to use, making them ideal for those who prefer a manual option.
- Power awnings: Power awnings are controlled with the push of a button, making them convenient and effortless to operate. They offer quick deployment and retraction, providing shade and protection at your convenience.
When choosing an RV awning, consider the features that are most important to you:
- LED lighting: Some awnings come with built-in LED lights, allowing you to create a welcoming ambiance for outdoor gatherings in the evenings.
- Adjustable angles: Look for awnings that offer adjustable angles, so you can easily adapt to changing sun positions and maximize shade coverage throughout the day.
- Size and length: It’s crucial to choose an awning that matches the length and style of your current awning to ensure a seamless replacement.
In the words of RV enthusiast Jane Smith, “Choosing the right awning for your RV can greatly enhance your outdoor experience. Take your time to evaluate your needs and preferences before making a decision.”
Comparison of RV Awning Types
| Awning Type | Operation | Features |
|---|---|---|
| Manual crank awning | Hand crank | – Affordable – Easy to use – No need for power source |
| Power awning | Push-button control | – Convenient – Quick deployment and retraction – LED lighting available |
Choosing the right awning is essential for a satisfying RV experience. Consider your preferences, features, and budget to make an informed decision.
Replacing the Fabric
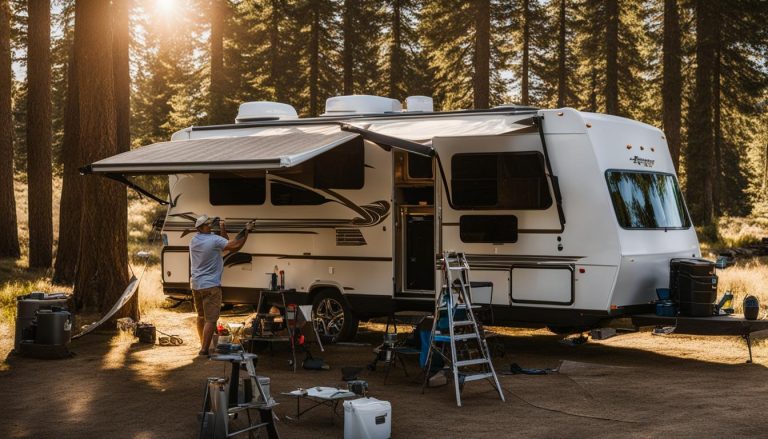
If your RV awning fabric is worn or damaged, you can easily replace it yourself. Follow these step-by-step instructions to ensure a successful replacement:
- Start by extending the awning out and securing the arms to prevent any unexpected movements.
- Next, remove the screws that hold the fabric to the top rail and roller tube. Be sure to keep these screws in a safe place for later use.
- Once the screws are removed, unroll the fabric from the tube. Take your time to carefully slide the fabric off the roller tube, making sure to avoid any unnecessary tugging or tearing.
- Now it’s time to install the new fabric. Begin by sliding the new fabric onto the roller tube, ensuring that it is centered.
- After the new fabric is properly positioned on the roller tube, reinstall the screws that secure it to the top rail and roller tube. This will ensure that the fabric stays securely in place.
- Lastly, slide the fabric back into the track on top of the RV. This will provide a neat and clean finish to your replacement process.
With these simple steps, you can effortlessly replace your RV awning fabric and restore the charm and functionality of your outdoor space.
Note: Always consult your RV’s manufacturer guide for specific instructions related to your awning model and type, as the replacement process may slightly vary.
Removing and Installing the Roller Tube
If you need to remove the roller tube for a complete replacement or to access other components, follow these step-by-step instructions to ensure a smooth process.
Step 1: Prepare the Awning
Start by extending the awning out to its fully extended position. This will give you better access to the roller tube. To prevent any movement during the removal process, secure the extending awning arms with zip ties.
Step 2: Remove the Awning Material
Using a screwdriver or drill, remove the screws that hold the awning material in place. These screws are typically located on the top rail and the roller tube. Be sure to keep track of the screws for reassembly.
Step 3: Lower the Roller Tube
Gently lower the roller tube until it reaches the ground. This will allow you to easily access the end cap and remove the old fabric. Carefully detach the end cap and set it aside for later.
Step 4: Replace the Fabric
Unroll the fabric from the old roller tube and slide the new fabric onto the roller tube. Make sure the fabric is aligned and centered properly. Once the new fabric is in place, reinstall the end cap securely.
Step 5: Reattach the Roller Tube
With the new fabric in place, carefully lift and reattach the roller tube to the extending arms. Ensure that the roller tube is securely fastened to avoid any issues during operation.
Following these steps will guide you through the process of removing and installing the roller tube for your RV awning. Always refer to the manufacturer’s instructions for specific details and safety precautions.

Replacing the Motor and Supports
If your power awning motor or supports need replacement, it’s crucial to follow the correct steps to ensure a smooth process. Properly functioning motor and supports are essential for the optimal operation and stability of your RV awning.
To start, it’s essential to test the motor to determine if it genuinely requires replacement. Check for any unusual noises, lack of movement, or signs of damage. If the motor is malfunctioning, consult the manufacturer’s instructions for removing and installing a new one. Following their guidance will ensure the motor replacement process is done correctly.
“Taking the time to carefully remove and install a new motor will help prevent further issues down the road and ensure your RV awning functions efficiently for your future adventures.”
If the supports of your RV awning are bent or damaged, it’s possible to replace them individually without disassembling the entire awning system. This can be a helpful solution, especially if only specific supports are affected. However, exercise caution when working with hinged supports, as they can be challenging to handle alone. If needed, don’t hesitate to seek assistance from a friend or family member.

Remember, safety is paramount when replacing the motor and supports of your RV awning. Ensure you have the necessary tools and equipment, follow the correct procedures, and take your time to avoid any accidents or damage. By prioritizing proper maintenance and timely repairs, you can enjoy smooth and hassle-free RV awning operation for all your future outdoor journeys.
Best Practices and Common Mistakes
When replacing your RV awning, it’s important to follow some best practices to ensure a smooth and successful replacement process. One of the first things you should do is have a helper available. They can assist you in handling the awning and provide an extra set of eyes for safety and ease.
Another important tip is to use the correct tools and equipment for the job. This includes following the manufacturer’s instructions to ensure proper installation and avoid any potential damage. Using the wrong tools can lead to costly mistakes and delays in the replacement process.
During the awning replacement, take the opportunity to inspect other components, such as springs and hinges, for any signs of wear or potential issues. It’s better to address any problems now rather than having to replace them separately later on.
Lastly, be mindful of common mistakes that can occur during the replacement process. One common mistake is not properly securing the fabric, which can lead to tears or the fabric coming loose during travel. Additionally, don’t overlook the condition of other awning parts, as they may need to be replaced or repaired along with the awning fabric.
By following these tips and avoiding common mistakes, you can successfully replace your RV awning and enjoy the benefits of a fresh and functional awning that enhances your RV experience.
FAQ
How do I choose the right awning for my RV?
When choosing an awning for your RV, consider the features you want, such as LED lighting and adjustable angles. Make sure to match the length and style of your current awning for a seamless replacement.
How do I replace the fabric on my RV awning?
To replace the fabric on your RV awning, start by extending the awning out and securing the arms. Remove the screws that hold the fabric to the top rail and roller tube. Unroll the fabric from the tube and slide the new fabric onto the roller tube, making sure to center it. Reinstall the screws and end cap, and then slide the fabric back into the track on top of the RV.
How do I remove and install the roller tube on my RV awning?
To remove the roller tube on your RV awning for a complete replacement or to access other components, start by extending the awning out. Secure the extending awning arms with zip ties to prevent movement. Remove the screws that hold the awning material to the top rail and roller tube. Lower the roller tube to the ground and remove the end cap. Unroll the fabric from the tube and slide the new fabric onto the roller tube. Reinstall the end cap and then reattach the roller tube to the extending arms.
How do I replace the motor and supports on my RV awning?
If you need to replace the motor or supports on your power awning, test the motor to determine if it needs replacing and follow the manufacturer’s instructions for removing and installing a new motor. If the supports are bent or damaged, they can be replaced individually without disassembling the entire awning. Be cautious when working with hinged supports and seek assistance if needed.
What are some best practices for replacing an RV awning?
When replacing an RV awning, it’s best to have a helper for safety and ease. Use the correct tools and follow the manufacturer’s instructions. Take the opportunity to inspect other components, such as springs and hinges, for potential issues. Avoid common mistakes such as not securing the fabric properly or overlooking the condition of other awning parts.