RV Makeover Guide: How to Renovate an RV
gorvlifestyle.com and its partners may earn a commission if you purchase a product through one of our links
Welcome to our comprehensive guide on how to renovate an RV! Whether you’re a DIY enthusiast or looking to hire professionals, we’ve got you covered with valuable tips, ideas, and practical advice for a successful RV renovation. From interior design inspiration to budget-friendly remodel ideas, we’ll help you transform your RV into a beautiful and functional space.
Key Takeaways:
- Learn how to renovate your RV following our step-by-step guide
- Discover budget-friendly ideas for a stunning RV remodel
- Gain inspiration for interior design and decoration
- Find out where to shop for RV renovation supplies
- Get tips on demolishing, preparing, painting, and decorating your RV
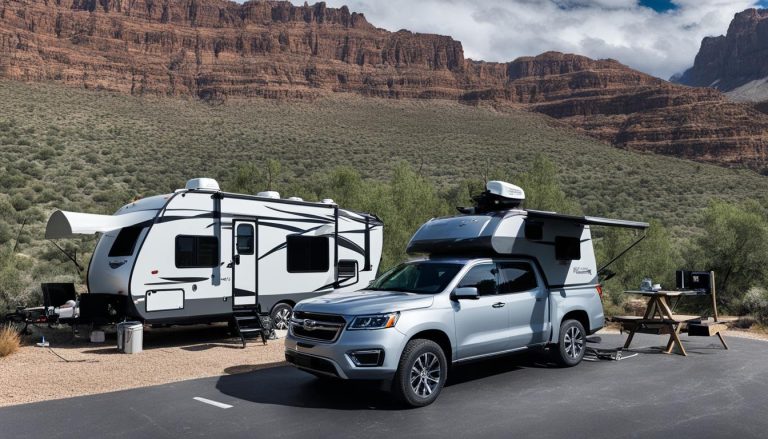
Finding and Assessing an Old Camper
The first step in renovating an RV is finding an old camper to work with. You can search for used RVs on popular platforms such as Facebook Marketplace, Kijiji, and Craigslist. These platforms offer a wide selection of pre-owned campers, allowing you to find one that fits your budget and requirements.
However, it’s crucial to assess the condition of the camper before making a purchase. By thoroughly inspecting the RV, you can avoid costly surprises and ensure that it’s suitable for renovation. Look for any mechanical or structural issues that may require significant repairs or compromise the safety of the vehicle.
Assessing the Camper
During the assessment, pay attention to the following key areas:
- Water Damage: Check for signs of water damage on the walls, ceiling, and floor. Water intrusion can lead to mold, rot, and structural issues.
- Working Appliances: Test all the appliances in the RV, including the refrigerator, stove, oven, air conditioner, and heater. Ensure that they are in good working condition or consider the cost of repair or replacement.
- Functional Water and Bathroom Systems: Check the plumbing system, faucets, and toilet, making sure they are in proper working order. Addressing plumbing issues can be time-consuming and expensive.
- AC and Heating Systems: Test the air conditioning and heating systems to verify that they provide adequate temperature control.
- Tires and Brakes: Examine the condition of the tires and check if they have sufficient tread. Inspect the brakes for any signs of wear or damage.
- Awning: If the camper has an awning, inspect it for any tears or damage. A missing or damaged awning may require replacement.
By thoroughly assessing these areas, you can make an informed decision about the RV’s condition and potential renovation costs. This step will help you save money on unnecessary repairs and focus your efforts on transforming the camper into your ideal mobile home.
Planning the RV Renovation
Before you embark on renovating your RV, proper planning is essential to ensure a successful and budget-friendly remodel. Taking the time to plan your RV renovation will help you stay organized, make informed decisions, and achieve the desired look for your mobile home on wheels.
Start by determining your decoration style and envisioning the overall theme for your RV. Whether you prefer a modern, rustic, or coastal look, having a clear vision will guide you in selecting the right materials, colors, and furniture.
Now, considering your taste and budget, think of the specific elements you want to include in your RV renovation. Do you plan to upgrade the flooring, repaint the walls, or replace the furniture? Are there any must-have features or unique design ideas you’d like to incorporate? Make a list of these priorities to keep your renovation on track.
When planning your renovation, be open to exploring budget-friendly alternatives for costly items. For example, if you have your heart set on high-end appliances, consider shopping for gently used or discounted models. By finding creative solutions, you can achieve a stylish and functional RV without breaking the bank.
| Planning Tips for a Budget-Friendly RV Renovation |
|---|
| Research online for RV renovation ideas and inspiration |
| Visit RV renovation forums and communities to learn from others’ experiences |
| Create a budget breakdown to track and prioritize your expenses |
| Make a detailed shopping list for necessary supplies and decorations |
| Consider DIY projects to save on labor costs |
| Explore local thrift stores and online marketplaces for affordable decor pieces |
| Opt for multipurpose furniture to make the most of limited space |
| Keep track of discounts and seasonal sales for potential savings |
| Be flexible and adapt your plans as needed to stay within your budget |
A well-planned RV renovation ensures that you’re prepared with the necessary supplies and materials. In addition to painting supplies and tools, consider the decor and extra items you’ll need to purchase, such as lighting fixtures, window treatments, and storage solutions.
Remember, the key to a successful RV renovation is to plan ahead, be creative, and embrace cost-effective options. With careful planning, you can transform your RV into a comfortable and stylish home away from home, all while staying within your budget.

Shopping for the RV Renovation
Now that you have a plan for your RV renovation, it’s time to start shopping for the supplies you’ll need to bring your vision to life. Making a list of the items you need and separating them by priority can help you stay organized and ensure you don’t forget anything important.
When it comes to shopping for RV renovation supplies, you have a few options. Home improvement stores like Home Depot and Ikea offer a wide range of products for all your renovation needs. They have a variety of materials, tools, and accessories that can help you transform your RV into the perfect space.
If you prefer the convenience of online shopping, platforms like Amazon have a vast selection of RV renovation supplies. From paint and wallpaper to hardware and furniture, you can find everything you need with just a few clicks. Plus, many items come with customer reviews, giving you valuable insights to help you make informed purchasing decisions.
While shopping, be sure to check the return policies of the stores or online platforms you choose. This way, if you change your mind or encounter any issues with the products, you can easily return or exchange them.
Where to Buy RV Renovation Supplies:
- Home Depot – Offers a wide selection of RV renovation supplies, including paint, flooring, fixtures, and tools.
- Ikea – Provides stylish and affordable options for furniture, storage solutions, and decor.
- Amazon – A convenient online platform with a vast selection of RV renovation supplies, including a variety of brands and styles.
Remember to shop strategically, comparing prices and reading customer reviews to find quality materials at affordable prices. With the right supplies, you’ll be one step closer to turning your RV into the perfect home away from home.

Demolition and Preparation
Before you can begin the exciting process of renovating your RV, it’s important to tackle the demolition and preparation phase. This step involves removing old elements from the interior and ensuring that surfaces are ready for the upcoming updates. By taking the time to properly demolish and prepare, you’ll set the foundation for a successful renovation.
Start by removing any window treatments, such as outdated curtains or blinds, to create a blank canvas for your RV’s new look. Additionally, consider removing any built-in furniture that no longer serves your needs or clashes with your intended design aesthetic.
Quote: “Demolition is an essential part of the renovation process, allowing you to strip away the old and make way for the new.” – RV Renovation Expert
Once the interior has been cleared, it’s crucial to clean and degrease all surfaces. This step ensures that the paint and other materials you’ll be applying adhere properly and provide a long-lasting finish. Use a suitable cleaner and follow the manufacturer’s instructions for best results.
When it comes to painting, the surface preparation will depend on the texture of the walls in your RV. Smooth surfaces may require minimal preparation, while textured walls might benefit from a light sanding to create a smoother finish. You may also need to apply a primer before painting, especially if you’re making a drastic color change or covering up existing patterns or dark colors.
In addition to painting, cabinets and doors may require sanding and priming before you can achieve the desired finish. This helps ensure better adhesion of the paint and a professional-looking result. Take the time to sand any rough or damaged areas and apply a primer suitable for the material of your cabinets and doors.
Proper demolition and preparation are crucial steps in the RV renovation process. By removing old elements and preparing surfaces adequately, you’ll create a solid foundation for the rest of your project. Take your time with this phase to guarantee a smooth and successful renovation.
Painting and Decorating
One of the most transformative steps in an RV renovation is painting. Choosing the right colors and applying a fresh coat of paint can completely revitalize the interior of your RV. Here’s a step-by-step guide to help you paint your RV walls and cabinets and add beautiful decorations to create a personalized space that reflects your style.
Painting the Walls
Start by selecting a color scheme that suits your taste and complements the overall aesthetic of your RV. Consider using light and neutral colors to create a sense of openness and brightness. Once you have your paint colors chosen, it’s time to prepare the walls.
Before painting, ensure that the walls are clean and free of any dirt or grime. Wipe them down with a gentle cleanser and rinse thoroughly. If your RV has vinyl wallpaper, you can paint directly over it, but make sure to clean the surface first for optimal adhesion.
Apply a coat of latex paint to the walls using a roller or paintbrush. Remember to start from the top and work your way down, ensuring smooth and even coverage. Allow the paint to dry completely before applying a second coat if needed.
Painting the Cabinets
Painting your RV cabinets can give them a fresh, modern look. Before you start, remove the cabinet doors and hardware, and clean them thoroughly. Sand the surfaces lightly to create a rough texture for better paint adhesion.
Use a primer specifically designed for wood or laminate surfaces to ensure the best results. Apply the primer with a brush or roller, making sure to cover all surfaces evenly. Once the primer is dry, apply a coat of cabinet and trim enamel paint. This durable paint will provide a long-lasting finish that withstands the wear and tear of RV life.
Allow the cabinets to dry completely before reattaching the doors and hardware. Consider upgrading the hardware to complement your new cabinet color and add visual interest.
Decorating with Accents
After painting, it’s time to add decorative accents that will enhance the overall look of your RV interior. Here are some ideas:
- Wallpaper: Add wallpaper to create a focal point or an accent wall. Choose peel-and-stick options for easy installation and removal.
- Contact Paper: Use contact paper to cover countertops, tabletops, or cabinet shelves. It comes in various colors and patterns, allowing you to personalize your space.
- Peel-and-Stick Tiles: Upgrade your backsplash or bathroom with peel-and-stick tiles. They are easy to install and can instantly transform the look of your RV.
Additionally, consider installing new hardware, light fixtures, and window treatments to complete your RV interior decoration. These small details can make a big difference in the overall aesthetic and functionality of your RV.
With a fresh coat of paint and thoughtful decorations, your RV will be transformed into a space that reflects your personal style and feels like home. Whether you choose bold colors or stick with a neutral palette, the key is to create an interior that you love and enjoy during your RV adventures.
Flooring and Furniture
Upgrading the flooring and furniture in your RV can make a significant difference in the overall look and functionality. When it comes to flooring, consider installing luxury vinyl plank flooring. Not only is it durable and easy to maintain, but it also offers a wide range of styles and colors to suit your taste.
For furniture, take the time to assess your existing pieces. If they’re in good condition but don’t match your style or comfort preferences, you can consider reupholstering or slipcovering them. This cost-effective option allows you to refresh the appearance of your sofas, dinettes, and other soft furnishings without breaking the bank.
Pro Tip: When selecting fabric for your furniture, opt for materials that are easy to clean and withstand the wear and tear of RV life.
If your furniture is beyond repair or simply doesn’t meet your needs, upgrading to new pieces is a great option. Look for furniture designed specifically for RVs, as it is often lightweight and space-saving. Remember to measure your RV’s dimensions to ensure the furniture fits properly.
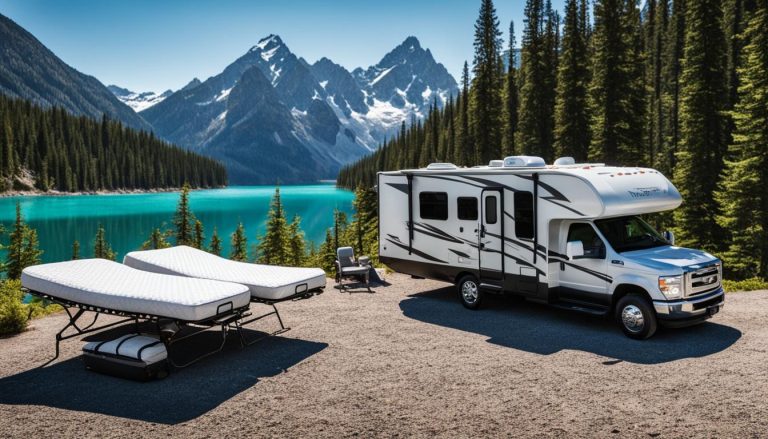
Additionally, don’t forget to replace old mattresses with new ones for a comfortable sleeping experience. Investing in high-quality mattresses will improve your sleep while on the road.
Comparison of Flooring Options
| Flooring Type | Pros | Cons |
|---|---|---|
| Luxury Vinyl Plank (LVP) | Durable, easy to clean, wide variety of styles available | May require professional installation, can be more expensive than other options |
| Laminate | Affordable, wide range of styles, easy to clean | Not as durable as LVP, may be prone to water damage |
| Carpet | Provides warmth and insulation, comfortable underfoot | Difficult to clean, can trap dirt and allergens, may require frequent replacement |
| Tile | Durable, water-resistant, easy to clean | Heavy and may add extra weight to your RV, can be cold underfoot |
By paying attention to the flooring and furniture in your RV renovation, you can create a cozy and inviting space that reflects your personal style while ensuring functionality for your travels.
Adding Final Touches and Cost Considerations
Now that the major renovation work is complete, it’s time to put the final touches on your RV. Enhance the organization and functionality of your space by installing hooks, bars, and other storage solutions. To personalize the interior, hang art on the walls, add DIY pillow covers, and select durable dinnerware that suits your style.
Throughout the renovation process, it’s important to keep track of your expenses to determine the overall cost. The cost of renovating an RV can vary depending on the extent of the renovation, the materials you choose, and whether you opt for professional help or take a hands-on, do-it-yourself approach. By carefully considering these factors, you can create a stunning RV that fits within your budget.
Remember, the final touches can truly make a difference in the overall look and feel of your RV. By adding these small details and keeping an eye on costs, you’ll be able to create a space that reflects your personal style and meets your functional needs. So go ahead and complete your RV transformation with these final touches!
FAQ
How do I find an old camper for renovation?
You can search for used RVs on platforms such as Facebook Marketplace, Kijiji, and Craigslist.
What should I assess in an old camper before purchasing it?
It’s crucial to assess the condition of the camper, checking for any mechanical or structural issues, like water damage, working appliances, functional water and bathroom systems, AC and heating systems, tires, brakes, and the awning.
How should I plan my RV renovation?
Determine your decoration style and select the items you want to include in the renovation. Make a list of the basics, such as painting supplies and tools, as well as the decor and extra items you’ll need to purchase.
Where can I shop for RV renovation supplies?
Consider shopping at home improvement stores like Home Depot and Ikea for in-person purchases and online platforms like Amazon for convenience.
What should I do before starting the actual renovation?
Before starting the actual renovation, you’ll need to demolish the interior of the RV and prepare the different surfaces for painting and other updates. This may involve removing old window treatments, built-in furniture, and outdated flooring. It’s important to clean and degrease all surfaces before painting.
How do I go about painting my RV?
Choose a color scheme that matches your style and start by painting the walls with latex paint. Cabinets and doors should be primed and painted with cabinet and trim enamel for a durable finish. After painting, you can add decorative surface treatments like wallpaper, contact paper, and peel-and-stick tiles for accents.
What are some flooring and furniture ideas for an RV renovation?
Install luxury vinyl plank flooring, which is durable and easy to maintain. Consider replacing or recovering the existing furniture to suit your style and comfort preferences.
What are some final touches I can add to my RV?
Install hooks, bars, and other storage solutions to maximize organization and functionality. Hang art, add DIY pillow covers, and select durable dinnerware to personalize the space.
How much does it cost to renovate an RV?
The cost of renovating an RV can vary depending on the extent of the renovation, the materials used, and whether you hire professionals or take a DIY approach. It’s important to keep track of the expenses throughout the renovation process to determine the overall cost.