RV Rubber Roof Installation Made Easy
gorvlifestyle.com and its partners may earn a commission if you purchase a product through one of our links
Your RV’s roof is a key part of its structure and protection. It shields the interior from weather elements and prevents water damage. Maintaining a high-quality rubber roof is crucial. In this article, we will provide a step-by-step guide on how to install an RV rubber roof. This DIY project can be completed in a day with the right tools and materials.
Key Takeaways:
- Proper installation of an RV rubber roof is essential for protecting your RV’s interior from weather and water damage.
- This DIY project can be completed in a day with the right tools and materials.
- To ensure a successful installation, it is important to prepare the roof surface and use the appropriate adhesive.
- Following best practices, such as working in small sections and applying lap roof sealant, can help create a watertight seal.
- Avoid common mistakes such as not properly preparing the roof surface or cutting the new roof material incorrectly.
Tools and Materials Needed for RV Rubber Roof Installation
To install an RV rubber roof, you will need the following tools and materials:
- Roofing membrane (EPDM Rubber, TPO Rubber, PVC, or Aluminum roof)
- RV roofing adhesive
- Nails and self-tapping screws
- Self-leveling lap sealant
- Paint roller
- Ladder
- Screwdriver
- Putty knife
- Metal shears or saw (for metal roof replacement)
- Electric sander (recommended for removing old roofing material and adhesive)
Having the right tools and materials is essential for a successful installation. Let’s take a closer look at each item:
Roofing membrane:
The roofing membrane is the main material that forms the top layer of your RV’s roof. There are various options available, including EPDM Rubber, TPO Rubber, PVC, or Aluminum roofs. Choose a membrane that suits your specific needs and preferences.
RV roofing adhesive:
RV roofing adhesive is used to bond the roofing membrane to the roof deck. Make sure to use a high-quality adhesive that is specifically designed for RV roofs. This will ensure a secure and long-lasting installation.
Nails and self-tapping screws:
Nails and self-tapping screws are used to secure the roofing membrane and other components. They provide stability and prevent the roof from shifting or coming loose.
Self-leveling lap sealant:
Self-leveling lap sealant is used to create a watertight seal between the roofing membrane and other roof components. This helps prevent water from seeping into the RV and causing damage.
Paint roller:
A paint roller is used to apply adhesive and lap sealant evenly. It ensures a smooth and uniform application, leading to better results.
Ladder:
A ladder is essential for accessing the roof of your RV. Make sure to use a sturdy and stable ladder that can safely support your weight.
Screwdriver and putty knife:
A screwdriver and putty knife are necessary for removing and installing roof components. They help with the precise placement of screws and the removal of old sealant.
Metal shears or saw (for metal roof replacement):
If you are replacing a metal roof, you will need metal shears or a saw to cut through the old roof and trim the new roofing material to size.
Electric sander:
An electric sander is recommended for removing old roofing material and adhesive. It facilitates the cleaning process and ensures a smooth surface for the new roof installation.
Now that you have an understanding of the tools and materials needed, let’s move on to the step-by-step guide for installing an RV rubber roof.
Step-by-Step Guide for RV Rubber Roof Installation
Installing an RV rubber roof can be a straightforward process when done step by step. Follow the guide below to ensure a successful installation:
-
Remove all vent covers, vents, and other installed items.
Before starting the installation, it’s important to clear the roof surface of any obstructions. Remove vent covers, vents, and any other items that may interfere with the installation process.
-
Remove any edge molding and side/end caps.
Take out the edge molding and side/end caps to prepare the roof for the new rubber membrane. Carefully detach them to avoid damaging the roof or the components.
-
Remove the old roof.
It’s crucial to remove the old roof before installing the new rubber membrane. Make sure to dispose of the old material properly, following local disposal guidelines.
-
Clean the roof surface thoroughly.
Prior to installing the new roof, thoroughly clean the roof surface to ensure proper adhesion. Remove any debris, dirt, or old adhesive using a brush, broom, or pressure washer if necessary. Allow the surface to dry completely before proceeding.
-
Fasten down the new RV roof.
With the roof surface properly cleaned and prepped, it’s time to install the new RV rubber roof. Follow the manufacturer’s instructions for applying the adhesive and carefully position the rubber membrane on the roof surface.
-
Cut holes for installed items.
Use a sharp utility knife or scissors to cut openings for items that will be reinstalled on the roof, such as vents, skylights, or antennas. Take precise measurements and make clean, accurate cuts for a proper fit.
-
Reinstall roof components.
After the rubber roof is securely in place and the necessary openings are cut, it’s time to reinstall the roof components. Carefully put back the vent covers, vents, and any other items that were removed in the initial step.
Following these step-by-step instructions will help you successfully install an RV rubber roof and ensure the protection and longevity of your RV.
Preparing for RV Rubber Roof Installation
Before you begin the installation of your new RV rubber roof, it is essential to make sure you are adequately prepared. Taking the time to properly prepare the roof surface will ensure a smooth and successful installation process. Follow these steps to ensure a seamless transition to your new roof:
- Remove any existing components: Begin by removing all the vents, vent covers, skylights, air conditioner rooftop units, antennas, satellite dishes, and any other items that are installed on the roof surface. This will give you a clear and clean area to work with.
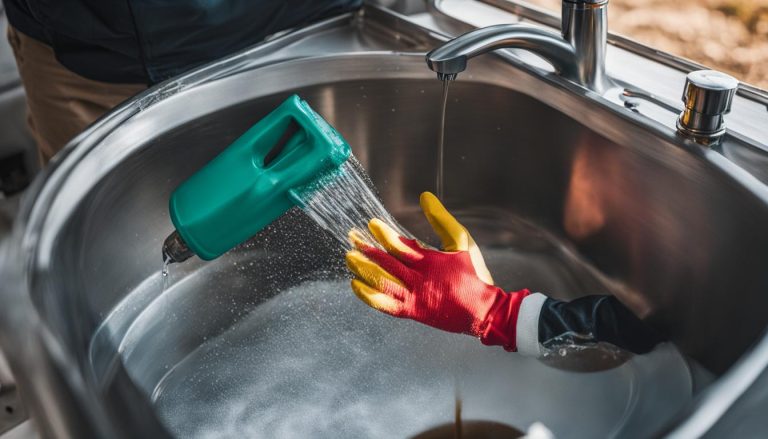
- Clean the roof surface: Thoroughly clean the roof surface to remove dirt, debris, and old sealant. Use a mild detergent and a soft-bristle brush to scrub the surface gently. Rinse with clean water and allow it to dry completely.
- Inspect and repair: Take the time to inspect the roof for any signs of damage, such as cracks, tears, or punctures. Repair any existing damage before proceeding with the installation.
- Remove old lap sealant: Carefully remove any old lap sealant around the edges of the roof and at the seams. Use a putty knife or a sealant remover tool to ensure a clean and smooth surface.
- Ensure a clean roof deck: Before applying the new roofing material, make sure the roof deck is clean and free of any debris. Sweep away any dirt, leaves, or loose materials to provide a solid foundation for the new roof.
By following these steps, you will create the ideal conditions for a successful RV rubber roof installation. Ensuring a clean and well-prepared surface will help the new roof bond properly and provide long-lasting protection for your RV.

Best Practices for RV Rubber Roof Installation
To ensure a successful RV rubber roof installation, it is important to follow best practices and utilize effective installation techniques. Here are some valuable tips to help you achieve a reliable and long-lasting result:
- Work in small sections: When installing your RV rubber roof, it is advisable to work in small sections rather than trying to cover the entire roof at once. This approach allows for better control and ensures that the adhesive is applied evenly.
- Choose the right adhesive: Different types of roofing materials require different adhesives. Make sure to select the appropriate adhesive recommended for your specific rubber roof type. This will ensure proper adhesion and prevent any issues down the line.
- Exercise caution when cutting: When cutting the new roof material, be careful not to remove too much. Precise measurements and accurate cuts are essential for a seamless fit and a professional-looking installation.
- Eliminate air bubbles: To achieve a smooth and uniform surface, use a broom or squeegee to carefully remove any air bubbles that may have formed under the roofing membrane. This will enhance the overall appearance and integrity of the roof.
- Create tight fits: When cutting holes for installed items such as vents, make sure to create an “X” shape cut. This technique helps to create a tight fit that minimizes the risk of water infiltration and ensures a watertight seal.
- Apply ample lap roof sealant: To ensure maximum protection against water penetration, generously apply lap roof sealant to all seams, screws, joints, and flanges. This will create an effective barrier and prevent potential leaks.
- Consider using an RV cover: After completing the rubber roof installation, consider utilizing an RV cover to provide additional protection against the elements. This will help to extend the lifespan of your rubber roof and safeguard the sidewalls of your RV as well.
By adhering to these best practices, you can confidently install your RV rubber roof, knowing that you have taken the necessary steps to ensure a successful and durable result.

Common Mistakes in RV Rubber Roof Installation
While installing an RV rubber roof can be relatively straightforward, it’s important to be aware of common mistakes that can occur during the process. By avoiding these errors, you can ensure a successful installation and increase the longevity of your roof.
One common mistake is not properly preparing the roof surface before installation. It’s crucial to remove any existing components, clean the roof thoroughly, and ensure it is free from debris. Failure to do so can result in poor adhesion and potential leaks.
Using the incorrect adhesive for the type of roofing material is another common error. Different roofing materials require specific adhesives for optimal bond strength. Using the wrong adhesive can lead to inadequate adhesion and potential roof failure.
Another mistake to avoid is cutting the new roof material too short or removing too much. Accurate measurements and precise cuts are essential to ensure proper coverage and a watertight seal. Cutting corners in this step can compromise the integrity of the roof.
Failing to smooth out all air bubbles from under the membrane is also a common misstep. Air bubbles can compromise the adhesion and overall effectiveness of the roof. It’s important to carefully remove any trapped air during installation for a smooth and secure fit.
Inadequate application of lap roof sealant is another mistake to steer clear of. It’s crucial to apply enough sealant to all seams, screws, joints, and flanges to create a watertight barrier. Skipping or insufficient sealant can result in leaks and water damage.
Lastly, neglecting to reinstall all roof components properly is a common oversight. After installing the new roof, ensure that all vent covers, vents, and other components are correctly reinstalled. Failing to do so can compromise the functionality and aesthetics of your RV’s roof.
FAQ
What is the purpose of an RV rubber roof?
An RV rubber roof is essential for protecting the interior of your RV from weather elements and preventing water damage.
What tools and materials do I need for RV rubber roof installation?
To install an RV rubber roof, you will need the following tools and materials: roofing membrane (EPDM Rubber, TPO Rubber, PVC, or Aluminum roof), RV roofing adhesive, nails and self-tapping screws, self-leveling lap sealant, paint roller, ladder, screwdriver, putty knife, metal shears or saw (for metal roof replacement), and an electric sander (recommended for removing old roofing material and adhesive).
How do I prepare for RV rubber roof installation?
Before installing an RV rubber roof, it is important to remove all existing components from the roof’s surface, clean the roof thoroughly, and ensure the roof deck is free of debris.
What are some best practices for RV rubber roof installation?
To ensure a successful RV rubber roof installation, it is recommended to work in small sections, use appropriate adhesive for the roofing material, cut holes for installed items carefully, remove air bubbles from under the membrane, apply generous amounts of lap roof sealant, and consider using an RV cover for added protection.
What are some common mistakes to avoid during RV rubber roof installation?
Some common mistakes to avoid include not properly preparing the roof surface, using incorrect adhesive, cutting the new roof material incorrectly, failing to smooth out air bubbles, not applying enough lap roof sealant, and neglecting to reinstall all components properly.