Easy Guide: How to Install RV Awning Quickly
gorvlifestyle.com and its partners may earn a commission if you purchase a product through one of our links
Installing an RV awning doesn’t have to be a complicated task. With the right tools and a step-by-step approach, you can have your awning up and ready in no time. This guide will walk you through the process of installing an RV awning, providing you with the essential tips and instructions to make the installation quick and hassle-free.
Key Takeaways:
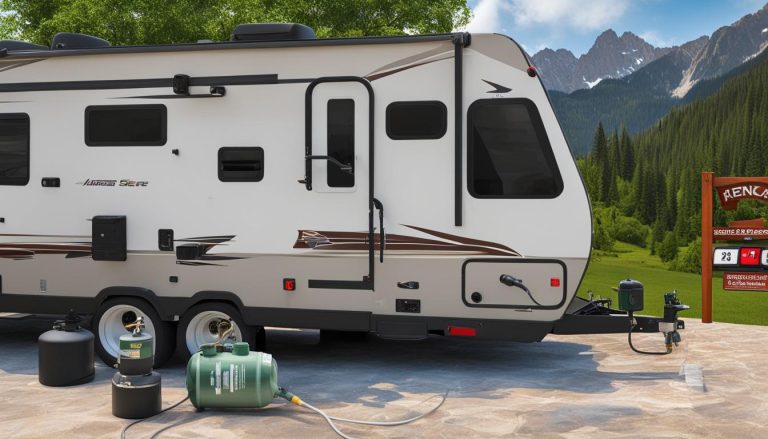
- Gather all the necessary tools before you start, including work gloves, silicone spray, a flat head screwdriver, a power drill, a tape measure, and a stepladder.
- Take caution when removing the old fabric and inspect the awning bracket for any damage.
- Apply a silicone spray or baby oil to the grooves on the roller and the upper guide for smooth gliding of the new fabric.
- Center and align the new fabric properly before securing it with screws.
- Test the functionality of the awning by retracting and extending it a few times to ensure everything works properly.
Step-by-Step RV Awning Installation
Installing an RV awning doesn’t have to be a daunting task. By following a few simple steps, you can easily install a new awning and enhance the comfort and convenience of your outdoor space. Here’s a step-by-step guide to help you through the process:
- Measure the length of your awning: Start by measuring the length of your existing awning to ensure you purchase the correct replacement fabric. This will ensure a proper fit and a smooth installation.
- Gather the necessary tools: Before you begin, gather all the necessary tools for the installation. You will need work gloves, a tape measure, a power drill, and silicone spray to facilitate smooth movement of the new fabric.
- Remove the old fabric: Unscrew the awning support and carefully cut the old fabric into two pieces to remove it. Be cautious during this step to avoid damaging any components.
- Create a new slot: On the remaining piece of fabric, drill a hole and create a new slot to slide it off the guide. This will allow for easy removal and installation of the new fabric.
- Apply lubrication: Apply a silicone spray or baby oil to the grooves on the roller and upper guide. This will ensure smooth movement and prevent any friction during operation.
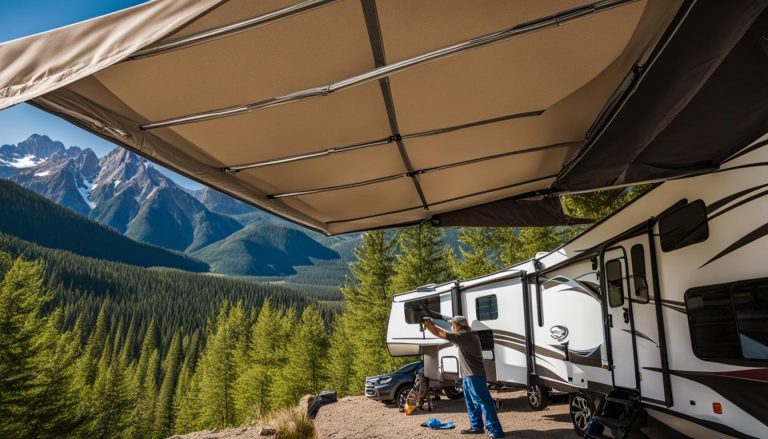
- Slide the new fabric: Carefully slide the new fabric onto the roller and guide, ensuring it is centered and aligned. Take your time during this step to achieve a professional-looking installation.
- Secure the new fabric: Secure the new fabric in place by using screws and reattaching the awning support. Make sure the fabric is taut and properly aligned to ensure smooth operation of the awning.
- Test the functionality: Finally, retract and extend the awning a few times to ensure smooth operation and proper functionality. This will ensure that the installation was successful and that the awning is ready to use.
By following these step-by-step instructions, you can easily install a new RV awning and enjoy the benefits of outdoor shade and comfort. Remember to take your time, use the proper tools, and ensure everything is properly aligned and secure for a hassle-free installation.
Tips for Installing RV Awning
Installing an RV awning can be an exciting project that adds value and comfort to your outdoor experience. To ensure a successful installation, here are some essential tips to keep in mind:
- Use an inexpensive awning installation tool: Investing in a specialized tool designed for awning installation can greatly simplify the process and save you time and effort.
- Apply silicone spray or baby oil: Before sliding the new fabric onto the roller and guide, apply a thin layer of silicone spray or baby oil to the grooves. This will enhance smooth movement and make the installation easier.
- Take necessary precautions: Prioritize safety by wearing work gloves to protect your hands and using a stable ladder or stepladder for accessing high areas. Accidents and damage can be avoided with proper precautions.
- Ensure proper alignment and centering: Before securing the new fabric with screws, double-check its alignment and centering between the end caps. This will result in a professional-looking installation.
- Ensure smooth operation: After installing the awning, retract and extend it a few times to ensure smooth operation and proper functionality. This step will help identify any potential issues and allow you to make necessary adjustments.

By following these tips, you can make your RV awning installation a smooth and successful process. Remember to take your time, follow the manufacturer’s instructions, and seek professional assistance if needed. Enjoy the benefits of a well-installed awning, providing shade and enhancing your outdoor living space during your RV adventures.
DIY RV Awning Installation Made Simple
Installing an RV awning by yourself is a rewarding project that can save you both time and money. With a few essential tools and some handy tips, you can easily install a new awning for your RV. Here’s a step-by-step guide to help you get started.
Gather the Necessary Tools
Before you begin the installation process, make sure you have the following tools at hand:
- Work gloves
- Tape measure
- Power drill
- Silicone spray
Inspect and Prepare
Prior to removing the old fabric, carefully inspect the awning bracket for any damage. It’s also a good idea to save the screws for reinstallation later. Once you’re ready, proceed with removing the old fabric.
Apply Lubrication
To ensure smooth movement of the new fabric, apply silicone spray to the grooves on the roller and guide. This will make the installation process much easier and more efficient.
Align and Secure
When installing the new fabric, take the time to align it properly and make sure it is centered between the end caps. Secure the fabric in place using screws, ensuring a secure and sturdy installation.
Test for Functionality
After completing the installation, retract and extend the awning a few times to ensure that it functions smoothly. This step will help you identify any issues and make any necessary adjustments.

By following these simple steps and taking the DIY approach to installing your RV awning, you can enjoy the benefits of outdoor shade and comfort during your travels. Remember to take your time and work with caution to ensure a successful installation.
Key Steps for a Successful RV Awning Installation
A successful RV awning installation relies on a few key steps. Follow these guidelines to ensure a smooth and hassle-free installation process.
Gather the Necessary Tools and Materials
Before you begin the installation, gather all the necessary tools and materials:
- Work gloves
- Silicone spray
- Tape measure
- Power drill
- Stepladder
Having these items on hand will make the installation process much easier and more efficient.
Remove the Old Fabric
Carefully remove the old fabric, making sure there are no sharp edges or obstacles in the way. Save any screws that were used to secure the old fabric, as they may be needed for the new installation.
Apply Lubrication
Before installing the new fabric, apply lubrication to the grooves on the roller and guide. This will ensure smooth movement of the fabric and prevent any potential sticking or snagging.
Align and Secure the New Fabric
Align the new fabric properly between the end caps and ensure it is centered. Secure it in place using the saved screws, ensuring there is no misalignment or sagging.
Test the Functionality
Finally, test the functionality of the awning by retracting and extending it a few times. This will help ensure that the installation is successful and that the awning operates smoothly.
By following these key steps, you can achieve a successful RV awning installation. Enjoy the shade and comfort that your new awning brings!
Expert Tips for Installing a Retractable RV Awning
When it comes to installing a retractable RV awning, there are a few expert tips that can make the process smoother and more successful. To begin, carefully remove the old fabric, ensuring that you inspect the awning bracket for any damage. This will help ensure a strong foundation for your new awning.
Next, apply some lubrication, such as silicone spray, to the grooves on the roller and guide. This will facilitate the smooth movement of the new fabric, allowing for easy operation of the retractable feature. Take your time during the installation process to align the new fabric properly and secure it with screws. This step is crucial in ensuring a tight and secure fit.
Once the installation is complete, it’s essential to test the functionality of the retractable feature. Retract and extend the awning multiple times to ensure it operates smoothly and without any issues. If you encounter any difficulties or have concerns about the installation process, don’t hesitate to consult with an expert or seek professional assistance. They can provide valuable guidance and ensure that your retractable RV awning is installed correctly.
Installing a retractable RV awning can be a worthwhile investment, enhancing your outdoor space and providing convenience and comfort while on the road. With these expert tips, you’ll be well-equipped to install your retractable RV awning with confidence and enjoy the benefits it brings.
FAQ
How do I install an RV awning?
To install an RV awning, start by gathering the necessary tools and materials. Remove the old fabric, save the screws, and inspect the awning bracket. Apply lubrication to the grooves on the roller and guide, then align and secure the new fabric with screws. Test the functionality by retracting and extending the awning.
What tools do I need for RV awning installation?
For RV awning installation, you will need work gloves, a tape measure, a power drill, a flat head screwdriver, a stepladder, and silicone spray. An awning installation tool can also be helpful.
How do I remove the old fabric when installing a new RV awning?
To remove the old fabric when installing a new RV awning, unscrew the awning support and cut the fabric into two pieces. Drill a hole and create a new slot on the remaining piece to slide it off the guide.
Should I lubricate the grooves on the roller and guide before installing a new RV awning?
Yes, applying a silicone spray or baby oil to the grooves on the roller and guide will help the new fabric glide on smoothly during installation.
How do I ensure proper alignment and centering of the new fabric?
Before securing the new fabric with screws, make sure it is centered between the end caps and aligned properly. Double-check the alignment to ensure a professional-looking installation.
Any tips for installing an RV awning?
Some tips for installing an RV awning include using an inexpensive awning installation tool, wearing work gloves for safety, applying lubrication to the grooves for smooth movement, and testing the functionality after installation.
Can I install an RV awning myself?
Yes, installing an RV awning yourself is a feasible DIY project. By following the step-by-step instructions and taking necessary precautions, you can successfully install a new awning.
Should I seek professional assistance for installing a retractable RV awning?
If you have any difficulties or concerns with installing a retractable RV awning, it may be helpful to consult with an expert or seek professional assistance to ensure proper installation and functionality.