Easy Guide: How to Install RV AC Efficiently
gorvlifestyle.com and its partners may earn a commission if you purchase a product through one of our links
Installing an RV AC unit doesn’t have to be a complicated process. With the right guidance and step-by-step instructions, you can efficiently install an RV AC unit on your own. In this guide, we will cover everything you need to know about the installation process, including tips and common mistakes to avoid.
Key Takeaways:
- Follow a step-by-step guide to ensure a smooth and efficient RV AC installation.
- Determine whether you need a complete installation or just parts replacement based on the condition of your current AC unit.
- Properly remove the old AC unit and place the new one in the same location.
- Connect the ducts and electrical wiring for the new AC unit.
- Optimize RV air conditioner performance by cleaning filters, avoiding obstructions, and checking the condenser coil.
Do I Need to do a Complete RV A/C Installation?
When considering an RV AC installation, it’s important to determine whether a complete installation is necessary or if certain parts can be replaced. Making the right decision can save you time and money in the long run.
If your current air conditioner is old or experiencing multiple issues, a complete AC installation is often the best solution. Replacing the entire unit ensures optimal performance and avoids future problems. However, if only minor parts need to be replaced, it might be more cost-effective to focus on those specific components.
The main parts needed for a complete motorhome or travel trailer AC replacement include the rooftop unit and the ceiling assembly. These components work together to provide efficient cooling for your RV. By replacing both, you can ensure a seamless installation process and enjoy the benefits of a fully functional AC system.
Benefits of Complete RV AC Installation
- Improved performance: A new AC unit can provide better cooling capabilities and more efficient energy usage.
- Reliability: Replacing all the necessary parts reduces the risk of future breakdowns or malfunctions.
- Peace of mind: Knowing that your AC system is in top condition can enhance your overall camping experience.
Considerations for Partial RV AC Replacement
- Cost-effectiveness: If only specific parts need to be replaced, focusing on those components can save money compared to a complete installation.
- Compatibility: Ensure that the replacement parts are compatible with your existing AC system.
- Age and condition: Assess the overall age and condition of your current AC unit to determine if partial replacement is worth the investment.
Ultimately, the decision between a complete RV AC installation and partial replacement depends on the specific circumstances of your situation. Consider factors such as cost, performance, and long-term reliability to make an informed choice.
| Complete RV AC Installation | Partial RV AC Replacement |
|---|---|
| Replaces the entire AC unit | Replaces only specific parts |
| Optimal performance and reliability | Cost-effective option for minor issues |
| Includes rooftop unit and ceiling assembly | Focuses on specific components |
Steps to Complete a Camper Air Conditioner Installation
To successfully install a camper air conditioner, you need to follow a series of steps. Below, we outline each stage of the installation process, from removing the old unit to connecting ducts and electrical components for the new AC unit.
Step 1: Removing the Old RV AC Unit
- Start by taking off the air conditioner shroud on the roof of your RV. This will give you access to the unit.
- Next, disconnect the electrical wiring connected to the old AC unit. Make sure to turn off the power supply before doing this.
Step 2: Removing the Ceiling Assembly
After removing the old AC unit from the roof, you’ll need to remove the ceiling assembly inside the coach.
Step 3: Placing the New RV AC Unit
- Position the new air conditioner rooftop unit in the same location where the old unit was located.
- Ensure that the new unit is properly aligned with the roof opening for optimal functionality.
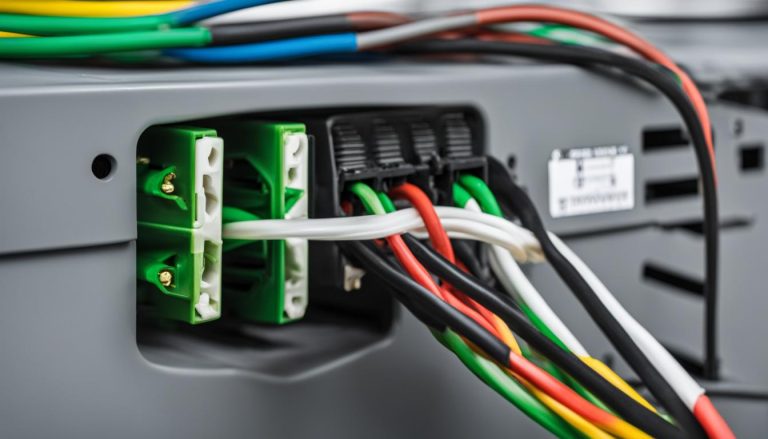
Step 4: Connecting Ducts and Electrical Wiring
Once the new AC unit is in place, it’s time to connect the ducts and electrical wiring. Follow these steps:
- Connect the ducts from the ceiling assembly to the new AC unit. Make sure all connections are secure and properly sealed.
- Connect the electrical wiring to the new AC unit, following the manufacturer’s instructions carefully.
Step 5: Testing the Functionality
After completing the installation and connections, it’s crucial to test the functionality of the new RV AC unit.
Turn on the power supply and the AC unit to check if it starts and cools the air effectively.
Congratulations! You have successfully completed the installation of your new camper air conditioner. Enjoy the comfort of a well-functioning RV AC system during your travels.
Tips for Optimizing RV Air Conditioner Performance
To ensure the optimal performance of your RV air conditioner, there are several tips and maintenance practices you can follow. By implementing these strategies, you can enhance cooling efficiency and prolong the lifespan of your AC unit. Here are some essential tips to keep in mind:
-
Clean and check the filters regularly: Dirty filters can obstruct airflow and reduce cooling capacity. Clean or replace the filters at least once a month, or as recommended by the manufacturer. This simple task can significantly improve air conditioner performance.
-
Avoid obstructions in the cold air return: Ensure that the return air vents are not blocked or obstructed by furniture, curtains, or any other objects. Blocked vents can restrict airflow, making your RV AC work harder and less efficiently.
-
Check and clean the condenser coil: Over time, the condenser coil can accumulate dirt, debris, and even mold. Regularly inspect and clean the condenser coil to improve heat transfer and maintain optimal cooling performance. Refer to your RV AC unit’s manual for specific instructions.
-
Park in the shade: When possible, park your RV in shaded areas to reduce the impact of external heat. This helps your RV air conditioner operate more efficiently by reducing the workload to cool down the interior.
-
Use window coverings: Install window coverings, such as blinds or curtains, to insulate the interior from direct sunlight. This helps prevent heat from entering your RV and eases the workload on the air conditioner.
-
Limit the use of heat-generating appliances: Appliances like ovens, stoves, and even certain lighting fixtures can generate heat in your RV. Minimize their usage during the hottest times of the day to prevent additional heat buildup.
-
Add fans for better air circulation: Consider installing additional fans in your RV to improve air circulation and distribute cool air more effectively. Ceiling fans and portable fans can help create a comfortable environment and reduce the reliance on the air conditioner.
-
Create cooling zones: Divide your RV into different cooling zones by closing off areas that are not in use. This allows you to concentrate cool air where it’s needed most, optimizing the performance of your RV air conditioner.
By implementing these tips, you can optimize your RV air conditioner’s performance, minimize energy consumption, and ensure a comfortable and refreshing environment inside your vehicle.

Battery-Friendly 12 Volt Air Conditioners for Vans
For van owners looking to stay cool on their adventures, battery-friendly air conditioners provide a viable solution. With 12 volt DC air conditioning options, you can enjoy energy-efficient cooling without relying on traditional rooftop AC units. These innovative alternatives are designed specifically for vans and offer a range of benefits.
Unlike conventional AC units, 12 volt DC air conditioners are specifically designed to be powered directly from the vehicle’s battery bank. This means you can still enjoy cooling even when you’re not connected to shore power, making them ideal for off-grid adventures.
In addition to their battery-friendly nature, these AC units are energy-efficient, helping to optimize power consumption and extend battery life. You can keep your van cool without draining the battery excessively, ensuring you have ample power for other essential devices.
These energy-efficient AC units are designed to be compact and lightweight, making them easy to install and suitable for all types of vans. Whether you have a campervan, motorhome, or cargo van conversion, there are options available to meet your specific needs.
With battery-friendly 12 volt DC air conditioners, you can enjoy reliable cooling on your van adventures while minimizing your environmental impact. Embrace the freedom of off-grid living and stay comfortable wherever your travels take you.

| Benefits of Battery-Friendly 12 Volt Air Conditioners for Vans | Features |
|---|---|
| Energy-efficient cooling | – Lower power consumption |
| Off-grid functionality | – Powered directly from the vehicle’s battery bank |
| Easy installation | – Compact and lightweight units |
| Versatility | – Suitable for various types of vans |
Understanding RV Air Conditioner Cooling System
To fully understand your RV air conditioner and optimize its performance, it’s important to grasp how the cooling system works. The compressor and condenser play crucial roles in removing heat from the air and providing cold air to the RV.
The compressor, located in the outdoor unit, circulates refrigerant through the system. It compresses low-pressure refrigerant gas into high-pressure gas, which then moves to the condenser. The condenser, also located in the outdoor unit, acts as a heat exchanger, dissipating the heat from the compressed refrigerant and converting it into a high-pressure liquid. This hot liquid travels to the indoor unit.
Inside the RV, the liquid refrigerant passes through the expansion valve, where its pressure drops. This causes the refrigerant to evaporate and absorb heat from the surrounding air inside the RV. The now cold air is then distributed through the RV’s ductwork, providing the desired cooling effect. Meanwhile, the gaseous refrigerant is returned to the compressor, and the cycle continues.
Regular maintenance is crucial for maintaining the efficiency of your RV air conditioner. One important task is cleaning the return air filters. Clogged filters can restrict airflow and reduce cooling efficiency. It’s also important to be aware of common issues associated with absorption systems, such as refrigerant leaks or inadequate cooling, and take appropriate steps to address them. By understanding how your RV air conditioner works and performing routine maintenance, you can optimize its performance and ensure a comfortable environment during your travels.
FAQ
How do I install an RV AC unit?
To install an RV AC unit, you need to remove the old unit by taking off the air conditioner shroud on the roof and disconnecting the electrical wiring. Then, remove the ceiling assembly inside the coach. Place the new rooftop unit in the same location, aligning it with the roof opening. Finally, connect the ducts and electrical wiring for the new AC unit and test its functionality.
Do I need to do a complete RV AC installation?
Whether you need to do a complete RV AC installation or just replace certain parts depends on the condition of your air conditioner. If it is old or has multiple issues, it’s usually best to replace the entire unit. However, if only minor parts need to be replaced, it might be more cost-effective to replace those specific components.
What parts do I need for a complete RV AC replacement?
For a complete RV AC replacement, you will need the rooftop unit and the ceiling assembly. These are the main components required to replace the old AC unit in your motorhome or travel trailer.
What are the steps to complete a camper air conditioner installation?
The steps to complete a camper air conditioner installation include removing the old AC unit by taking off the air conditioner shroud on the roof and disconnecting the electrical wiring. Then, remove the ceiling assembly inside the coach. Place the new rooftop unit in the same location, aligning it with the roof opening. Finally, connect the ducts and electrical wiring for the new AC unit and test its functionality.
How can I optimize my RV air conditioner’s performance?
To optimize your RV air conditioner’s performance, here are some tips to keep in mind: regularly clean and check the filters, ensure there are no obstructions in the cold air return, inspect and clean the condenser coil, park in the shade to reduce external heat, use window coverings to insulate the interior, limit the use of heat-generating appliances, add fans to improve air circulation, and create cooling zones within the RV.
Are there battery-friendly air conditioning options for vans?
Yes, there are 12 volt DC air conditioning units available that are more energy-efficient and can be a suitable alternative to traditional rooftop AC units. These units can be powered directly from the vehicle’s battery bank, allowing for cooling even when not connected to shore power. They are a great option for van conversions, providing reliable cooling while minimizing power consumption.
How does the RV air conditioner cooling system work?
The RV air conditioner cooling system relies on the compressor and condenser to remove heat from the air and provide cold air to the RV. Regular maintenance, such as cleaning the return air filters, is essential to ensure proper airflow and cooling efficiency. It’s also important to be aware of common issues associated with absorption systems and take necessary steps to address them.