Easy RV Awning Fabric Replacement Guide
gorvlifestyle.com and its partners may earn a commission if you purchase a product through one of our links
Replacing RV awning fabric doesn’t have to be a daunting task. With a few simple steps, you can easily install a replacement fabric and give your RV’s awning a fresh new look. Whether you’re looking to upgrade the fabric for aesthetic reasons or your current fabric is worn and in need of replacement, this guide will provide you with all the information you need to get the job done.
By following the step-by-step instructions in this guide, you can save time and money by completing the project yourself. Let’s dive into the process of installing replacement RV awning fabric.
Key Takeaways:
- Replacing RV awning fabric is a simple DIY project.
- Following step-by-step instructions will ensure a successful replacement.
- Having the right tools and materials is essential.
- Solera awning fabrics are a popular choice for durability and quality.
- Keep these tips in mind for a hassle-free experience.
Materials Needed for RV Awning Fabric Replacement
To replace your RV awning fabric, you will need a few basic tools and materials. Having these supplies on hand will make the process of awning fabric installation easier and more efficient.
- Safety glasses: Protect your eyes during the replacement process.
- Rv caulk: Use caulk to seal any gaps during installation, ensuring a watertight seal.
- Vice grips: These will come in handy for holding and securing various components.
- Screwdriver: A screwdriver is necessary for loosening and tightening screws.
- Sharpie: Use a sharpie to mark measurements and reference points.
- Wire cutters: Cut any wires or cords as needed during the process.
- Nail or pin: A nail or pin can be used to remove the old awning fabric from the track.
- Measuring tape: Accurately measure the dimensions of your awning for a proper fit.
- Razor cutter: Use a razor cutter to remove any excess or damaged fabric.
- Drill: A drill may be needed to secure components in place.
Having the right tools and materials readily available will ensure a smooth and successful RV awning fabric replacement process. Now that you have gathered everything you need, it’s time to move on to the next section and learn the step-by-step process of replacing your RV awning fabric.
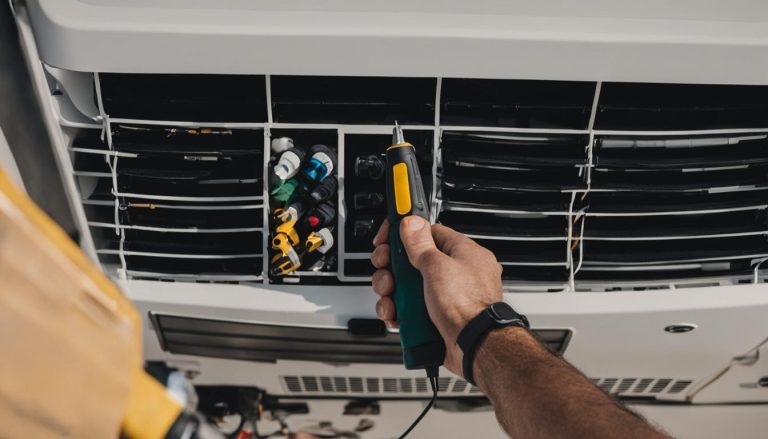
Steps to Replace RV Awning Fabric
Replacing the fabric of your RV’s awning is a DIY project that can give your vehicle a fresh, new look. By following these step-by-step instructions, you can easily install replacement RV awning fabric and enhance the appearance of your awning.
- Begin by extending the awning fully, ensuring that it is securely locked in place.
- Next, secure the head assemblies of the awning to prevent any accidental movement or injury.
- Using the appropriate tools, carefully remove the roll tube from the awning structure.
- Once the roll tube is detached, unroll and detach the old fabric from the tube.
- Prepare the fabric track by cleaning it thoroughly and ensuring there are no obstructions that could affect the installation of the new fabric.
- Roll the new fabric onto the roll tube, making sure it is aligned properly.
- Reinstall the roll tube and end cap back into the awning structure, ensuring they are securely fastened.
- Test the alignment of the fabric and make any necessary adjustments to ensure it is positioned correctly.
- Finally, reattach the polycord screws to the awning tube, securing the fabric in place.
Following these step-by-step instructions will guide you through the process of replacing your RV awning fabric effectively and efficiently. Take your time and ensure each step is completed accurately for a successful DIY RV awning fabric replacement.
Expert Tip:
Before starting the replacement process, it’s a good idea to measure the dimensions of your existing fabric and compare them to the new fabric to ensure a proper fit. This will help avoid any complications during the installation.
| Tools and Materials Needed: |
|---|
| Safety glasses |
| RV caulk |
| Vice grips |
| Screwdriver |
| Sharpie |
| Wire cutters |
| Nail or pin |
| Measuring tape |
| Razor cutter |
| Drill |
Make sure you have all the necessary tools and materials ready before starting the replacement process. This will help ensure a smooth and hassle-free DIY RV awning fabric replacement.
Why Choose Solera Awning Fabrics
Solera awning fabrics are a popular choice for RV owners looking to replace their awning fabric. These fabrics are known for their heat-welded seams, heavy-duty materials, and durability in the face of the elements. By choosing Solera awning fabrics, you can have confidence in the quality and longevity of your new awning fabric. Consider replacing your RV awning fabric with Solera for added peace of mind.

When it comes to selecting replacement awning fabric for your RV, the quality of the material matters. Solera awning fabrics are specially designed to withstand the harsh outdoor conditions that RVs often face. The heat-welded seams ensure that the fabric stays intact, even during strong winds and heavy rains. The heavy-duty materials used in Solera awning fabrics provide long-lasting protection against UV rays, preventing fading and deterioration over time.
By choosing Solera awning fabrics, you can have peace of mind knowing that your awning will remain in excellent condition for years to come. Whether you’re traveling to sunny destinations or braving the elements on a camping trip, your Solera awning fabric will stand up to the challenges.
“I replaced my RV’s awning fabric with Solera, and I couldn’t be happier with the results. The fabric is incredibly durable and has held up well during our cross-country adventures. I highly recommend Solera for anyone looking to upgrade their RV awning.” – Rebecca Smith, RV enthusiast
Not only are Solera awning fabrics built to last, but they also come in a variety of colors and patterns to suit your style preferences. Whether you prefer a classic solid color or a vibrant pattern, there’s a Solera awning fabric that will complement your RV’s exterior.
Benefits of Choosing Solera Awning Fabrics:
- Durable and long-lasting
- Heat-welded seams for added strength
- Heavy-duty materials for protection against the elements
- UV-resistant to prevent fading
- Available in a variety of colors and patterns
- Easy to install and maintain
| Brand | Durability | Weather Resistance | Color Options |
|---|---|---|---|
| Solera | High | Excellent | Wide range |
| Other Brands | Varies | Varies | Limited |
Tips for a Hassle-Free RV Awning Fabric Replacement
When it comes to replacing your RV awning fabric, following a few tips can help make the process smooth and hassle-free. By taking these precautions and using the right techniques, you can ensure a successful and easy RV awning fabric replacement.
1. Secure the Head Assemblies
Before you start replacing the awning fabric, make sure to securely lock the head assemblies in place. This will prevent any accidental unrolling or movement during the replacement process. Use zip ties or clamps to keep the head assemblies secure.
2. Use Zip Ties for Added Stability
To further stabilize the awning fabric replacement, consider using zip ties along the roll tube. This will help keep the fabric securely in place as you roll it onto the tube. It prevents any unnecessary movement and ensures a tight fit.
3. Lubricate the Fabric Track with Silicone Spray
Applying silicone spray to the fabric track can make the installation process smoother and easier. The lubrication reduces friction, allowing the fabric to slide easily along the track as you roll it onto the tube. This step saves time and ensures a seamless installation.
4. Inspect the New Fabric for Tears or Rips
Before installing the new awning fabric, carefully inspect it for any tears, rips, or defects. Addressing these issues before installation will save you from having to redo the process or deal with potential complications later on. It’s best to catch any defects early on and either return the fabric or repair it before proceeding with the replacement.
5. Ensure Proper Alignment and Tightness
As you roll the new fabric onto the roll tube, make sure it is aligned properly and tightly attached. Avoid any unevenness or loose spots that may cause the fabric to sag or flap in the wind. Ensuring proper alignment and tightness will result in a neat and professional-looking awning.
6. Widening the Awning Rail for Easier Installation
If you encounter difficulty when sliding the fabric into the awning rail, consider widening the rail slightly using a flathead screwdriver or another suitable tool. This will make the installation process easier and prevent any unnecessary frustration.
7. Test the Awning’s Functionality
Before finalizing the awning fabric replacement, test the awning’s functionality to ensure it extends and retracts smoothly. Make sure all components are functioning properly, including the head assemblies and roll tube. This step will give you peace of mind and ensure a successful replacement.

Following these tips will help you tackle an RV awning fabric replacement with ease and confidence. By taking the time to prepare and execute the replacement carefully, you’ll enjoy a refreshed and functional awning that enhances your RVing experience.
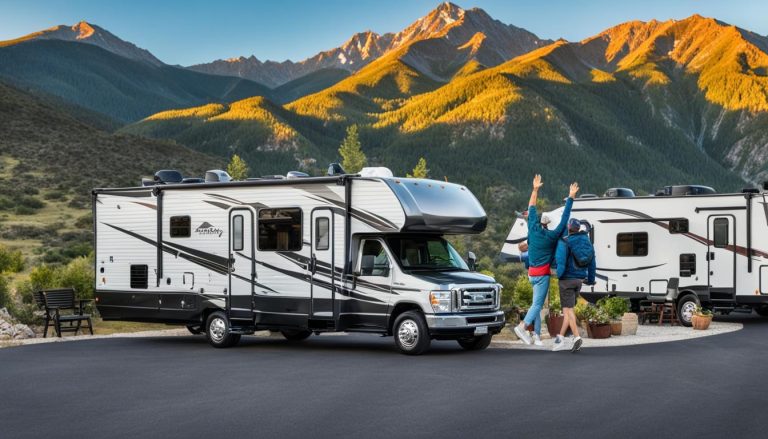
Enjoy Your Upgraded RV Awning
Congratulations! You have successfully replaced your RV awning fabric. Take a moment to enjoy your upgraded RV awning, which not only adds a refreshed look to your vehicle but also provides shade and privacy for your outdoor space. With your new awning fabric in place, you can now fully enjoy your RVing adventures.
Replacing your RV awning fabric has numerous benefits. Not only does it give your RV a fresh and modern appearance, but it also enhances your outdoor experience by providing a comfortable and shaded area. Whether you’re lounging outside, hosting a barbecue, or simply enjoying the beautiful scenery, your new awning fabric will create a cozy and private space for you and your loved ones.
With the easy RV awning fabric replacement process completed, you can embark on your next camping trip with confidence. No more worrying about worn-out or damaged fabric; your new awning is designed to withstand the elements and stand the test of time. So sit back, relax, and soak in the beauty of nature while enjoying the comfort and convenience of your upgraded RV awning.
FAQ
Can I replace the fabric of my RV awning myself?
Yes, replacing the fabric of your RV awning is a simple DIY project that can save you time and money. With the right tools and instructions, you can easily install replacement RV awning fabric.
What tools do I need to replace RV awning fabric?
To replace your RV awning fabric, you will need safety glasses, RV caulk, vice grips, a screwdriver, a sharpie, wire cutters, a nail or pin, a measuring tape, a razor cutter, and a drill.
What are the steps to replace RV awning fabric?
The steps to replace RV awning fabric include extending the awning and securing the head assemblies, removing the roll tube, unrolling and detaching the old fabric, preparing the fabric track, rolling the new fabric onto the roll tube, reinstalling the roll tube and end cap, testing for proper alignment, and reattaching the polycord screws to the awning tube.
Why should I choose Solera awning fabrics for my RV?
Solera awning fabrics are known for their heat-welded seams, heavy-duty materials, and durability in the face of the elements. Choosing Solera awning fabrics ensures quality and longevity for your RV awning.
What tips should I keep in mind when replacing RV awning fabric?
When replacing RV awning fabric, it’s important to secure the head assemblies, use zip ties for added stability, lubricate the fabric track with silicone spray, inspect the new fabric for tears or rips, ensure proper alignment and tightness when rolling the fabric onto the roll tube, widen the awning rail for easier installation, and test the awning’s functionality before finalizing the replacement.
How can I enjoy my upgraded RV awning after replacing the fabric?
After successfully replacing your RV awning fabric, take a moment to enjoy the refreshed look of your upgraded awning. It not only adds a new aesthetic to your RV but also provides shade and privacy for your outdoor space, enhancing your RVing adventures.