RV Awning Installation Made Easy & Quick
gorvlifestyle.com and its partners may earn a commission if you purchase a product through one of our links
Are you ready to take your RV camping experience to the next level? Installing an awning on your recreational vehicle can provide you with a comfortable and shaded retreat while enjoying the great outdoors. While it may seem like a daunting task, we’re here to guide you through the step-by-step process of awning installation, making it easy and quick even for beginners.
Whether you’re looking to replace your old awning or install a new one, our comprehensive guide will equip you with all the necessary information and instructions to ensure a successful project. Let’s dive in and make your RV awning dreams a reality!
Key Takeaways:
- Installing an awning on your RV can enhance your camping experience by providing shade and comfort.
- With the right tools and instructions, awning installation can be a straightforward DIY project.
- Gather all the necessary tools and materials before starting the installation process.
- Removing the old fabric and preparing the new fabric are important steps in the awning installation process.
- Properly securing the awning rail, brackets, and fabric ensures a stable and functional awning.
Now that you have a clear overview of what’s ahead, let’s move on to the first step of installing your RV awning.
Gather the Tools and Materials
Before you start the installation process, it’s important to gather all the necessary tools and materials.
You’ll need:
- A strong pair of work gloves
- Silicone spray
- A flat head screwdriver
- A power drill
- A tape measure
- A stepladder
It is also recommended to purchase an inexpensive awning installation tool to make the job even easier. Additionally, if you are replacing an old awning, you may need replacement fabric and any necessary brackets.
Remove the Old Fabric
The first step in the RV awning installation guide is to remove the old fabric. Here’s a step-by-step process to help you:
- Extend the awning: Extend the awning fully to gain access to the fabric.
- Unscrew the awning support: Begin by unscrewing the awning support on the right side. Remember to save the screws for reinstallation.
- Inspect the awning bracket: Take a close look at the awning bracket for any damage. If you notice any defects, it’s recommended to replace it before proceeding.
- Remove the small screws: Locate and remove the small screws that lock the awning fabric in place on both the left and right sides of the awning.
- Cut the old fabric: Find a suitable spot above the roller and cut the old fabric in half. Then, make another cut all the way down the roller to separate the fabric pieces.
- Remove the end cap with the slot: Pull out the fabric piece that has the slot on the end cap. This will make it easier to install the new fabric later.
- Create a new hole and slot: Drill a new hole and create a new slot in the remaining fabric piece to facilitate the removal and installation of the new fabric.
Follow these steps carefully to ensure a successful awning installation on your RV.
Prepare the New Fabric
Before installing the new awning fabric, there are a couple of preparatory steps to ensure a smooth and successful installation. Follow these instructions to make the process of installing your new RV awning easy and hassle-free.
Apply Lubrication
To make the new fabric glide on effortlessly, apply silicone spray or baby oil to the grooves on the roller and the upper guide near the roof. This lubrication allows the fabric to slide smoothly without any resistance, saving you time and effort.
Prevent Fabric Catching
One common issue during awning installation is the fabric catching on the top edge of the guide near the roof. To prevent this, use a screwdriver to flare open the top edge of the guide. By creating a wider opening, you ensure that the fabric can pass through freely without any snags or tears.
Inspect Fabric Quality
Prior to installation, inspect the new fabric for any imperfections or sharp edges. Make sure it is smooth and free from any potential damages that could compromise its lifespan. By ensuring the fabric is in perfect condition, you can avoid future problems and enjoy your awning for years to come.
“I followed these steps when installing my RV awning fabric, and it made the process a breeze. The fabric glided smoothly onto the roller, and I had no issues with catching or tearing. I highly recommend applying lubrication and checking the fabric for any damage before installation.” – RV Enthusiast
Now that you have prepared the new fabric, you are ready to move on to the next step of the installation process. In the following section, we will guide you through the step-by-step process of installing the new awning fabric on your RV.
| Items Needed: | Instructions: |
|---|---|
| 1. Silicone spray or baby oil | Apply lubrication to the roller and upper guide near the roof. |
| 2. Screwdriver | Flare open the top edge of the guide to prevent fabric catching. |
| 3. New awning fabric | Inspect for smoothness and sharp edges. |

Install the New Awning Fabric
Now that you have removed the old fabric, it’s time to install the new awning fabric on your RV. Follow these step-by-step instructions to ensure a successful installation:
- Begin by sliding the new awning fabric into the grooves on the roller and the upper guide near the roof. Take your time to ensure it is centered and aligned properly.
- Once the fabric is in place, secure it by screwing the end caps onto the mounting brackets. Make sure the awning is rolled up tightly and does not sag.
- With the fabric securely in place, remove the spring locking pin. This will allow you to test the awning by rolling it all the way out and then all the way back in again. This will help ensure that the fabric rolls smoothly and without any issues.
Expert Tip:
“When installing the new awning fabric, make sure to follow the manufacturer’s instructions carefully. This will ensure a proper and secure installation for a long-lasting awning.” – RV Awning Experts
By following these steps, you will have successfully installed the new awning fabric on your RV. Take a moment to admire your handiwork and get ready to enjoy the benefits of your newly installed awning!
Secure the Awning Rail and Brackets
Now that you have installed the new awning fabric, it’s time to secure the awning rail and brackets. This step is crucial to ensure the stability and durability of your awning. Follow these steps to complete the installation:
1. Attach the Awning Rail
Start by drilling pilot holes into the side of your RV where you want to attach the awning rail. Make sure the holes are level and aligned with the center marks. Once the pilot holes are drilled, use screws to secure the awning rail in place. Double-check that it is straight and securely fastened.
2. Apply Butyl Tape for Additional Sealant
For added protection against leaks, apply a strip of butyl tape behind the awning rail. This will create a tight seal and prevent water from seeping into your RV. Press the tape firmly against the RV wall, ensuring full coverage along the length of the awning rail.
3. Position and Attach the Mounting Brackets
Next, position the mounting brackets onto the slide-out room. Align them with the pilot hole marks on the slide-out room and use Geoflex sealant to seal each hole before inserting the screws. This sealant will provide a watertight bond and prevent any potential leaks. Take your time during this step to ensure proper alignment and a secure attachment.
Here is a table summarizing the steps to secure the awning rail and brackets:
| Steps | Instructions |
|---|---|
| 1 | Drill pilot holes into the side of your RV, ensuring they are level and aligned with the center marks. |
| 2 | Attach the awning rail using screws, making sure it is straight and securely fastened. |
| 3 | Apply butyl tape behind the awning rail for additional sealant, pressing it firmly against the RV wall. |
| 4 | Position the mounting brackets on the slide-out room, aligning them with the pilot hole marks. |
| 5 | Seal each hole with Geoflex sealant before attaching the brackets with screws. |
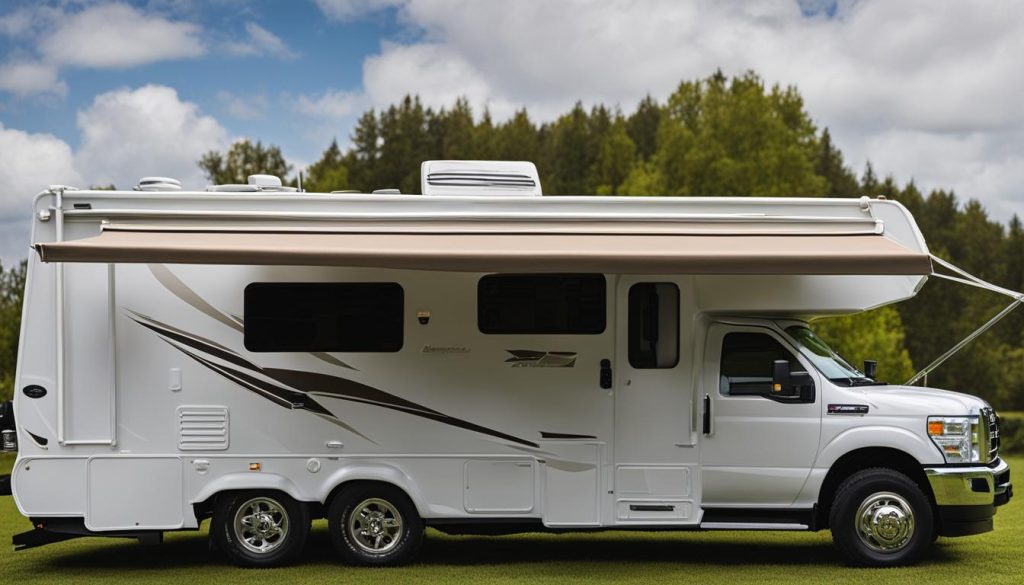
By following these steps, you can ensure that your awning rail and brackets are securely installed, providing a stable and reliable support system for your RV awning.
Final Steps and Testing
Now that you have completed the main steps of the RV awning installation process, it’s time to focus on the final touches and ensure everything is secure and functioning properly. Follow these steps to wrap up your DIY awning installation:
1. Attach the end cap extensions to the mounting brackets, but keep them loose for now. This will allow you to make any necessary adjustments later on.
2. Slide the awning tube into the rail, using silicone spray to ensure smooth gliding. Take your time to ensure that the awning is properly centered.
3. Roll up any slack in the awning fabric and secure the end caps and fabric using shoulder screws. Double-check that everything is tightly in place.
4. Finally, remove the spring tension pin and test the awning by rolling it out and retracting it a few times to ensure it operates smoothly and properly.
By following this DIY awning installation guide and completing these final steps, you have successfully installed an awning on your RV. Now, you can enjoy a shady retreat on your camping adventures, protected from the sun and ready to relax in comfort.
FAQ
Is installing an awning on an RV a difficult task?
Installing an awning on your RV may seem daunting, but with the right tools and instructions, it can be a straightforward and achievable DIY project.
What tools and materials do I need for installing an RV awning?
To install an RV awning, you will need a strong pair of work gloves, silicone spray, a flat head screwdriver, a power drill, a tape measure, a stepladder, and an inexpensive awning installation tool. If you are replacing an old awning, you may also need replacement fabric and brackets.
How do I remove the old fabric from my RV awning?
The first step in installing a new awning is to remove the old fabric. Extend the awning, unscrew the awning support on the right side, and remove the small screws that lock the fabric in place on both sides of the awning. Cut the old awning in half above the roller and make another cut down the roller. Pull out the piece with the slot on the end cap and create a new slot in the remaining piece for easy removal and installation of the new fabric.
How do I prepare the new fabric for installation?
Before installing the new awning fabric, apply silicone spray or baby oil to the grooves on the roller and upper guide near the roof. Use a screwdriver to flare open the top edge of the guide near the roof to prevent the fabric from catching. Ensure that the new fabric is smooth and free from any sharp edges that could damage it.
How do I install the new awning fabric on my RV?
Slide the new awning fabric into the grooves on the roller and upper guide near the roof, ensuring it is centered and aligned properly. Secure the fabric by screwing the end caps onto the mounting brackets, making sure the awning is rolled up tightly and does not sag. Test the awning by rolling it all the way out and then all the way in again.
How do I secure the awning rail and brackets to my RV?
To secure the awning rail, drill pilot holes and use screws to attach it, ensuring it is level and aligned with the center marks. Use butyl tape behind the rail for additional sealant. Position and attach the mounting brackets to the slide-out room, aligning with the pilot hole marks and using Geoflex sealant in each hole before adding the screws. Take your time to ensure everything is properly secured and sealed.
What are the final steps in installing an awning on my RV?
Attach the end cap extensions to the mounting brackets, keeping them loose for adjustments. Slide the awning tube into the rail using silicone spray to make it glide smoothly. Center the awning and roll up any slack. Secure the end caps and awning fabric with shoulder screws. Finally, test the awning by rolling it out and retracting it to ensure proper functionality.

