Easy Guide: Install an RV Vent Cover Correctly
gorvlifestyle.com and its partners may earn a commission if you purchase a product through one of our links
Learning how to install an RV vent cover is an essential skill for RV owners. Installing a vent cover can improve ventilation, prevent water damage, and increase the lifespan of your RV’s roof vent. With the right tools and step-by-step instructions, installing an RV vent cover can be a straightforward DIY project. This guide will provide you with all the information you need to install an RV vent cover correctly, including the essential tools, common mistakes to avoid, and useful tips for a successful installation.
Key Takeaways:
- Installing an RV vent cover is important for proper ventilation and protection against water damage.
- Essential tools for RV vent cover installation include a screwdriver, butyl tape, denatured alcohol, rags, a drill, dicor lap sealant, a caulking gun, and a measuring tape.
- Proper measurement, sealing, and wiring are crucial steps in the installation process.
- Avoid common mistakes like using incorrect sealant and neglecting roof inspection.
- Follow tips such as cleaning the vent screen regularly, choosing the right vent cover, and testing the vent’s operation after installation.
Understanding the Importance of an RV Roof Vent
An RV roof vent is a crucial component of your RV’s ventilation system. It plays a significant role in ensuring a comfortable and healthy living environment inside your RV. Let’s explore the importance and benefits of having a properly installed RV roof vent.
Benefits of an RV Roof Vent
An RV roof vent provides several benefits that contribute to the overall well-being of your RV and its occupants:
- Airflow in RV: The roof vent allows for proper airflow to circulate inside the RV. This helps in maintaining a fresh and comfortable indoor atmosphere, no matter the weather outside.
- Preventing Mold and Mildew: Adequate ventilation through the roof vent helps to prevent the growth of mold and mildew, which can be harmful to both your RV and your health.
- Natural Light: A properly installed roof vent promotes natural light entry, eliminating the need for excessive artificial lighting during the day. This not only saves energy but also enhances the overall ambiance inside your RV.
- Protecting RV Interior: By allowing hot air, odors, and moisture to escape, the roof vent helps in protecting the interior of your RV from potential damages caused by excess heat, condensation, and unwanted smells.
- Promoting Healthy Air Circulation: The roof vent ensures healthy air circulation by removing stale air and replacing it with fresh air from outside. This helps keep the atmosphere inside your RV clean, comfortable, and free from unpleasant odors.
Protecting Your RV with a Vent Cover
A properly installed roof vent cover adds an extra layer of protection to your RV’s ventilation system. It safeguards the vent and vent lid from rain, debris, and potential damage due to harsh weather conditions. The vent cover helps maintain the efficiency of the roof vent while minimizing the need for frequent cleaning and maintenance.
Essential Tools for RV Vent Cover Installation
Before you begin installing your RV vent cover, it’s important to gather all the necessary tools. Having the right tools on hand will make the installation process smooth and efficient. Here are the essential tools you’ll need:
- A screwdriver (or a square head driver for a portable drill) to remove the old vent cover and install the new one.
- Butyl tape to create a watertight seal between the vent cover and the roof.
- Denatured alcohol and rags to clean the area around the vent opening before installation.
- A drill with drill bits to secure the new vent cover in place.
- Dicor lap sealant to further seal and protect the installation.
- A caulking gun for easy application of the sealant.
- A measuring tape to ensure accurate placement of the new vent cover.
These tools will enable you to remove the old vent cover, clean the area, install the new vent cover securely, and seal it properly to prevent any leaks. Make sure to have these tools readily available before you start the installation process.

Step-by-Step Guide to Installing an RV Vent Cover
Installing a new RV vent cover is a simple process that can be broken down into easy-to-follow steps. By following this step-by-step guide, you’ll have your new vent cover installed in no time:
- Remove the old vent cover: Start by locating the screws or fasteners that secure the old vent cover in place. Use a screwdriver or a drill to remove the screws and take off the old cover.
- Measure the RV roof vent: Before installing the new vent cover, it’s important to measure the dimensions of the RV roof vent opening. Use a measuring tape to accurately measure the width and length of the opening.
- Seal the RV roof vent: Next, apply a layer of sealant around the edges of the RV roof vent opening. This will help create a watertight seal and prevent leaks. Use a trusted sealant product that is compatible with your RV’s roof material.
- Install the new vent cover: Carefully place the new vent cover over the RV roof vent opening. Align the screw holes of the cover with the holes on the RV roof. Secure the cover in place by tightening the screws with a screwdriver or a drill. Be cautious not to overtighten, as it may cause damage to the cover or roof.
- Wire the RV roof vent: If your RV roof vent has a built-in fan or light, you’ll need to wire it properly. Follow the manufacturer’s instructions for wiring the vent, ensuring proper connections and safety precautions.
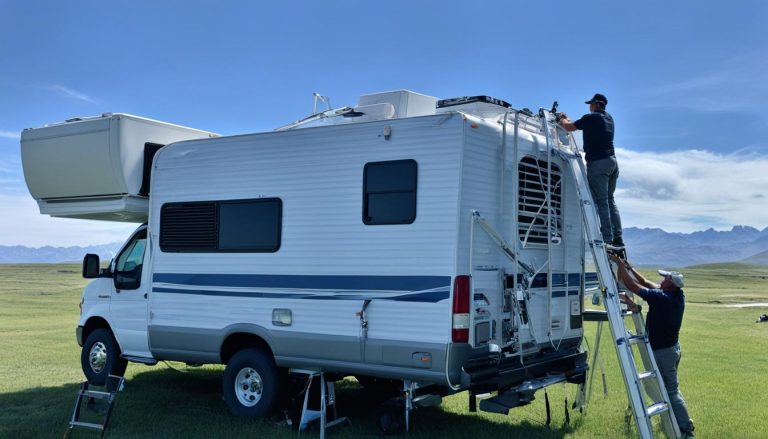
Once you have completed all the steps above, your new RV vent cover should be securely installed and ready for use. Take a moment to admire your handiwork and enjoy the improved ventilation and protection it provides for your RV.

Note: For a visual representation of the step-by-step process, refer to the image above.
Common Mistakes to Avoid When Installing RV Vent Covers
When it comes to installing RV vent covers, it’s crucial to steer clear of common mistakes that can result in future problems. By being aware of these mistakes and taking the necessary precautions, you can ensure a smooth and effective installation process.
Improper Measurement
One of the most common mistakes is improper measurement of the vent opening. Failing to accurately measure the size of the vent can lead to ill-fitting vent covers and potential leaks. Always double-check your measurements to ensure a proper fit.
Improper Sealing
Another mistake to avoid is improper sealing of the vent cover. Using the correct sealant is essential for preventing water leaks and damage. Be sure to follow the manufacturer’s instructions and use a high-quality sealant that is compatible with your RV’s roof material.
Overtightening Screws
It’s important to avoid overtightening the screws when installing the vent cover. Over-tightening can lead to cracks in the vent cover, which can compromise its effectiveness. Use a moderate amount of force when tightening the screws to ensure a secure fit without damaging the cover.
Using Incorrect Sealant
Using the wrong sealant can also be a common mistake. It’s crucial to use sealant specifically designed for RV roof applications. Using the correct sealant will ensure a proper seal and prevent water intrusion.
Neglecting Roof Inspection
Before installing the vent cover, it’s important to thoroughly inspect the roof for any existing damage or weak spots. Neglecting to do so can result in further damage or complications during the installation process. Take the time to inspect the roof and address any issues before proceeding.
Improper Wiring of RV Vent
Improper wiring of the RV vent is another mistake to avoid. Ensure that the wiring connections are secure and follow the manufacturer’s instructions. A faulty wiring connection can lead to malfunctioning vents or electrical issues within your RV.
Not Testing Vent Operation
Finally, it’s crucial to test the vent’s operation after installation. Failing to do so can result in a vent that doesn’t function properly, affecting air circulation and ventilation within your RV. Test the vent’s opening and closing mechanism as well as the fan (if applicable) to ensure everything is working correctly.
By avoiding these common mistakes and following the proper installation steps, you can ensure a successful and long-lasting RV vent cover installation.
Tips for a Successful RV Vent Cover Installation
When it comes to installing an RV vent cover, there are several important tips to keep in mind. Following these tips will ensure a smooth and hassle-free installation process while maximizing the effectiveness of your RV vent cover.
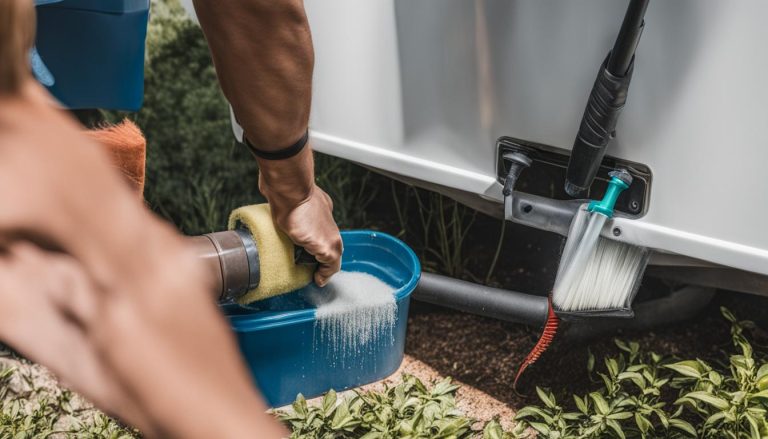
Firstly, it is crucial to regularly clean the vent screen to prevent any blockages. A clogged vent screen can restrict airflow and reduce ventilation efficiency. By keeping the vent screen clean, you’ll ensure optimal airflow throughout your RV.
Secondly, choosing the right vent cover is essential. Consider factors such as weather resistance, durability, and ease of installation. Take the time to research and select a vent cover that meets your specific needs and preferences.
Using the correct sealant is also crucial to prevent any leaks. Follow the manufacturer’s instructions and use the recommended sealant for the installation. Proper sealing will ensure that your RV remains watertight and protected from any potential water damage.
Prior to installation, it is important to inspect the roof thoroughly. Look for any signs of damage or weak spots that may need to be addressed before installing the vent cover. Taking these precautions will help avoid any unwanted surprises and ensure a secure installation.
Once the vent cover is installed, it is recommended to test the vent’s operation. Make sure it opens and closes smoothly and has a secure latch. This will ensure proper functionality and prevent any potential issues in the future.
Consider additional features that may enhance the performance of your RV vent cover. For example, an automatic vent cover equipped with a rain sensor can provide added convenience and protection against unexpected weather conditions.
Lastly, always follow the manufacturer’s instructions carefully. Each vent cover may have specific installation guidelines that should be followed to ensure optimal performance. By adhering to these instructions, you’ll avoid any potential mistakes and ensure a successful installation.
Following these tips will help you achieve a successful RV vent cover installation, promoting optimal ventilation, and protecting your RV. By keeping your vent screen clean, selecting the right vent cover, using the correct sealant, inspecting the roof, testing vent operation, considering additional features, and following the manufacturer’s instructions, you can enjoy the benefits of a well-installed RV vent cover.
FAQ
How do I install an RV vent cover?
To install an RV vent cover, you will need to gather the essential tools such as a screwdriver, butyl tape, denatured alcohol, rags, a drill with drill bits, dicor lap sealant, a caulking gun, and a measuring tape. Then, follow the step-by-step guide for removing the old vent cover, measuring the RV roof vent, sealing the RV roof vent, and wiring the new RV roof vent.
Why is an RV roof vent important?
An RV roof vent is essential for ventilation, preventing mold and mildew growth, controlling temperature, removing odors, and bringing in natural light. It also protects the vent and vent lid from rain, debris, and frequent cleaning.
What tools do I need for RV vent cover installation?
The essential tools for RV vent cover installation include a screwdriver (or a square head driver for a portable drill), butyl tape, denatured alcohol, rags, a drill with drill bits, dicor lap sealant, a caulking gun, and a measuring tape.
How do I install an RV vent cover step by step?
The step-by-step guide for installing an RV vent cover involves removing the old vent cover, measuring the RV roof vent, sealing the RV roof vent, and wiring the new RV roof vent. Following these steps will ensure a proper and secure installation.
What are common mistakes to avoid when installing RV vent covers?
Common mistakes to avoid when installing RV vent covers include improper measurement of the vent opening, improper sealing, overtightening screws, using incorrect sealant, neglecting a roof inspection, improper wiring, and not testing the vent’s operation after installation.
What are some tips for a successful RV vent cover installation?
Tips for a successful RV vent cover installation include regularly cleaning the vent screen, choosing the right vent cover, using the correct sealant, inspecting the roof before installation, testing the vent’s operation, considering additional features, and following the manufacturer’s instructions carefully.