DIY Guide: How to Install an RV Awning from Scratch
gorvlifestyle.com and its partners may earn a commission if you purchase a product through one of our links
Installing an RV awning from scratch may seem like a daunting task, but with the right tools and instructions, it can be a rewarding DIY project. In this guide, we will provide you with a step-by-step process to successfully install an RV awning on your own. We will cover everything from gathering the necessary tools to securing the awning in place, ensuring a secure and stylish addition to your RV.
Key Takeaways:
- Installing an RV awning yourself can be a rewarding and cost-effective DIY project.
- Gather all the necessary tools before starting the installation process.
- Removing the old awning fabric is the first step in the installation process.
- Prepare the new awning fabric by applying silicone spray and flaring open any edges that may catch on the fabric.
- Slide the new fabric into the awning track and roll it onto the roller tube counterclockwise.
Continue reading for a detailed guide on how to install an RV awning from scratch and make the most of your outdoor space on your next RV adventure.
Gathering the Tools
Before you embark on your DIY RV awning installation, it’s important to gather all the necessary tools. Having the right tools on hand will make the installation process smoother and more efficient. Here are the essential tools you’ll need:
- A pair of work gloves
- Silicone spray
- A flat head screwdriver
- A power drill
- A tape measure
- A stepladder
- An awning installation tool (recommended for ease)
With these tools at your disposal, you’ll be well-equipped to tackle the task of installing an RV awning on your own.
Removing the Old Awning Fabric
Before you can install a new RV awning, it’s important to remove the old fabric. Follow these steps to easily remove the old awning fabric and prepare for the installation of your new awning.
- Step 1: Extend the Awning
- Step 2: Unscrew the Awning Support
- Step 3: Inspect the Awning Bracket
- Step 4: Protect the New Fabric
- Step 5: Remove the Small Screws
- Step 6: Cut and Pull Out the Old Awning
Start by extending the awning fully, allowing easy access to the fabric and its supporting components.
Take a moment to identify the awning support on the right side of the RV. Use a screwdriver or a power drill to unscrew it carefully. This will release the tension and allow you to manipulate the fabric more easily during the removal process.
While the awning is extended, inspect the awning bracket for any damage or signs of wear. It’s crucial to address any issues before installing the new awning fabric. If you notice any damage, replace the bracket with a new one to ensure a secure installation.
Before removing the old fabric, apply painter’s tape to the sharp edges of the support. This will prevent any accidental tears or snags when installing the new fabric.
Locate the small screws that hold the old fabric in place. Use a screwdriver to remove them one by one. Be sure to keep them in a safe place as you will need them later to secure the new fabric.
With the screws removed, cut the old awning fabric in half using a sharp knife or scissors. This will make it easier to remove the fabric piece by piece. Start by pulling out one piece of fabric, then drill a new hole at the end of the remaining piece to create a new slot. This will allow the fabric to slide out of the guide near the roof more easily. Pull out the larger piece to the right to completely remove it from the guide.
By following these steps, you can safely and efficiently remove the old awning fabric in preparation for the installation of your new RV awning.

Quote:
Removing the old awning fabric is an important step in the installation process. It ensures a clean and secure foundation for your new awning, allowing you to enjoy all the benefits it has to offer. Take your time and be cautious during this process to avoid any unnecessary damage or complications.
Your progress so far:
| Section | Status |
|---|---|
| Section 1: DIY Guide: How to Install an RV Awning from Scratch | Done |
| Section 2: Gathering the Tools | Done |
| Section 3: Removing the Old Awning Fabric | In Progress |
| Section 4: Preparing the New Awning Fabric | Not Started |
| Section 5: Installing the New Awning Fabric | Not Started |
| Section 6: Securing the Awning in Place | Not Started |
| Section 7: Enjoying Your New RV Awning | Not Started |
Preparing the New Awning Fabric
Now that the old fabric has been removed, it’s time to prepare the new awning fabric for installation. This step is crucial to ensure a smooth installation process and prevent any damage to the new fabric. Follow these best practices for an easy awning installation process:
- Apply a silicone spray or baby oil to the grooves on the roller and the upper guide near the roof. This lubrication will make the new fabric glide on easier, saving you time and effort.
- Use a screwdriver to flare open any edges or corners that may catch on the fabric. By doing this, you’ll eliminate potential snags and tears, ensuring a seamless installation.
By taking the time to prepare the new awning fabric, you’ll set yourself up for success and a hassle-free RV awning installation. Remember, following these easy steps is key to achieving the best results and enjoying your new awning to the fullest.
Awning Fabric Preparation Checklist
| Step | Actions |
|---|---|
| 1 | Apply silicone spray or baby oil to the grooves on the roller and upper guide near the roof |
| 2 | Use a screwdriver to flare open any edges or corners that may catch on the fabric |

Installing the New Awning Fabric
Now that you have prepared the new fabric, it’s time to install it onto your RV awning. Follow these step-by-step instructions to ensure a proper and successful installation:
- Slide the new fabric into the awning track on your RV. Make sure to center the fabric between the end caps for an even appearance.
- Roll the fabric onto the roller tube in a counterclockwise direction. Take your time to ensure that the fabric is evenly and smoothly rolled.
- Reattach the awning arms to the roller tube and securely fasten them in place. This will provide the necessary support for your new awning fabric.
- Test the awning to make sure it rolls up correctly and smoothly. This will help you identify any potential issues before finalizing the installation.
- Insert set screws on the top of the roller tube to keep the fabric securely in place. These screws will prevent the fabric from unraveling or becoming loose.
By following these steps, you can ensure a step-by-step awning installation process that is beginner-friendly and leads to a properly installed RV awning.
Pro Tip:
Take your time during the installation process and double-check each step to avoid any mistakes. Proper RV awning installation is essential for the longevity and functionality of your awning.
Securing the Awning in Place
Proper RV awning installation is essential for ensuring a secure and durable awning that will withstand the test of time. By following the best practices for installing an RV awning, you can enjoy a worry-free camping experience. Here are the steps to secure your awning in place:
- Reattach the main bolts: Begin by reattaching the main bolts that hold the awning to the side of your RV. Make sure they are tightened securely to provide a stable foundation for your awning.
- Replace the small screws: Replace any small screws that prevent the fabric from sliding in the track. This will ensure that the awning fabric stays in place and doesn’t move out of position during use.
- Pop the awning arms back into their brackets: Gently pop the awning arms back into their brackets on the RV. Ensure that they are securely fastened and aligned properly.
- Extend the awning arms to the ground: Extend the awning arms downward until they reach the ground. This will provide extra stability and support to the awning structure.
- Roll out the awning about 1 foot from the RV: Roll out the awning fabric approximately 1 foot from the RV to create the desired amount of shade or coverage. This will also help test the functionality of the awning before final adjustments.
- Protect the upper awning brackets: Cover the upper awning brackets with electrical tape or masking tape to prevent scratching. This simple step will help preserve the appearance and condition of your awning.
- Spread the end of the track: Use a flat blade screwdriver to spread the end of the track slightly. This will make it easier to remove and install the fabric, ensuring a smooth transition and minimizing the risk of damage.
By following these steps, you can secure your RV awning in place effectively. Taking the time to properly install and secure your awning will provide peace of mind knowing that it will withstand various weather conditions and enhance your outdoor camping experience.
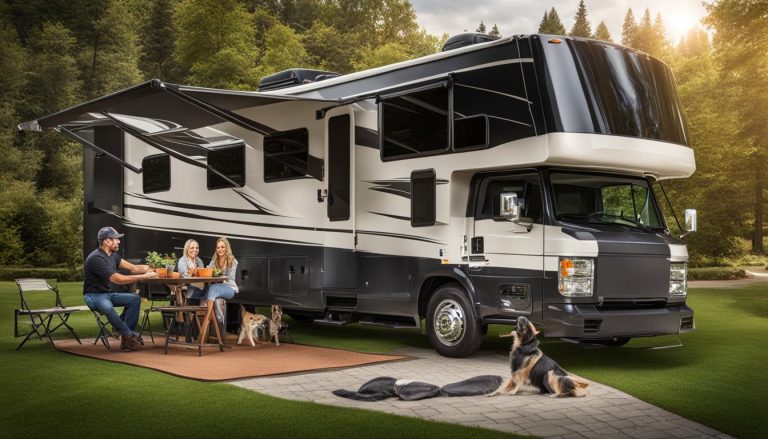
Enjoying Your New RV Awning
Now that you have successfully installed and secured your new awning fabric, it’s time to reap the benefits of your efforts. With this stylish and functional addition to your RV, you can enjoy the shade on hot summer days or seek shelter from unpredictable weather conditions. Your awning will provide not only comfort but also convenience on all your RV adventures.
Imagine relaxing under your awning, sipping a cold drink, and watching the world go by. Whether you’re camping in the great outdoors or parked at your favorite RV resort, your awning will create a perfect outdoor living space. You can host friends and family, have a cozy outdoor dinner, or simply indulge in some quality alone time.
From protecting your outdoor furniture from sun damage to providing a shaded area for pets or children to play, your new RV awning has endless possibilities. It’s an investment that enhances the overall functionality and aesthetics of your RV.
FAQ
Is installing an RV awning from scratch a difficult task?
Installing an RV awning from scratch may seem daunting, but with the right tools and instructions, it can be a rewarding DIY project.
What tools do I need to install an RV awning?
To install an RV awning, you will need a pair of work gloves, silicone spray, a flat head screwdriver, a power drill, a tape measure, a stepladder, and an awning installation tool (recommended for ease).
How do I remove the old awning fabric?
To remove the old awning fabric, extend the awning, unscrew the awning support on the right side, remove the small screws that hold the fabric in place, cut the old awning in half, and pull out each piece separately.
How do I prepare the new awning fabric for installation?
Before installing the new awning fabric, apply silicone spray or baby oil to the grooves on the roller and upper guide near the roof. Use a screwdriver to flare open any edges that may catch on the fabric.
What are the steps for installing the new awning fabric?
To install the new awning fabric, slide it into the awning track on the RV, center it between the end caps, roll it onto the roller tube counterclockwise, reattach the awning arms, and secure them in place. Finally, insert set screws to keep the fabric in place.
How do I secure the awning in place?
To secure the awning, reattach the main bolts that hold it to the side of the RV, replace the small screws that prevent the fabric from sliding, and pop the awning arms back into their brackets. Make sure the awning is rolled out about 1 foot from the RV and cover the upper awning brackets with electrical tape or masking tape to prevent scratching.
What are the benefits of having an RV awning?
Having an RV awning provides shade on hot summer days and protection from the elements, adding comfort and convenience to your RV adventures.