RV Vent Cover Installation Guide
gorvlifestyle.com and its partners may earn a commission if you purchase a product through one of our links
Installing a vent cover on your RV is a simple DIY project that can provide numerous benefits. It allows you to keep your air vents open and the fans running even in rainy weather, promotes proper airflow, prevents moisture buildup, and protects the interior of your RV from the elements. In this comprehensive guide, we will walk you through the step-by-step process of installing a vent cover on your RV roof.
Key Takeaways:
- Installing a vent cover on your RV improves airflow, even during rainy weather.
- Proper ventilation helps to prevent moisture buildup and protects the interior of your RV.
- Choosing the right vent cover and following the correct installation steps are important for a successful installation.
- Regular maintenance and cleaning of your RV vent covers are necessary to ensure their longevity.
- By installing vent covers, you can enjoy a more comfortable and functional RV experience.
Are RV Vent Covers Worth It?
RV vent covers offer numerous benefits and are definitely worth investing in. They allow you to keep your vents open and the fans running even during rainy weather, which helps improve airflow and prevents the buildup of humidity inside your RV. This ensures a comfortable and pleasant indoor environment no matter the weather conditions.
Additionally, vent covers act as a protective shield for your vents and the interior of your RV. They safeguard against rain, leaves, and other debris, preventing them from entering and potentially causing damage. With vent covers installed, you can enjoy peace of mind knowing that your vents are guarded against unwanted elements.
Moreover, these covers provide an extra layer of insulation, helping to regulate the temperature inside your RV. By promoting proper airflow, vent covers contribute to efficient cooling and heating, reducing reliance on air conditioning and heating systems. This can ultimately lead to energy savings and a more sustainable camping experience.
When it comes to maintenance, vent covers are relatively low-maintenance. They are designed to withstand various weather conditions and often feature UV-resistant materials, ensuring long-lasting durability. Cleaning is a breeze too – simply wipe them down periodically to remove dust and debris, keeping them in optimal condition.
By investing in RV vent covers, you not only enhance the overall comfort and functionality of your RV, but also protect its vital components from potential damage. Whether you’re camping in rainy or sunny weather, vent covers provide peace of mind and improve your overall camping experience.
Don’t miss out on the benefits that RV vent covers can bring to your camping adventures. Start enjoying improved airflow, protection, and insulation by installing vent covers on your RV today!
How to Choose the Right RV Vent Cover
When it comes to selecting an RV vent cover, several key factors should guide your decision-making process. By considering these factors, you can ensure that you choose a vent cover that meets your specific needs, providing optimal airflow and protection for your RV.
Factors to Consider
- Venting and Airflow: Look for a vent cover that offers sufficient venting for high airflow. Adequate ventilation is crucial to maintaining a comfortable interior temperature and preventing condensation buildup in your RV. Ensure that the vent cover design allows for maximum air circulation.
- Cleaning Accessibility: Opt for a vent cover that allows easy access for cleaning. Over time, dust and debris can accumulate on the cover, reducing the effectiveness of the ventilation system. A cover with accessible cleaning features will make maintenance a breeze, helping to keep your RV in optimal condition.
- UV-Resistant Materials: Durability is key when it comes to your RV’s vent cover. Choose a cover made from UV-resistant materials to ensure that it can withstand exposure to the sun’s rays without fading or deteriorating. This will help prolong the lifespan of the cover and maintain its functionality over time.
- Proper Fit: Measure the size of your existing roof vent opening to ensure a proper fit. A vent cover that doesn’t fit securely may be prone to vibrating or coming loose, compromising its effectiveness. Take accurate measurements to ensure a snug and secure installation.
- Brand Reputation: Consider brands that are known for their quality and reliability in the RV industry. Research customer reviews and ratings to gauge the overall satisfaction levels with a particular brand or model. Look for brands that offer features like maximum airflow, easy installation, and durability.
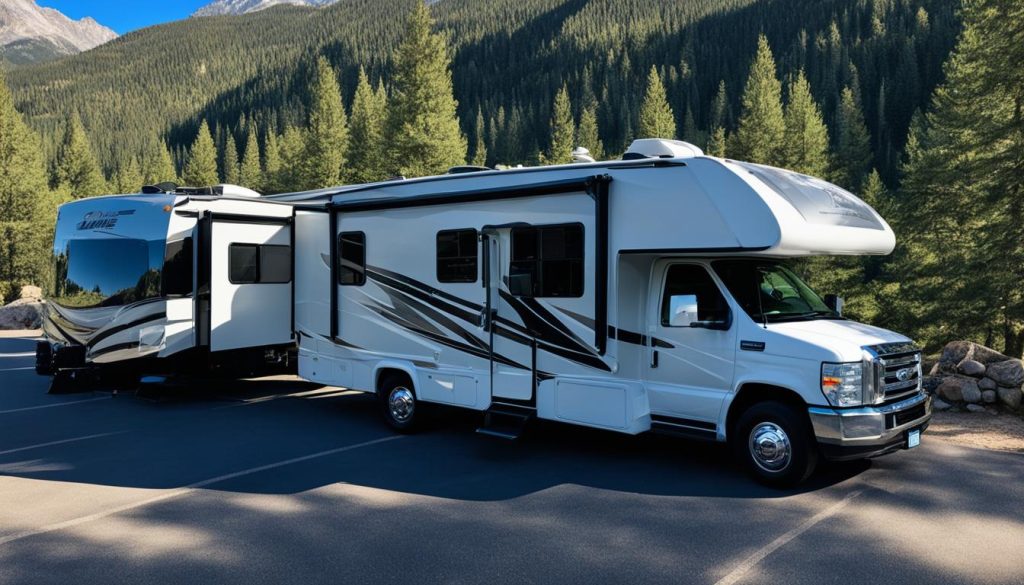
By taking these factors into account, you can make an informed decision and choose an RV vent cover that meets your specific needs. One notable brand that offers a range of vent covers with excellent features is the Camco Aero-Flo vent cover.
| Features | Camco Aero-Flo Vent Cover |
|---|---|
| High Ventilation | Yes |
| Easy Cleaning Access | Yes |
| UV-Resistant | Yes |
| Proper Fit | Yes |
| Brand Reputation | Well-established |
Choosing the right RV vent cover is an essential step in optimizing ventilation and protecting your RV. With the right cover, you can ensure efficient airflow, easy maintenance, and long-term durability. Invest in a high-quality vent cover that meets your specific requirements and enjoy the benefits it brings to your RV.
How to Install an RV Vent Cover
Installing an RV vent cover is a simple process that requires a few basic tools and materials. By following these step-by-step instructions, you can easily install a vent cover on your RV roof.
- Start by separating the top of the vent cover from the bottom, ensuring that all components are included.
- Gather the necessary tools, including a drill, a marker, a screwdriver, and a ratchet or wrench.
- Line up the mounting brackets with the pre-existing holes on your RV roof.
- Use a marker to mark the locations for drilling the holes.
- Pre-drill the appropriate holes using a drill bit that is slightly smaller than the screws provided with the vent cover.
- Attach the mounting brackets to the roof by inserting the screws into the pre-drilled holes.
- Position the base of the vent cover over the screws, ensuring a secure fit.
- Secure the vent cover to the mounting brackets using washers and nuts, tightening them with a ratchet or wrench.
- Align the hinge and cover, making sure they are properly aligned and functioning smoothly.
- Tighten all screws and ensure that the vent cover is securely installed on your RV roof.
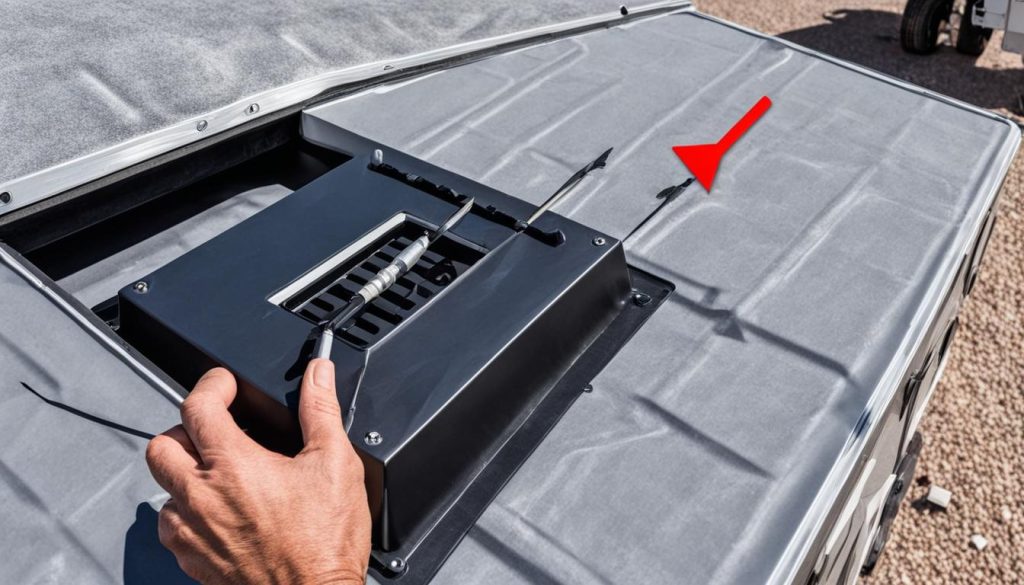
Following these simple steps will ensure a successful installation of an RV vent cover. Now you can enjoy the benefits of improved airflow, protection from the elements, and a more comfortable RV experience.
Tips for Maintenance and Cleaning
To keep your RV vent covers in good condition, regular maintenance and cleaning are essential. Follow these tips to ensure that your vent covers stay functional and durable for years to come.
- Inspect the covers periodically: Check your RV vent covers regularly for any signs of damage or wear. Look for cracks, discoloration, or warping, as these can affect their effectiveness. If you notice any significant issues, it’s important to replace the covers promptly to maintain proper ventilation.
- Clean the vent covers regularly: Over time, vent covers can accumulate dust, debris, and other particles that can impede airflow. Clean the covers regularly to remove any buildup that may hinder their performance. Use a mild detergent and water solution, and gently scrub the covers with a soft brush or cloth. Avoid using harsh chemicals or abrasive cleaning tools that can cause damage.
- Promote airflow: Keeping the vent covers clean is crucial for promoting proper airflow in your RV. When the covers are free from obstructions, they can effectively ventilate your RV and prevent condensation and moisture buildup. This helps to maintain a comfortable and healthy interior environment.
- Check for leaks: During the cleaning process, inspect the sealing and closing mechanisms of your vent covers. Ensure that they create a tight seal and prevent any water leaks or drafts from entering your RV. If you notice any gaps or issues with the seals, address them promptly to avoid potential water damage or heat loss.
- Protect against UV damage: UV radiation can degrade the materials of your vent covers over time. Apply a UV-resistant coating or consider investing in covers that are specifically designed to withstand prolonged sun exposure. This will help extend the lifespan of your vent covers and maintain their overall performance.
By following these maintenance and cleaning tips, you can ensure that your RV vent covers remain in optimal condition, providing the necessary ventilation and protection for your RV.
Regular maintenance and cleaning of your RV vent covers are essential for optimal performance and longevity. By inspecting the covers, cleaning them regularly, and promoting airflow, you can enhance the overall ventilation and comfort in your RV. Remember to check for leaks and protect against UV damage to maintain the effectiveness of your vent covers.
Enjoy the Benefits of RV Vent Covers
By installing vent covers on your RV, you can enjoy a range of benefits. These covers allow for proper ventilation and airflow, even in inclement weather, ensuring a comfortable interior environment. With their easy DIY installation process and comprehensive guide, adding vent covers to your RV is a practical and valuable upgrade.
One of the primary advantages of RV vent covers is their ability to keep your RV cool and comfortable. They promote air circulation and prevent the buildup of heat and humidity, making your RV a comfortable space to relax and unwind, no matter the weather conditions outside.
In addition to enhancing comfort, vent covers also protect your vents and interior from rain, leaves, and other debris. This reduces the need for frequent cleaning and maintenance, allowing you to spend more time enjoying your RV and less time on upkeep tasks. With their durable design and UV-resistant materials, vent covers provide long-lasting protection for your RV’s interior.
Thanks to their step-by-step installation process and user-friendly design, RV vent covers are easy to install even for first-time DIYers. The RV vent cover installation guide and tutorial provided in this comprehensive article will ensure a smooth and hassle-free installation. You’ll have your vent covers in place quickly, allowing you to reap the benefits without any unnecessary complications.
FAQ
How do I install a vent cover on my RV?
Installing a vent cover on your RV is a simple DIY project. Start by separating the top of the vent cover from the bottom. Gather the necessary tools and materials, including a drill, marker, screwdriver, and ratchet or wrench. Line up the mounting brackets, mark their locations, and pre-drill the appropriate holes. Attach the brackets, position the base of the cover over the screws, and secure it with washers and nuts. Finally, align the hinge and cover, tighten the screws, and ensure a secure installation.
Are RV vent covers worth it?
Yes, RV vent covers are worth it. They allow you to keep your vents open and the fans running even in rainy weather, which improves airflow and prevents moisture buildup inside the RV. Vent covers also protect your vents and the interior of your RV from rain, leaves, and other debris, making them a valuable investment that enhances comfort and functionality.
How do I choose the right RV vent cover?
When selecting an RV vent cover, consider factors such as high airflow venting, easy access for cleaning, and UV-resistant materials for durability. Measure the size of your existing roof vent opening to ensure a proper fit. Look for brands that offer features like maximum airflow, easy installation, and durability, such as the Camco Aero-Flo vent cover.
What are some tips for maintenance and cleaning?
To keep your RV vent covers in good condition, inspect them periodically for any signs of damage or wear and replace them if necessary. Clean the vent covers regularly to remove dust, debris, and any buildup that can impede airflow. Use a mild detergent and water solution, along with a soft brush or cloth, to gently scrub the covers. Avoid using harsh chemicals or abrasive cleaning tools that can damage the covers.
What are the benefits of RV vent covers?
By installing vent covers on your RV, you can enjoy benefits such as proper ventilation and airflow, even in inclement weather. Vent covers promote air circulation, keeping your RV cool and comfortable by preventing the buildup of heat and humidity. Additionally, vent covers protect your vents and interior from rain, leaves, and other debris, reducing the need for frequent cleaning and maintenance. With an easy DIY installation process, adding vent covers to your RV is a practical and valuable upgrade.

