Easy RV Vent Cover Installation Guide
gorvlifestyle.com and its partners may earn a commission if you purchase a product through one of our links
Are you looking to improve the ventilation and airflow in your RV? Installing an RV vent cover is a simple and cost-effective solution. In this comprehensive RV vent cover installation guide, we will walk you through the step-by-step process to help you successfully install a vent cover on your RV roof.
Key Takeaways:
- Installing an RV vent cover enhances the functionality of your RV and ensures proper airflow.
- A vent cover allows for fresh air circulation and prevents the buildup of humidity and odors.
- Benefits of installing an RV vent cover include improved ventilation, rain protection, and debris prevention.
- Choose the right type and size of vent cover that suits your RV’s vent openings.
- Gather the necessary tools and materials before starting the installation process.
Why Install an RV Vent Cover?
There are several compelling benefits of installing an RV vent cover that make it a worthwhile investment for any RV owner. By understanding these advantages, you’ll realize the importance of proper ventilation and airflow in your RV.
Improved Ventilation and Airflow
One of the primary advantages of having an RV vent cover is the improved ventilation and airflow it provides. By keeping your RV’s vents open, even during rain showers, you can ensure a constant flow of fresh air inside the vehicle. This not only helps to keep the interior cool but also prevents the accumulation of moisture, mold, and unpleasant odors.
Rain Protection
RV vent covers are specifically designed to protect your vents from water intrusion during inclement weather. Their durable construction prevents rainwater from entering your RV, allowing you to keep your vents open and enjoy natural ventilation regardless of the weather conditions outside.
Debris Prevention
Another significant benefit of installing an RV vent cover is the prevention of debris such as leaves, twigs, and insects from entering your RV through the vent openings. The vent cover acts as a barrier, keeping unwanted debris out while still allowing for proper airflow. This helps to maintain a clean and comfortable interior environment.
Enhanced Comfort and Functionality
Overall, an RV vent cover enhances the comfort and functionality of your RV. By ensuring a steady airflow and preventing the accumulation of moisture and odors, it creates a more pleasant living environment. Additionally, it eliminates the need to constantly open and close vents based on weather conditions, providing convenience and peace of mind during your travels.
Now that you understand the benefits of installing an RV vent cover, let’s explore how to choose the right one in the next section.
Choosing the Right RV Vent Cover
When it comes to selecting an RV vent cover, finding the right type and brand that suits your needs is essential. With a wide range of options available on the market, it can be overwhelming to make a choice. However, we’ve narrowed down the selection to highlight some of the best RV vent cover brands and the different types you can consider.
Types of RV Vent Covers
- Camco Aero-Flo Vent Cover: Known for its high airflow capacity and easy swing-open access for cleaning, the Camco Aero-Flo vent cover is a popular choice among RV enthusiasts. With its durable construction and sleek design, it not only provides excellent ventilation but also adds an aesthetic appeal to your RV.
- MaxxAir Vent Cover: MaxxAir is another trusted brand that offers a range of vent covers designed to optimize airflow and protect against rain, dust, and debris. These covers feature louvers and a rain shield to ensure efficient ventilation while keeping unwanted elements out of your RV.
- VentMate Vent Cover: VentMate is known for its versatile vent covers that fit a wide range of vent sizes. Their covers feature a removable bug screen and are UV resistant, providing durability and functionality for your RV.
While these are some of the best RV vent cover brands in the market, it’s important to ensure compatibility with your RV’s existing vent openings. Most RV roof vents are standardized at 14″ x 14″, but it’s always recommended to measure your vent openings to ensure a proper fit.
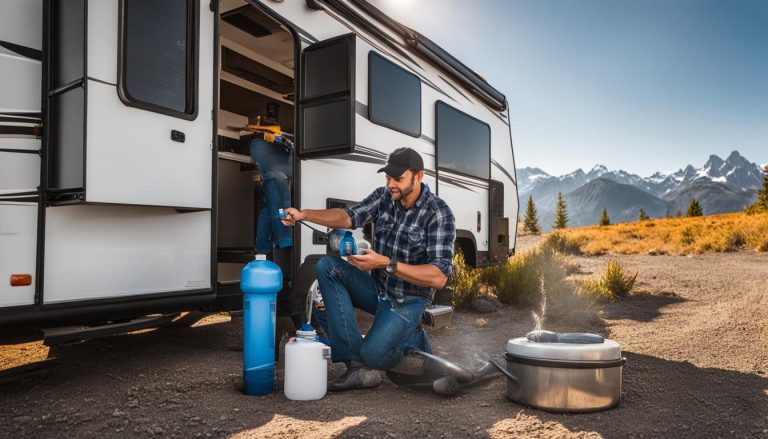
Tools and Materials Needed
Before you begin the RV vent cover installation, gather the necessary tools and materials. You will need the following:
- New RV vent cover (compatible with your RV’s vent size)
- Drill with the appropriate drill bit
- Sharpie or marker
- Phillips head screwdriver
- Ratchet or wrench for securing nuts and bolts
- Silicone sealant
- Cleaning supplies for prepping the roof surface
Having these tools and materials ready will ensure a smooth and efficient installation process.

| Tool/Material | Description |
|---|---|
| New RV vent cover | A compatible vent cover that fits your RV’s vent size. |
| Drill with appropriate drill bit | To create holes for screws during installation. |
| Sharpie or marker | To mark the areas where holes need to be drilled. |
| Phillips head screwdriver | To tighten screws during installation. |
| Ratchet or wrench | To secure nuts and bolts. |
| Silicone sealant | To provide a watertight seal and prevent leaks. |
| Cleaning supplies | To clean and prepare the roof surface before installation. |
Step-by-Step RV Vent Cover Installation
Installing an RV vent cover is a straightforward process that can be done with a few simple steps. Follow this guide to ensure a successful installation:
- Choose the right vent cover: Select a vent cover that is compatible with your RV’s vent size and matches your specific needs. Consider factors such as airflow capacity, swing-open access, and brand reputation.
- Gather the necessary tools and materials: Before you begin the installation, make sure you have all the required tools and materials on hand. These may include a new vent cover, a drill with the appropriate drill bit, a sharpie or marker, a phillips head screwdriver, a ratchet or wrench, silicone sealant, and cleaning supplies for the roof surface.
- Clean the roof surface: Thoroughly clean the area where you will be installing the vent cover. Remove any dirt, debris, or old sealant to ensure a clean and smooth surface.
- Mark the position of the vent cover: Place the vent cover over the vent opening and use a marker or sharpie to mark the screw holes on the roof surface. This will serve as a guide for drilling the holes.
- Drill the screw holes: Use a drill with the appropriate drill bit to carefully drill the marked screw holes on the roof surface. Take caution to avoid damaging the RV’s roof.
- Install the vent cover: Line up the screw holes on the vent cover with the drilled holes on the roof surface. Secure the vent cover in place by inserting screws through the holes and tightening them using a phillips head screwdriver.
- Apply silicone sealant: To ensure a watertight seal, apply silicone sealant around the edges of the vent cover. This will prevent water from entering through the gaps and provide added protection against leaks.
Once you have completed these steps, your RV vent cover should be securely installed and ready to use. Enjoy improved ventilation and airflow in your RV, even during adverse weather conditions.

Benefits of Installing an RV Vent Cover
Installing an RV vent cover comes with several advantages that contribute to improved RV ventilation. By adding a vent cover to your RV, you can enjoy the following benefits:
- Continuous airflow and ventilation: A vent cover allows for the constant circulation of fresh air inside your RV, ensuring a comfortable and pleasant interior environment.
- Rain protection: With a vent cover in place, you can keep your RV vents open even during rainy weather. The cover acts as a shield, preventing rainwater from entering your RV while still allowing air to flow freely.
- Debris prevention: Vent covers serve as a barrier against debris, such as leaves and insects, entering your RV through the vent openings. This helps to keep your RV clean and bug-free.
By installing an RV vent cover, you can significantly enhance the ventilation and airflow in your RV, creating a more enjoyable camping experience. Not only will you have better air quality, but you’ll also be able to maintain a comfortable temperature inside your RV, regardless of the weather conditions.
Conclusion: Enjoy Fresh Air in Your RV with an RV Vent Cover
Installing an RV vent cover is a straightforward and practical solution to improve the ventilation and airflow in your RV. By carefully following the step-by-step installation guide and selecting the right vent cover for your specific RV, you can enjoy the luxury of fresh air inside your vehicle, regardless of the weather conditions outside.
With an RV vent cover in place, you can effortlessly keep your vents open, even in rainy weather. This not only ensures continuous airflow but also prevents the accumulation of moisture, mold, and unpleasant odors inside your RV. Furthermore, the vent cover acts as a barrier against debris such as leaves and pesky insects, keeping your RV interior clean and pest-free.
Investing in an RV vent cover is a wise decision for any RV owner. By effortlessly enhancing ventilation and protecting against the elements, you can make your RV travels more comfortable and enjoyable. So, equip your RV with a vent cover today and experience the convenience of fresh air circulation in your mobile home, wherever your adventures take you.
FAQ
Why should I install an RV vent cover?
Installing an RV vent cover allows for improved ventilation and airflow inside the RV, keeping the interior cool and preventing the accumulation of moisture, mold, and odors. Vent covers also enable you to keep your vents open even during rain showers, as they provide protection against water intrusion. Additionally, vent covers help to prevent debris such as leaves and insects from entering your RV through the vent openings.
How do I choose the right RV vent cover?
When selecting an RV vent cover, it’s important to choose the right type and brand that suits your needs. Consider factors such as airflow capacity, ease of access for cleaning, and size compatibility with your existing vent openings. Popular brands for RV vent covers include Camco, MaxxAir, and VentMate.
What tools and materials do I need for RV vent cover installation?
The tools and materials you will need for RV vent cover installation include a new RV vent cover compatible with your RV’s vent size, a drill with the appropriate drill bit, a sharpie or marker, a Phillips head screwdriver, a ratchet or wrench for securing nuts and bolts, silicone sealant, and cleaning supplies for preparing the roof surface.
How do I install an RV vent cover?
Follow these steps to install an RV vent cover:
1. Clean the roof surface around the existing vent opening.
2. Use the sharpie or marker to outline the position of the new vent cover on the roof.
3. Drill pilot holes inside the marked outline.
4. Attach the new vent cover to the roof using screws or bolts, following the manufacturer’s instructions.
5. Apply silicone sealant around the edges of the vent cover to ensure a watertight seal.
6. Check the tightness of all screws or bolts and make any necessary adjustments.
What are the benefits of installing an RV vent cover?
Installing an RV vent cover allows for continuous airflow and ventilation inside the RV, keeping the interior fresh and comfortable. Vent covers provide protection against rain, allowing you to keep your vents open even in wet weather. Additionally, vent covers prevent the entry of debris, such as leaves and insects, into your RV through the vent openings.