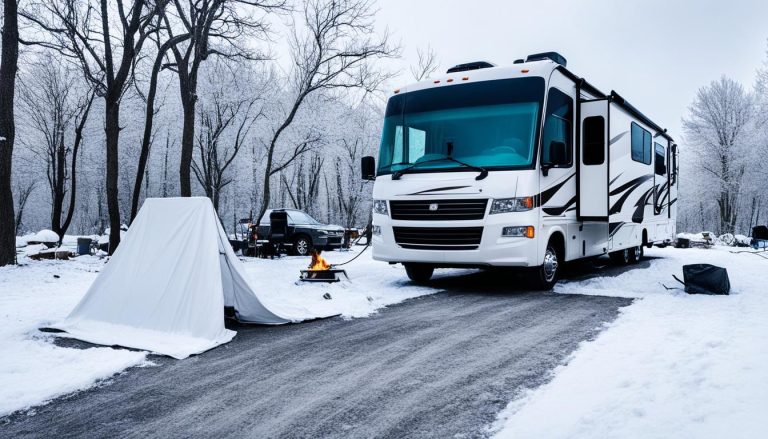
Install a RV Air Conditioner Easily – DIY Guide
gorvlifestyle.com and its partners may earn a commission if you purchase a product through one of our links
If your RV air conditioner is not cooling properly, it may be time to replace the unit. This DIY guide will show you step-by-step how to install a new air conditioner in your RV. By following these instructions, you can save money on installation and have a cool and comfortable RV for your road adventures.
Key Takeaways:
- Installing a new RV air conditioner can help resolve cooling issues and improve your comfort during road trips.
- Replacing a faulty RV air conditioner unit is often more cost-effective than repeatedly replacing individual parts.
- When replacing your camper air conditioner, you will need to purchase a rooftop unit and a compatible ceiling assembly.
- The installation process involves removing the old AC unit, disconnecting electrical wiring, placing the new air conditioner, and testing its operation.
- Maintaining the air filter, being cautious while moving the AC units, and ensuring sufficient operating voltage are important for optimal performance.
Do I Need to do a Complete RV A/C Installation?
Some issues with your RV air conditioner can be fixed by replacing only certain parts. However, if the air conditioner is old or if one component is faulty, it is often best to replace the entire unit. This is because there is a higher likelihood of other components failing in the near future. While the investment for a new RV air conditioner installation may be steep, it can save you money in the long run compared to repeatedly replacing individual parts.
What are the Parts Needed for a Camper Air Conditioner Replacement?
To complete a camper air conditioner replacement, you will need two main parts:
- The rooftop unit: This is the primary component responsible for cooling the air in your RV. It is installed on the roof of your vehicle, allowing for efficient airflow and heat exchange.
- The ceiling assembly: This part is located inside your RV, typically mounted on the ceiling. It includes the vents, controls, and filters for the air conditioning system.
The specific type of ceiling assembly you need will depend on the design of your RV’s air conditioning system. There are two main types:
- A ducted system: This type of system uses a network of ducts to distribute cool air throughout your RV. It provides more even cooling but may require additional installation and modification of your RV’s interior.
- A non-ducted system: This system operates without ducts, instead releasing cool air directly into the RV’s living space. It is generally easier to install but may result in less uniform cooling.
When it comes to purchasing the necessary parts, it’s a good idea to consult with a professional at an RV Part Shop. They can help you determine the best replacement package for your specific application, taking into consideration factors such as cooling capacity, energy efficiency, and any additional features you may desire, such as a heat pump-assisted rooftop unit or an RV AC heat strip.
By carefully selecting the right rooftop unit and ceiling assembly, you can ensure a smooth and effective camper air conditioner replacement that provides optimal cooling and comfort for your RV adventures.
What are the Steps to Complete a Camper Air Conditioner Installation?
Installing a camper air conditioner is a relatively straightforward process that can be completed by someone with minimal technical skills. By following these step-by-step instructions, you’ll be able to replace your old AC unit with a new one and enjoy the comfort of cool air during your RV adventures.
Step 1: Removing the Old AC Unit
The first step in the installation process is to remove the old AC unit from your RV. Start by taking off the shroud that covers the unit. This can usually be done by unscrewing a few bolts or clips holding it in place. Once the shroud is removed, you can access the internal components of the AC unit.
Step 2: Removing the Ceiling Assembly
Next, disconnect the ceiling assembly from the AC unit. This is typically done by disconnecting the electrical wiring and any ductwork that connects the ceiling assembly to the unit. Carefully follow the manufacturer’s instructions to ensure a safe disconnection.
Step 3: Separating the Foam Gasket and Removing Old Sealants
After disconnecting the ceiling assembly, you’ll need to separate the foam gasket that seals the unit to the roof of your RV. Gently pry it away from the roof, being careful not to damage it. Once the foam gasket is separated, remove any old sealants that were used to secure the old AC unit.
Step 4: Placing the New Air Conditioner
Now it’s time to place the new air conditioner on the roof of your RV. Carefully position it in the same location where the old unit was installed, making sure it is aligned properly. Double-check the manufacturer’s instructions for any specific placement instructions.
Step 5: Connecting Ducts and Electrical
After placing the new air conditioner, reconnect the ductwork and electrical wiring to the ceiling assembly. Ensure that all connections are secure and properly tightened to prevent any air leaks or electrical issues.
Step 6: Testing the Air Conditioner
Once all connections are made, it’s time to test the air conditioner to ensure proper operation. Turn on the unit and adjust the settings to your desired temperature. Let the air conditioner run for a few minutes to ensure that it is cooling effectively and that all functions are working correctly.
Following these steps will guide you through the process of installing a camper air conditioner. Remember to consult the manufacturer’s instructions for specific details related to your RV model and air conditioner. With the installation complete, you can now enjoy the cool comfort of your RV on your next adventure.

| Step | Actions |
|---|---|
| Step 1 | Removing the Old AC Unit by taking off the shroud |
| Step 2 | Removing the Ceiling Assembly by disconnecting electrical wiring and ductwork |
| Step 3 | Separating the Foam Gasket and Removing Old Sealants |
| Step 4 | Placing the New Air Conditioner on the roof of the RV |
| Step 5 | Connecting Ducts and Electrical |
| Step 6 | Testing the Air Conditioner for proper operation |
More Good Advice for RV Air Conditioners
To keep your RV air conditioner running smoothly, it is important to maintain the foam air filter in the ceiling assembly and keep it clean. Regularly inspect the filter and remove any dust or debris that may clog the airflow. This simple maintenance task will ensure that your AC unit operates at its best and provides optimal cooling performance for your RV.
When it comes to moving the AC units, it is essential to exercise caution and handle them with care. Avoid dropping or banging the units on the side of your RV, as this can cause damage to the internal components. Remember, even a minor impact can lead to costly repairs or the need for a complete replacement. Take the time to secure the units properly during transportation to minimize the risk of accidents.
Operating voltage is another critical factor to consider for your RV air conditioner. In RV parks or campgrounds where electrical systems can be overloaded, it is crucial to ensure that the AC unit receives sufficient power. An insufficient voltage supply can lead to poor performance and potential damage to the unit. Investing in a Hughes Autoformer Voltage Regulator can help stabilize the voltage and protect your RV air conditioner, allowing it to function optimally even in areas with fluctuating power supply.
In addition to proper maintenance and voltage regulation, there are other measures you can take to enhance the cooling efficiency of your RV air conditioner. Whenever possible, park your RV in shaded areas to minimize the exposure to direct sunlight and reduce the workload on the AC unit. This simple step can significantly improve your comfort and help maintain a cooler temperature inside your RV. Furthermore, using window coverings such as blinds or curtains can provide additional insulation and prevent heat from entering your RV, further easing the burden on the air conditioner.
FAQ
How do I install an RV air conditioner?
To install an RV air conditioner, follow these steps: remove the old AC unit by taking off the shroud and disconnecting the ceiling assembly and electrical wiring, carefully separate the foam gasket and remove old sealants, place the new air conditioner, connect the ducts and electrical, and test the air conditioner for proper operation. For a more detailed installation guide, refer to the step-by-step guide for RV air conditioner installation.
Should I replace the entire RV air conditioner or just parts?
If your RV air conditioner is old or has a faulty component, it is often best to replace the entire unit. This is because there is a higher likelihood of other components failing in the near future. However, some issues can be fixed by replacing only certain parts. Consult with a professional at an RV dealership or with an RV technician to determine the best course of action for your specific situation.
What parts do I need for a camper air conditioner replacement?
For a camper air conditioner replacement, you will need two main parts: a rooftop unit and a ceiling assembly. The type of ceiling assembly you need (ducted or non-ducted) will depend on the design of your RV’s air conditioning system. Consider factors such as cooling capacity, energy efficiency, and whether you want a heat pump-assisted rooftop unit or an RV AC heat strip. You can purchase these parts at an RV Part Shop or consult with a professional for guidance.
What are the steps involved in a camper air conditioner installation?
The steps to complete a camper air conditioner installation include: removing the old AC unit by taking off the shroud and disconnecting the ceiling assembly and electrical wiring, carefully separating the foam gasket and removing old sealants, placing the new air conditioner, connecting the ducts and electrical, and testing the air conditioner for proper operation. For a more detailed step-by-step guide, refer to the RV air conditioner installation process.
How can I maintain my RV air conditioner?
To keep your RV air conditioner running smoothly, it is important to maintain the foam air filter in the ceiling assembly and keep it clean. When moving the AC units, be cautious and avoid dropping or banging them on the side of your RV to prevent damage. Ensure that the operating voltage is sufficient for the AC unit, especially in RV parks where the electrical systems can be overloaded. Consider using a Hughes Autoformer Voltage Regulator to ensure optimal performance. Additionally, parking in shaded areas and using window coverings can help reduce the workload of the AC unit and keep the interior of your RV cooler.