Hook Up Your 50 Amp RV Plug Easily & Safely
gorvlifestyle.com and its partners may earn a commission if you purchase a product through one of our links
Are you looking to hook up a 50 amp RV plug but not sure where to start? Wiring a 50 amp RV outlet might seem daunting, but with the right knowledge and tools, you can do it yourself easily and safely. By learning how to wire a 50 amp RV outlet, you’ll have the power to run all your RV appliances and devices while at home or on the road.
In this article, we’ll guide you through the process of wiring a 50 amp RV outlet step-by-step, ensuring that you have all the information you need to complete the installation with confidence. We’ll also provide essential safety precautions and tips for mounting and grounding your RV plug. Whether you’re a seasoned DIYer or new to electrical work, this guide will help you navigate the project effectively.
Key Takeaways:
- Wiring a 50 amp RV outlet allows you to power all your RV appliances and devices.
- Take proper safety precautions and consider hiring a professional electrician if needed.
- No separate grounding rod is usually required for a 50 amp RV outlet.
- Mount your 50 amp RV outlet securely to provide proper support.
- Tools and materials needed include a 50 amp circuit breaker, NEMA 14-50R receptacle, 4-conductor wire, and more.
Understanding the 50 Amp RV Outlet
A 50 amp RV outlet is a specialized electrical outlet designed to deliver 50 amp power to your RV. It has four prongs and can provide a total of 100 amps of current at 120 volts. This high level of power ensures that you can run all of your RV’s appliances and devices simultaneously, whether you’re parked at a campsite or in your own driveway.
Having a 50 amp RV outlet offers several benefits. First, it allows you to enjoy a greater range of electrical options compared to a standard 30 amp outlet. With a 50 amp RV outlet, you can power more appliances and devices at the same time without overloading the circuit. This means you can run your air conditioning, refrigerator, microwave, and other power-hungry appliances simultaneously, providing you with greater comfort and convenience.
Another benefit is that a 50 amp RV outlet minimizes the risk of tripping your circuit breaker. By providing a higher amperage capacity, it ensures that your RV can operate smoothly without causing power disruptions.
“With a 50 amp RV outlet, you’ll never have to worry about running out of power or sacrificing the functionality of your favorite appliances while on the road.”
Additionally, a 50 amp RV outlet future-proofs your setup. As RVs continue to evolve with more advanced electrical systems and energy-demanding appliances, having a 50 amp outlet ensures that you can adapt to these changes without needing major rewiring or upgrades in the future.
Knowing how to wire a 50 amp RV outlet is a valuable skill for any RV owner. It allows you to set up a reliable power source for your RV at home or various locations, giving you peace of mind and ensuring a comfortable and enjoyable camping experience. Whether you’re a full-time RVer or someone who enjoys occasional road trips, a 50 amp RV outlet is a worthwhile investment.
Comparing 30 Amp and 50 Amp RV Outlets
| Feature | 30 Amp RV Outlet | 50 Amp RV Outlet |
|---|---|---|
| Amperage Capacity | 30 amps | 50 amps |
| Power Output | 3600 watts (120 volts) | 12,000 watts (240 volts) |
| Number of Appliances/Devices | Can power multiple appliances, but limited compared to 50 amp outlet | Can power a wide range of appliances and devices simultaneously without overloading the circuit |
| Risk of Circuit Overload | Higher risk, especially when running power-hungry appliances simultaneously | Minimized, as the outlet has higher amperage capacity |
| Future-Proofing | May require upgrading and rewiring if RV electrical demands increase | Capable of handling future electrical system upgrades and higher power demands |
Safety Precautions for Wiring a 50 Amp RV Outlet
When it comes to wiring a 50 amp RV outlet, prioritizing safety is crucial. Follow these essential safety precautions to ensure a smooth and secure installation.
- Turn off the power to the main breaker: Before embarking on any electrical work, always shut off the power to the main breaker. This step is essential to prevent any electrical accidents or injuries.
- Use the appropriate wire for 50 amp service: To ensure proper electrical functioning and safety, it’s imperative to use the correct wire size for your 50 amp RV outlet. Make sure to consult the manufacturer’s recommendations or a qualified electrician to determine the appropriate wire gauge.
- Follow proper wiring techniques: Familiarize yourself with proper wiring techniques, including stripping wires, making secure connections, and grounding. Following industry-standard practices will help minimize the risk of electrical issues and promote a safer installation.
- Consider hiring a professional electrician: If you’re not experienced or comfortable working with electrical systems, it’s advisable to hire a professional electrician. They have the expertise and knowledge to ensure that your 50 amp RV outlet is wired safely and correctly.
Remember, electrical safety should always be your top priority when working with any electrical installation, including wiring a 50 amp RV outlet.
By taking these safety precautions seriously, you can have peace of mind knowing that your 50 amp RV outlet is installed safely and ready to power your adventures.
Grounding Requirements for a 50 Amp RV Outlet
When it comes to wiring a 50 amp RV outlet, one important aspect to consider is the grounding requirements. Proper grounding ensures the safety and functionality of your RV’s electrical system. In this section, we’ll explore the grounding requirements for a 50 amp RV outlet and provide you with the necessary information to make informed decisions.
Typically, adding a 50 amp RV outlet to your home does not require a separate grounding rod. Your home’s electrical panel should already have a grounding rod in place, which provides a safe path for electrical currents to follow in the event of a fault or surge.
However, if you live in a high-lightning area or want additional peace of mind, you have the option to install an additional grounding rod for your RV plug. This is especially relevant if you plan to use your RV for an extended period or if you frequently experience severe weather conditions.
Before deciding to install an additional grounding rod, it’s crucial to research and comply with local codes and regulations. Local regulations may vary depending on your location, and it’s important to ensure that your installation aligns with the specific requirements set forth by your municipality.
By following the proper grounding requirements for a 50 amp RV outlet, you can ensure the safety and effectiveness of your electrical system, providing a reliable power source for all your RV adventures.
“`html
| Grounding Requirements for a 50 Amp RV Outlet | |
|---|---|
| Your home’s existing grounding rod is sufficient: | Yes |
| Additional grounding rod required: | No, but optional depending on circumstances |
| Compliance with local codes and regulations: | Required |
“`
Mounting Options for a 50 Amp RV Outlet
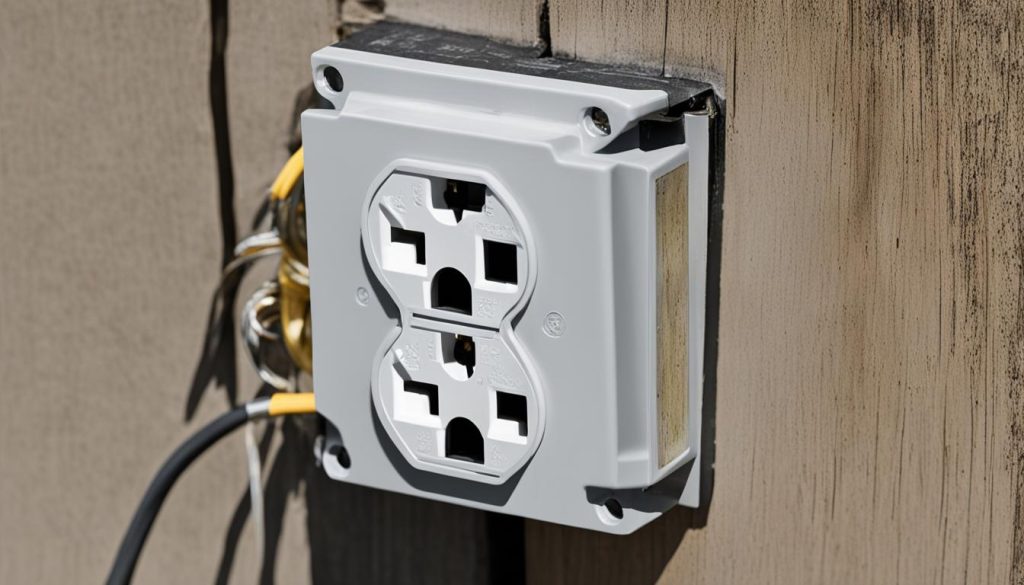
When it comes to mounting your 50 amp RV outlet, you have a few options to choose from. Consider your specific needs and preferences to determine the best mounting option for your RV plug installation.
Option 1: Wall Mounting
One popular choice is to mount your 50 amp RV outlet on a wall in your garage or on the side of your house. This option is convenient if you have an existing wall surface that can provide sturdy support for the outlet.
Here are the steps to wall mount your 50 amp RV outlet:
- Choose a suitable location on the wall where you have easy access to your electrical panel and where the outlet will be easily accessible.
- Mark the location for the outlet and use a stud finder to locate the studs in the wall for added support.
- Securely mount a weatherproof mounting box to the wall using screws and anchors suitable for your wall type.
- Connect the wires from the electrical panel to the outlet following proper wiring techniques (refer to Section 7 for a detailed guide).
- Attach the 50 amp RV outlet to the mounting box and secure it in place.
Option 2: Pedestal Mounting
If wall mounting is not feasible or not your preference, you can opt for pedestal mounting. This option involves installing a pedestal that holds the 50 amp RV outlet. Pedestal mounting is especially useful if you want your outlet to be easily accessible and at a comfortable height.
Here are the steps to pedestal mount your 50 amp RV outlet:
- Choose a suitable location in your outdoor space where the RV can be easily parked and connected to the outlet.
- Dig a hole deep enough to accommodate the pedestal and ensure it is level.
- Securely install the pedestal in the hole using concrete or other suitable anchoring methods.
- Connect the electrical wires from the pedestal to the 50 amp RV outlet following the proper wiring techniques (refer to Section 7 for a detailed guide).
- Attach the 50 amp RV outlet to the pedestal according to the manufacturer’s instructions.
Both wall mounting and pedestal mounting provide secure and reliable options for your 50 amp RV outlet. Choose the option that suits your space, accessibility, and personal preferences.
Tools and Materials Needed for Wiring a 50 Amp RV Outlet
When it comes to wiring a 50 amp RV outlet, having the right tools and materials is essential for a successful installation. Here’s a list of everything you’ll need:
Tools:
- Screwdrivers
- Wire cutters
- Wire strippers
- Electrical tape
- Drill
- Conduit bender (if necessary)
Materials:
- 50 amp circuit breaker
- NEMA 14-50R receptacle
- Weatherproof mounting box
- UF-rated 4-conductor wire
- Conduit, if required by local codes
- Wire connectors
- Grounding wire, if necessary
With these tools and materials, you’ll be equipped to handle the wiring process with confidence. Make sure to gather everything you need before starting the installation, ensuring a smooth and hassle-free experience.
Step-by-Step Guide to Wiring a 50 Amp RV Outlet
Wiring a 50 amp RV outlet may seem daunting, but with our step-by-step guide, you’ll be able to complete the job easily and safely. Before we begin, please ensure that you have the necessary tools and materials ready, including a 50 amp circuit breaker, a NEMA 14-50R receptacle, a weatherproof mounting box, UF-rated 4-conductor wire, conduit, and basic electrical tools such as screwdrivers, wire cutters, and wire strippers.
Important Note: Before starting any electrical work, always turn off the power to the main breaker to ensure your safety.
- Start by installing a double-pole circuit breaker in your electrical panel. This breaker will provide the necessary power for your 50 amp RV outlet. If you’re unsure about the specific installation instructions for your breaker panel, consult the manufacturer’s manual or seek professional assistance.
- Next, decide on the location for your 50 amp RV outlet. Keep in mind that it should be within reach of your RV’s power cord and should have proper ventilation.
- Using conduit, run the UF-rated 4-conductor wire from the electrical panel to the location where you plan to install the outlet. Ensure that the wire is properly secured and protected throughout the conduit.
- At the electrical panel, connect the wires from the UF-rated 4-conductor wire to the terminals of the double-pole circuit breaker. Follow the specific instructions provided by the manufacturer to ensure proper connections.
- Mount the weatherproof box for your outlet at the desired location. Make sure it is securely anchored and positioned in a way that provides easy access to the receptacle.
- Strip the wires at the end of the UF-rated 4-conductor wire and connect them to the appropriate terminals on the 50 amp NEMA 14-50R receptacle. Double-check that all connections are tight and secure.
- Securely mount the 50 amp NEMA 14-50R receptacle inside the weatherproof box, ensuring that it is level and well-positioned.
- Finally, turn the power back on at the main breaker and test the 50 amp RV outlet to ensure it is functioning correctly.
| Materials | Tools |
|---|---|
| 50 amp circuit breaker | Screwdrivers |
| NEMA 14-50R receptacle | Wire cutters |
| Weatherproof mounting box | Wire strippers |
| UF-rated 4-conductor wire | |
| Conduit |
Remember: If you’re not comfortable working with electrical systems or if you’re unsure about any step of the process, it’s always advisable to hire a professional electrician to ensure the job is done safely and correctly.
Final Tips and Recommendations
Now that you have learned how to wire a 50 amp RV outlet and ensure a safe power connection, here are some important considerations to keep in mind. These handy tips will help you make the most out of your RV power hookup:
1. Choose the right RV plug: When selecting your 50 amp RV plug, make sure it is compatible with your RV’s electrical system. Check the manufacturer’s guidelines or consult an expert to ensure a proper match.
2. Use quality components: Invest in high-quality wires, receptacles, and breakers to ensure a reliable and long-lasting connection. Don’t cut corners on materials as it can lead to electrical issues and potential safety hazards.
3. Troubleshoot any plug issues: If you encounter any problems with your 50 amp RV plug, such as intermittent power or sparks, it’s important to address them immediately. Check the wiring connections, inspect for damages, and consult a professional if needed.
By following these RV power hookup tips and considering important factors for your RV plug connection, you can enjoy a hassle-free and efficient power supply during your travels. Remember to prioritize safety and consult professionals when in doubt. For more RVing tips, tricks, and reviews, be sure to check out reputable online resources dedicated to the RVing community.
FAQ
How do I hook up a 50 amp RV plug?
To hook up a 50 amp RV plug, you will need to turn off the power to the main breaker, install a double-pole circuit breaker, run the wire through conduit, connect the wires to the electrical panel, mount the box for your outlet, and connect the wires to the 50 amp RV outlet. Follow a detailed step-by-step guide for proper installation.
What is a 50 amp RV outlet?
A 50 amp RV outlet is a specialized electrical outlet designed to deliver 50 amp power to your RV. It has four prongs and can provide a total of 100 amps of current at 120 volts, allowing you to power all of your RV’s appliances and devices while at home or on the road.
What safety precautions should I take when wiring a 50 amp RV outlet?
When wiring a 50 amp RV outlet, it’s important to turn off the power to the main breaker, use the appropriate wire for 50 amp service, and follow proper wiring techniques. If you’re not comfortable working with electrical systems, consider hiring a professional electrician.
Do I need a grounding rod for my 50 amp RV plug installation?
Typically, you don’t need a separate grounding rod when adding a 50 amp RV outlet at your home. Your home’s electrical panel should already have a grounding rod in place. However, if you live in a high-lightning area or want to install an additional grounding rod, make sure to comply with local codes and regulations.
How do I mount a 50 amp RV outlet?
You can mount your 50 amp RV outlet on a wall in your garage or on the side of your house. Alternatively, you can install a pedestal and mount the outlet on that. Make sure to securely mount the outlet, as 50 amp plugs are heavy and require proper support.
What tools and materials do I need for wiring a 50 amp RV outlet?
To wire a 50 amp RV outlet, you’ll need a 50 amp circuit breaker, a NEMA 14-50R receptacle, a weatherproof mounting box, UF-rated 4-conductor wire, conduit, and various tools such as screwdrivers, wire cutters, and wire strippers.
What is the step-by-step guide for wiring a 50 amp RV outlet?
Follow this step-by-step guide for wiring a 50 amp RV outlet: Turn off the power to the main breaker, install a double-pole circuit breaker, run the wire through conduit, connect the wires to the electrical panel, mount the box for your outlet, and connect the wires to the 50 amp RV outlet. Refer to a detailed guide for more in-depth instructions and illustrations.
Any final tips and recommendations for my RV power hookup?
When connecting your 50 amp RV plug, make sure to follow the manufacturer’s instructions and adhere to electrical safety guidelines. Consider using surge protectors or voltage regulators to protect your RV’s electrical system. If you encounter any issues with your 50 amp RV plug, consult a professional electrician. For further RVing tips, tricks, and reviews, check out reputable online resources and forums dedicated to RV enthusiasts.

