Fix Your RV Toilet Seal Yourself: Quick Guide
gorvlifestyle.com and its partners may earn a commission if you purchase a product through one of our links
Having problems with the seal on your RV toilet? Replacing the waste ball seal in a Thetford RV toilet is a simple and inexpensive DIY RV toilet repair. In this post, I walk you through the process, step-by-step to save you time, money, and avoid those unpleasant odors in your RV! Here’s how we knew we had a problem.
Key Takeaways:
- Learn how to fix your RV toilet seal to save time and money
- Replacing the waste ball seal is a simple DIY repair
- Prevent unpleasant odors in your RV by maintaining a watertight seal
- Regularly inspect and clean your RV toilet seal to prevent leaks
- Know the signs that your RV toilet seal needs replacing
Signs that your RV toilet seal needs replacing
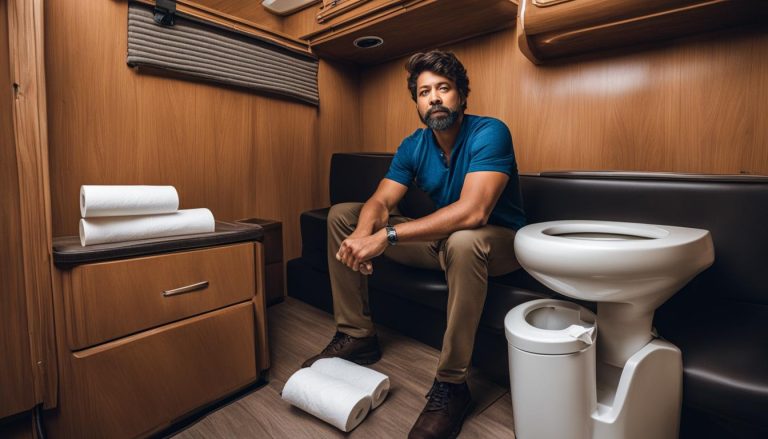
“Ewww, what’s that smell?”, Jeanne asked me one morning as we awoke in our motorhome. Even our Cavalier King Charles adventure dog, Hershey Pup, was scrunching up his little black nose! One good whiff and I knew it was a sewer smell from our RV’s black waste tank. But, why? I ventured into the bathroom of our mid-size 30’ motorhome and right away observed the root of the problem. There was no water left in the toilet bowl. It had drained dry overnight, indicating that the waste ball valve seal was no longer maintaining a watertight seal.
Symptoms of RV Toilet Seal Problem
- Unpleasant odor: The most obvious sign of a faulty RV toilet seal is a foul smell coming from your RV’s black waste tank. If you’re constantly detecting a sewer-like odor in your motorhome, it is likely due to a broken or worn-out toilet seal.
- Water leakage: Notice water accumulating around the base of your RV toilet or on the bathroom floor? This could be a result of a defective toilet seal. It allows water to escape from the toilet bowl, creating a mess and potential water damage.
- Dry toilet bowl: If you find that there is no water left in the toilet bowl, even after flushing, it indicates that the waste ball valve seal is failing to hold water properly. This leads to an incomplete flush and potential odor issues.
- Ineffective flushing: When you flush your RV toilet, but the waste doesn’t get fully cleared or drains slowly, it could be a sign that the toilet seal is not functioning correctly. This compromises the flushing mechanism and can lead to clogs and odors.
Understanding the RV Toilet Seal and Its Function
The Purpose of the RV Toilet Seal
When it comes to your RV’s bathroom, the toilet seal plays a crucial role in maintaining proper functionality and preventing unpleasant odors. The RV toilet seal, also known as the waste ball seal, serves as a barrier between the toilet bowl and the black holding tank. Its primary purpose is to create a watertight seal, allowing waste to flow down into the holding tank while keeping water in the bowl.
The waste ball seal is composed of a durable rubber material that can withstand the rigors of regular use. However, over time, the seal may degrade or accumulate mineral scaling, compromising its effectiveness. As a result, water may drain from the toilet bowl, and sewer odors can infiltrate your RV.
Components of the RV Toilet Seal
The RV toilet seal typically consists of two main components: the waste ball valve and the rubber seal that surrounds it. The waste ball valve is a large, ball-type rotating valve located at the bottom of the toilet bowl. When you flush the toilet, the valve opens to allow waste to flow into the black holding tank.
Surrounding the waste ball valve is the rubber seal, which forms a tight seal with the toilet bowl and prevents water and odors from escaping into the RV. The rubber seal is designed to create a secure barrier between the toilet bowl and the holding tank, ensuring that waste goes where it’s supposed to go.

It’s important to note that there may be slight variations in the design and components of the RV toilet seal depending on the specific model and brand of your RV toilet. However, the basic function and purpose remain the same.
Steps to replace the RV toilet seal
Don’t let a faulty RV toilet seal ruin your camping experience. By following these simple steps, you can replace the seal yourself and ensure a leak-free and odor-free RV bathroom.
To begin the RV toilet seal replacement process, shut off the water to your RV system. Release the water pressure by holding the foot pedal down until the water flow stops completely. This step is crucial to prevent any accidents or water damage.
Next, you’ll need a socket wrench to extract the two long hex-head screws that hold the toilet bowl onto the pedestal. Make sure to keep track of the stainless steel and nylon washers.
With the screws removed, give the toilet bowl a slight counter-clockwise twist to unlock it from the pedestal. Lift the bowl off the pedestal, exposing the old waste ball seal.
Remove the old seal and take the time to thoroughly clean the seal recess area. This ensures optimal contact and a proper seal with the new seal.
Now, it’s time to replace the RV toilet seal. Lightly coat the new seal with silicone lubricant or plumber’s grease to facilitate smooth operation and enhance its lifespan. Place the new seal in the cleaned seal recess, ensuring it sits securely in place.
Before reattaching the toilet bowl, clean the bottom and return it to the pedestal. Twist the bowl slightly clockwise to lock it into position.
Once the bowl is in place, reinstall the two long screws to secure it to the pedestal. Make sure the screws are tightened securely but avoid over-tightening.
Now that the toilet is back in position, turn the water back on to the system. Check for any leaks by inspecting the waste ball seal and the toilet pedestal over the next day or two.
Periodic inspection and maintenance are crucial for a long-lasting RV toilet seal. So, don’t forget to periodically check the seal to ensure there are no leaks and that your RV bathroom remains fresh and odor-free.

| Steps to Replace RV Toilet Seal |
|---|
| Step 1: Shut off the water to the RV system |
| Step 2: Release the water pressure by holding the foot pedal down |
| Step 3: Use a socket wrench to remove the two long hex-head screws |
| Step 4: Remove the toilet bowl by twisting and lifting it off the pedestal |
| Step 5: Remove the old waste ball seal and clean the seal recess area |
| Step 6: Coat the new seal with silicone lubricant or plumber’s grease |
| Step 7: Place the new seal in the cleaned seal recess |
| Step 8: Clean the bottom of the toilet bowl and return it to the pedestal |
| Step 9: Twist the bowl slightly clockwise to lock it into position |
| Step 10: Reinstall the two long screws to secure the bowl to the pedestal |
| Step 11: Turn the water back on and check for leaks |
| Step 12: Periodically reinspect the waste ball seal and toilet pedestal |
Other Possible Causes of Toilet Leaks and Troubleshooting Tips
While a bad RV toilet seal is a common cause of leaks, there are other possible causes as well. A cracked water valve, a bad valve seal or flush ball seal, a cracked toilet bowl, or loose or cracked fittings can all lead to toilet leaks. If you’re experiencing a leak and it’s not coming from the seal, you might need to further investigate these other components and repair or replace them as necessary. It’s important to diagnose the specific cause of the leak before attempting any repairs.
- Cracked Water Valve: Inspect the water valve for any visible cracks or damage. If you find any issues, you’ll need to replace the water valve to stop the leak.
- Bad Valve Seal or Flush Ball Seal: Check the valve seal and the flush ball seal for wear or damage. If they appear worn or if there are any signs of leakage, you’ll need to replace these seals.
- Cracked Toilet Bowl: Examine the toilet bowl for any cracks or fractures. If you find any, you’ll need to replace the toilet bowl to fix the leak.
- Loose or Cracked Fittings: Inspect all the fittings connected to the toilet for any looseness or cracks. Tighten any loose fittings and replace any cracked fittings to eliminate the leak.
To troubleshoot the leak, start by visually inspecting each of these components. Look for any visible signs of damage or wear. If you’re unable to identify the cause of the leak, it may be helpful to consult an RV professional for further assistance.
Remember, understanding the specific cause of the leak is crucial before attempting any repairs. By accurately diagnosing the problem, you can effectively fix your RV toilet leak and avoid any further complications.
Troubleshooting Tips:
- Inspect and tighten all connections and fittings to ensure they are secure.
- Check the water supply line and inlet valve for any leaks or damage.
- Verify that the toilet is securely fastened to the floor or pedestal.
- Ensure the toilet bowl and surrounding area are clean and free of debris.
- Test the toilet operation by flushing several times and observing for leaks.
By following these troubleshooting tips and addressing any potential causes of leaks, you can effectively fix your RV toilet leaks and ensure a well-functioning bathroom in your RV.
The importance of regular maintenance for your RV toilet seal
Regular maintenance is key to keeping your RV toilet seal in good condition. By taking proactive steps to maintain your RV toilet seal, you can avoid potential leaks and ensure that your RV bathroom remains odor-free.
Cleaning the seal periodically with a vinegar soak and scrubbing can help prevent buildup and extend the lifespan of the seal. The vinegar’s natural acidity helps break down any residue or deposits on the seal, while scrubbing removes any stubborn dirt or grime.
Additionally, applying plumbers grease or silicone lubricant to the seal can help to keep it functioning properly. These lubricants create a protective barrier on the seal, reducing friction and preventing it from drying out or deteriorating.
It’s also important to periodically inspect the seal for any signs of wear or damage. Look for cracks, tears, or any other visible defects that could compromise the seal’s effectiveness. If you notice any issues, it’s crucial to replace the seal promptly to prevent leaks and further damage.
By following these tips for RV toilet seal maintenance, you can ensure that your toilet seal remains in optimal condition, providing a watertight barrier between the toilet bowl and the black holding tank. This regular maintenance will not only help prevent leaks and unpleasant odors but also extend the overall lifespan of your RV toilet seal.
Conclusion
Taking care of your RV toilet seal is crucial for maintaining a fully functional and odor-free bathroom in your RV. Understanding how the seal works, regularly inspecting and maintaining it, and knowing how to replace it when necessary are all essential steps in preventing leaks and ensuring a smooth and enjoyable RVing experience.
By following a few simple steps, you can easily fix your RV toilet seal yourself and restore your RV bathroom to top shape. Regular maintenance, such as cleaning the seal with a vinegar soak, scrubbing, and applying plumber’s grease or silicone lubricant, helps prevent buildup and extends the lifespan of the seal. Additionally, periodic inspection for wear or damage allows you to replace the seal promptly if needed.
By taking proactive measures to care for your RV toilet seal, you can avoid potential leaks and keep your RV bathroom free from unpleasant odors. So, don’t neglect this important aspect of RV maintenance and enjoy a hassle-free camping experience with a well-functioning toilet seal.
FAQ
How do I know if my RV toilet seal needs replacing?
Some signs that your RV toilet seal needs replacing include water draining from the toilet bowl, unpleasant odors in your RV, and leaks around the toilet base. If cleaning and lubricating the seal no longer help, it’s time to replace it.
How does the RV toilet seal work?
The RV toilet seal, specifically the waste ball valve seal, creates a watertight barrier between the toilet bowl and the black holding tank. It prevents water from draining and sewer odors from entering the RV.
What are the steps to replace the RV toilet seal?
To replace the RV toilet seal, start by shutting off the water to the RV system and releasing the water pressure. Use a socket wrench to remove the screws holding the toilet bowl onto the pedestal. Remove the old seal, clean the seal recess, and lubricate the new seal before placing it in the recess. Reinstall the toilet bowl and screws, and check for leaks.
What are other possible causes of toilet leaks in an RV?
Other possible causes of toilet leaks in an RV include a cracked water valve, a bad valve seal or flush ball seal, a cracked toilet bowl, or loose or cracked fittings. It’s important to diagnose the specific cause of the leak before attempting any repairs.
How can I troubleshoot RV toilet leaks?
To troubleshoot RV toilet leaks, start by inspecting the toilet seal for signs of wear or damage. Check the water valve, valve seal, flush ball seal, toilet bowl, and fittings for any cracks or looseness. Repair or replace any faulty components as needed.
How can I maintain my RV toilet seal?
Regular maintenance is key to keeping your RV toilet seal in good condition. Clean the seal periodically with a vinegar soak, scrubbing, and apply plumbers grease or silicone lubricant. Inspect the seal for wear or damage and replace it as needed.
Can I replace the RV toilet seal myself?
Yes, replacing the RV toilet seal is a simple DIY repair that can be done in as little as half an hour. Follow the steps mentioned earlier, and you’ll be able to fix your RV toilet seal yourself and avoid costly repairs.