RV Delamination Repair: A Step-by-Step Guide
gorvlifestyle.com and its partners may earn a commission if you purchase a product through one of our links
Delamination is a common issue that RV owners may encounter, causing bubbling and separation of the sidewall layers. If left untreated, delamination can worsen and compromise the structural integrity of your RV. However, with the right knowledge and skills, you can perform delamination repairs yourself and bring your RV back to its original condition.
Key Takeaways:
- Delamination is a common problem that affects the sidewalls of RVs.
- It is important to identify the signs of delamination early on to prevent further damage.
- By following a step-by-step guide, you can repair delamination on your RV using simple tools and materials.
- Proper preparation and planning are crucial for a successful delamination repair.
- After completing the repair, take measures to prevent future delamination.
Signs of RV Delamination
Identifying delamination is the first step in the repair process. By knowing how to spot delamination, you can take the necessary steps to address the issue before it worsens.
So, how can you spot delamination on your RV? Here are some signs to look out for:
- Bubbling or bulging of the sidewall: One of the most obvious signs of delamination is the appearance of bubbles or bulges on the exterior sidewall of your RV. These bubbles indicate a separation between the outer fiberglass layer and the underlying structure.
- Differences in texture between panels: Delamination can also manifest as variations in texture between adjacent panels. If you notice unevenness or a “waviness” in the surface of your RV’s sidewall, it could be a sign of delamination.
It’s important to keep in mind that signs of delamination may not always be immediately apparent. Regularly inspecting your RV’s sidewalls can help you catch delamination in its early stages, preventing further damage and costly repairs.
“Delamination can compromise the structural integrity of your RV and should be addressed as soon as possible.”
By staying vigilant and knowing the signs of delamination, you can protect your investment and ensure the longevity of your RV. In the next section, we will explore the process of DIY delamination repair and provide you with the necessary steps and tips to successfully fix the issue.
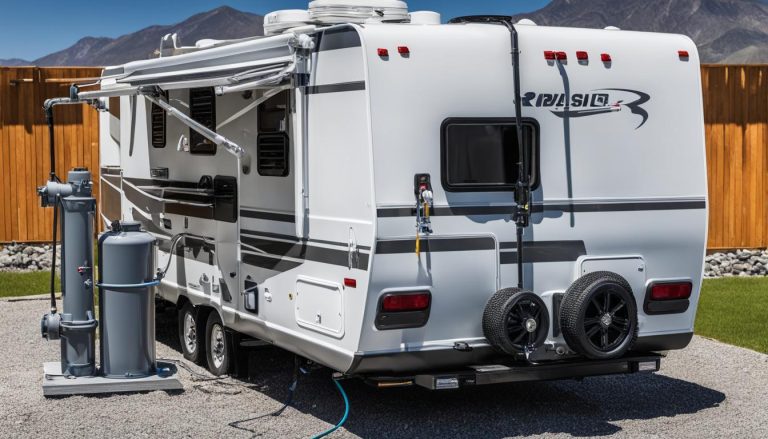
About the image:
The image above demonstrates an example of delamination on an RV sidewall. By spotting these signs, you can take action to address the issue and prevent further damage.
DIY RV Delamination Repair
If you’ve noticed delamination on your RV’s sidewalls, don’t worry – it’s a problem that can be fixed. With the right tools and techniques, you can repair delamination and restore the structural integrity of your recreational vehicle. This guide will walk you through the process of repairing delamination yourself, saving you time and money.
One effective method of repairing delamination is by injecting an epoxy mixture into the delaminated layers. This process helps promote adhesion and bonds the layers back together, ensuring a durable and long-lasting repair.
Here are the steps to follow for a successful DIY RV delamination repair:
- Begin by identifying the areas of delamination on your RV’s sidewalls.
- Gently mark these areas with painter’s tape to ensure precise repair.
- Next, you’ll need to gain access to the area behind the delaminated panels. This may involve removing interior fixtures or trim.
- Mix the epoxy resin and hardener according to the manufacturer’s instructions.
- Load the epoxy mixture into an epoxy injector or syringe.
- Pro tip: Use an epoxy injector with a long needle to reach deeper into the delaminated layers.
- Inject the epoxy mixture into the delaminated area, starting from the lowest point and working your way up.
- Press down on the surface to spread the epoxy evenly within the delaminated layers.
- Apply temporary clamps or use a bracing system to keep the layers compressed together while the epoxy cures.
- Repeat the process for all areas affected by delamination.
By following these steps and using the right materials, you can successfully repair delamination on your RV. Remember to take your time, follow the manufacturer’s instructions, and prioritize safety throughout the repair process.
Benefits of DIY Delamination Repair
Repairing delamination yourself not only saves you money but also gives you the satisfaction of restoring your RV’s structural integrity with your own hands.
Not only will DIY delamination repair help you avoid costly professional repairs, but it also allows you to develop new skills and gain a deeper understanding of your RV’s construction. Plus, you’ll have the peace of mind knowing that your recreational vehicle is safe and ready for your next adventure.

An important aspect of DIY delamination repair is taking proper safety precautions. Always wear protective gloves and work in a well-ventilated area to avoid exposure to harmful chemicals. Additionally, consult your RV manufacturer’s guidelines and recommendations for specific repair techniques and materials.
Stay tuned for the next section, where we’ll cover the materials you’ll need for RV delamination repair, ensuring you have everything necessary to tackle this project head-on.
Materials Needed for RV Delamination Repair
To repair delamination on an RV, you will need the following materials:
- Epoxy resin: A strong adhesive that will help bond the delaminated layers.
- Hardener: A catalyst that activates the epoxy resin, allowing it to harden and create a durable bond.
- Plastic syringes: Used for injecting the epoxy mixture into the delaminated areas.
- Plastic tubing: Connects the syringe to the injection points, facilitating the epoxy application.
- Mixing cups: Used for combining the epoxy resin and hardener.
- Clamps: Essential for holding the delaminated layers together during the repair process.
- Scrap wood for bracing: Provides support and stability to the repair area.
- Rubber gloves: Protects your hands from the epoxy mixture.
- Wedges: Used to create space and access behind the delaminated panels.
- Shims: Helps align the panels and distribute the pressure evenly during the repair.
- Plastic sheeting: Covers and protects the surrounding areas from dripping epoxy.

These materials, combined with basic tools, will be essential for successfully repairing delamination on your RV.
Preparing for RV Delamination Repair
Before you begin the delamination repair process, it’s essential to plan and prepare accordingly. By taking the time to consider important factors, such as parking location, weather conditions, and bracing systems, you can ensure a successful repair outcome.
Firstly, think about where you will park your RV during the repair. Ideally, you should choose a level and spacious area that allows easy access to the affected sidewalls. Additionally, consider the length of time required for the repair and ensure the parking spot is secure and stable.
In case of unexpected rain, have a plan in place for covering the RV during the repair. This will protect the work area from moisture, preventing complications and ensuring the repair is completed in optimal conditions.
Next, determine the specific areas of the RV that require delamination repair. Inspect the sidewalls carefully, marking the locations of delamination with painter’s tape. This will help you stay organized and focused during the repair process.
To support the repair area, it’s crucial to develop a bracing system. A bracing system helps keep the delaminated layers in place while the epoxy resin sets. Using scrap wood, create temporary braces to apply pressure evenly across the repair area, ensuring a strong bond. This bracing system will promote proper adhesion and prevent further separation of the sidewall layers.
By thoroughly planning and preparing for the delamination repair, you can tackle the project with confidence and improve the chances of a successful outcome.
Steps for RV Delamination Repair
Repairing delamination on your RV can be a straightforward process if you follow the right steps. Here is a step-by-step guide to help you navigate the delamination repair process:
- Begin by identifying the delaminated areas on your RV’s sidewalls. Look for signs of bubbling or bulging, as well as differences in texture between panels. Mark these areas with painter’s tape to ensure you address each one.
- To repair delamination, you’ll need to gain access to the area behind the delaminated panels. This may involve removing interior components or accessing the sidewall from the outside. Take your time and ensure you have a clear path before proceeding.
- The next step is to mix the epoxy resin and hardener according to the manufacturer’s instructions. This mixture will provide the adhesive properties needed to repair the delamination.
- Once the epoxy mixture is ready, load it into an epoxy injector. This tool will allow you to apply the adhesive directly into the delaminated area, ensuring thorough coverage.
- Inject the epoxy into the delaminated area, starting at the lowest point and working your way up. Use gentle pressure to evenly distribute the epoxy and ensure it reaches all layers of the delaminated sidewall.
- After injecting the epoxy, gently press down on the surface to spread the adhesive and improve adhesion between the layers. Be careful not to apply too much pressure to avoid damaging the sidewall.
- To hold the layers together while the epoxy cures, apply temporary clamps to the repaired area. These clamps will help maintain pressure and ensure a strong bond.
- Repeat the above steps for all delaminated areas of your RV. Take your time and be thorough to ensure a complete repair.
By following these steps, you can effectively repair delamination on your RV’s sidewalls and restore its structural integrity. Remember to take your time, use the right materials, and seek professional assistance if needed. With proper care and attention, your RV will be back on the road in no time.
Tips for a Successful RV Delamination Repair
When it comes to repairing delamination on your RV, following the right tips and techniques can make all the difference in achieving a successful outcome. Here are some valuable tips to keep in mind throughout the repair process:
- Work from the bottom up: Start repairing delamination from the bottom and work your way up to ensure proper adhesion and prevent any excess epoxy from dripping.
- Mark the areas with painter’s tape: Before injecting epoxy, mark the delaminated areas with painter’s tape. This will help you easily identify the sections that need repair.
- Cover the area with plastic: To protect other parts of your RV from dripping epoxy, cover the surrounding area with plastic sheeting. This will ensure a neat and clean repair process.
- Inject epoxy above the treated area: When injecting epoxy into the delaminated layers, make sure to inject it slightly above the treated area. This will allow the epoxy to spread and bond properly.
- Apply pressure to spread the epoxy: After injecting the epoxy, apply pressure to the surface using a roller or a similar tool. This will help spread the epoxy evenly and promote better adhesion.
- Use the right pumps for the epoxy system: Choose pumps that are suitable for the type of epoxy system you are using. This will ensure accurate measuring and a consistent epoxy mixture.
- Mix small batches of epoxy: To prevent the epoxy from curing before you finish injecting it, mix small batches at a time. This will give you enough time to work on repairing each section without wasting any epoxy.
- Perform a dry run: Before injecting epoxy and applying clamps, it’s recommended to perform a dry run. This will help you familiarize yourself with the process and ensure everything is in order before committing to the repair.
By following these tips, you can increase the chances of achieving a successful delamination repair on your RV. Remember to take your time, be thorough, and pay attention to detail for the best results.
Preventing RV Delamination
Now that you’ve successfully repaired the delamination on your RV, it’s important to take proactive measures to prevent future delamination from occurring. By implementing a few preventive strategies, you can ensure the long-term integrity of your RV’s sidewalls.
Start by regularly inspecting the fiberglass of your RV. Look for any signs of bubbling, bulging, or separation between the layers. Early detection can help you address any potential issues before they worsen. Additionally, keep an eye out for any cracks or damage to the exterior that could compromise the integrity of the sidewalls.
Maintaining a clean and dry interior is another key aspect of delamination prevention. Moisture can seep into the walls and lead to delamination, so make sure to address any leaks promptly. Regularly check the seals around windows, doors, and other openings, and ensure they are watertight. Keeping the interior humidity levels low and utilizing moisture-absorbing products can also help prevent moisture-related problems.
Lastly, using appropriate RV restoration products can go a long way in preventing delamination. Look for products specifically designed to protect and preserve fiberglass surfaces. These could include sealants, waxes, or coatings that provide an added layer of protection against UV rays and environmental elements.
FAQ
What are the signs of delamination on an RV?
Signs of delamination include bubbling or bulging of the sidewall and differences in texture between panels.
Can I repair delamination on my RV myself?
Yes, with the right tools and techniques, you can repair delamination on your RV yourself.
What materials do I need for RV delamination repair?
You will need epoxy resin, hardener, plastic syringes, plastic tubing, mixing cups, clamps, scrap wood for bracing, rubber gloves, wedges, shims, and plastic sheeting.
How do I prepare for RV delamination repair?
Before starting the repair, it is important to plan and prepare accordingly, including considering where to park the RV during the repair, having a plan for covering the RV in case of rain, determining the areas to be treated, and developing a bracing system to support the repair area.
What are the steps for repairing delamination on an RV?
The delamination repair process involves identifying the delaminated areas, marking them with painter’s tape, gaining access to the area behind the delaminated panels, mixing epoxy resin and hardener, loading the epoxy injector, injecting epoxy into the delaminated area, pressing down on the surface to spread the epoxy, applying temporary clamps, and repeating the process for all affected areas.
What are some tips for a successful RV delamination repair?
Tips for a successful delamination repair include working from the bottom up, marking the areas with painter’s tape, covering the area with plastic to protect from dripping epoxy, injecting epoxy above the treated area, applying pressure to spread the epoxy, using the right pumps for the epoxy system, mixing small batches of epoxy, and performing a dry run of the injecting and clamping process.
How can I prevent delamination on my RV?
To prevent delamination, regularly inspect the fiberglass, maintain a clean and dry interior, and use appropriate RV restoration products.