Disinfect Your RV Water Tank Safely & Easily
gorvlifestyle.com and its partners may earn a commission if you purchase a product through one of our links
Sanitizing your RV water tank is an essential part of maintaining clean and safe water for your adventures. By disinfecting your RV water tank regularly, you can ensure that the water you drink, shower with, and use for cleaning is free from bacteria, mold, and other contaminants. In this section, we will discuss how often you should sanitize your RV water tank and what you need to do so.
If you own an RV, you know that having a clean water supply is crucial for a comfortable and enjoyable trip. Whether you’re camping in the great outdoors or traveling across the country, it’s important to keep your RV water tank free from harmful bacteria. In this guide, we’ll show you how to disinfect your RV water tank safely and easily, ensuring that you have clean and safe water for all your needs.
Regularly disinfecting your RV water tank is essential to maintain the quality of your water and protect the health of you and your family. Bacteria, mold, and other contaminants can quickly multiply in your water tank if not properly cleaned, posing a risk to your health. By following the steps outlined in this guide, you can ensure that your RV water tank remains clean and safe throughout your travels.
Key Takeaways:
- Sanitizing your RV water tank is crucial for clean and safe water while on the road.
- RV manufacturers recommend sanitizing your water tank at least once a year.
- You can sanitize your RV water tank using non-scented bleach or RV tank sanitizer.
- Alternatively, you can use commercially available RV tank sanitizers or natural alternatives like vinegar or hydrogen peroxide.
- Maintaining a clean RV water tank includes using a water filter, regularly flushing the water lines, and monitoring water quality.
How Often Should You Sanitize Your RV Water Tank?
According to most RV manufacturers, it is recommended to sanitize your RV water tank at least once a year. This is usually done in the spring when you are dewinterizing your RV for the camping season. However, some RVers choose to sanitize their water tanks every time their RV has been unused for 2-4 weeks. This routine maintenance task ensures that your water tank is clean and safe for drinking, showering, dishwashing, and laundry while on the road.
Regularly sanitizing your RV water tank is a crucial step in maintaining a safe and hygienic water system. This preventive measure helps to eliminate harmful bacteria, mold, and other contaminants that can accumulate over time. By following the recommended sanitization schedule, you can ensure that your water tank remains clean and your water supply remains fresh and safe for use.
However, it’s important to note that the frequency of sanitization may vary depending on your specific usage and circumstances. If you travel frequently or use your RV extensively, you may need to sanitize your water tank more frequently. Additionally, if you notice any unusual odors, discoloration, or taste in your water, it’s a good idea to sanitize your tank immediately to address any potential contamination.
It’s recommended to consult your RV owner’s manual or contact the manufacturer for specific guidelines on how often to sanitize your water tank, as different RV models may have varying maintenance requirements.
To make it easier to understand the recommended sanitization frequency, here’s a table summarizing the general guidelines:
| Type of RVer | Sanitization Frequency |
|---|---|
| Occasional RVer | Once a year |
| Frequent RVer | Every 2-4 weeks of non-use |
Remember, maintaining a clean and sanitized RV water tank is vital for the health and well-being of you and your fellow travelers. By adhering to a regular sanitization schedule, you can ensure that your water supply remains fresh, clean, and safe.
What Do You Need to Sanitize Your RV Water Tank?
Sanitizing your RV water tank is an important step in maintaining the cleanliness and safety of your water system. Fortunately, you don’t need any special tools to get the job done. Here is a list of common items you’ll need:
- A measuring cup
- A funnel
- A 5-gallon bucket or water storage container
- A potable water hose
- Non-scented bleach or RV tank sanitizer
- Optionally, a water tank filler
When selecting non-scented bleach or an RV tank sanitizer, it’s important to choose a product that won’t leave any unwanted odors in your water system. This ensures that your water remains fresh and clean, without any unpleasant smells.
RV Water Tank Sanitizing Kit
If you prefer a convenient solution, you may consider purchasing an RV water tank sanitizing kit. These kits typically include all the necessary components, such as the sanitizer, measuring tools, and instructions. They can be a time-saving option for those who want a hassle-free way to sanitize their RV water tank.
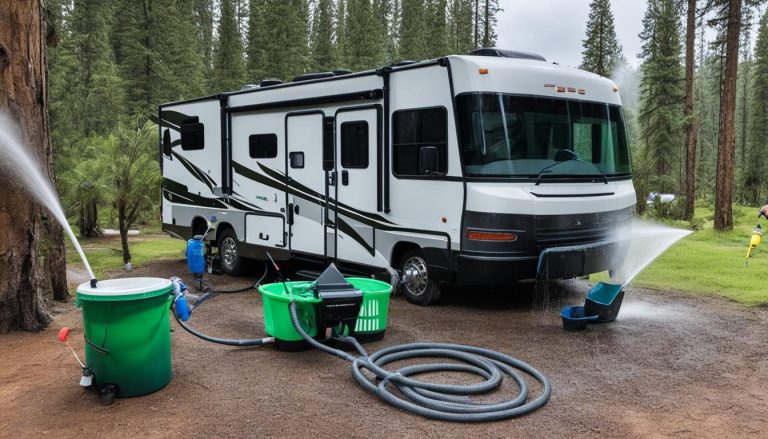
To help you visualize the process, here is an image of a basic RV water tank sanitizing kit:

Having the right tools and products makes it easy to keep your RV water tank clean and sanitized. In the next section, we will walk you through the step-by-step process of sanitizing your RV water tank using bleach.
How to Sanitize Your RV Water Tank with Bleach
To ensure a clean and safe water supply in your RV, it’s essential to sanitize your water tank regularly. Using bleach is a common method that effectively kills bacteria and disinfects the tank. Here is a step-by-step guide on how to sanitize your RV water tank with bleach:
-
First, turn off your water heater and water pump to prevent any damage.
-
Next, drain the fresh water system and locate the drain valves for your RV’s plumbing lines.
-
Calculate the amount of bleach needed based on the size of your tank. It is recommended to use 1/4 cup of bleach for every 15 gallons of the tank’s capacity.
-
Dilute the bleach in water. Use a clean bucket or container to mix the bleach with water, following the recommended ratio.
-
Add the bleach mixture to the fresh water tank. Use a funnel or other suitable method to pour the diluted bleach into the tank.
-
Fill the fresh water tank with clean water. Use a potable water hose to fill the tank until it is full.
-
Let the water sit for 12-24 hours. This allows the bleach to effectively disinfect the tank and kill any bacteria present.
-
After the designated time, drain the tank and flush the system. Open the drain valves and allow all the water to drain out completely. Then, refill the tank with clean water and flush the system by running water through all the faucets, including hot and cold water.
By following these steps, you can effectively clean and sanitize your RV water tank using bleach. Remember to always use caution when handling bleach and follow the recommended safety guidelines.
Alternative Methods for Sanitizing Your RV Water Tank
While using bleach is the most common method for sanitizing an RV water tank, some RVers prefer alternative methods. One option is to use a commercially available RV tank sanitizer, which eliminates the need for measuring and diluting bleach. These sanitizers are specially designed for RVs and are an easy and effective way to disinfect your water tank. Additionally, some RVers choose to use vinegar or hydrogen peroxide as natural alternatives to bleach.
Using a commercially available RV tank sanitizer is a convenient option for those who don’t want to deal with the hassle of measuring and diluting bleach. These sanitizers are specifically formulated to kill bacteria and other contaminants in your RV water tank, ensuring that you have fresh and clean water on your travels. Simply follow the instructions provided with the product to achieve effective disinfection. It’s important to choose a sanitizer that is suitable for RV use and follow the recommended dosage.
Alternatively, some RVers opt for natural alternatives to bleach, such as vinegar or hydrogen peroxide. Vinegar is an excellent natural cleaner and can help remove odor, stains, and bacteria from your RV water tank. Simply mix equal parts vinegar and water, pour the solution into your tank, and let it sit for a few hours before draining and flushing the system. Hydrogen peroxide can also be used as a natural sanitizer. Mix ¼ cup of hydrogen peroxide with 5 gallons of water, add it to your tank, let it sit for a few hours, and then drain and flush the system. These natural alternatives offer a gentler approach to disinfection while still effectively killing bacteria.
Benefits of using alternative methods:
- Convenient option with commercially available RV tank sanitizers
- Natural alternatives provide a gentler approach to disinfection
- Vinegar and hydrogen peroxide can help remove odors, stains, and bacteria
Considerations when using alternative methods:
- Follow the instructions provided with RV tank sanitizers
- Choose a sanitizer suitable for RV use
- Use proper dosage for effective disinfection
- When using vinegar or hydrogen peroxide, ensure proper dilution
By exploring alternative methods for sanitizing your RV water tank, you can find an approach that best suits your preferences and needs. Whether you choose a commercially available sanitizer or prefer natural alternatives, ensuring regular disinfection of your RV water tank is essential for maintaining clean and safe water on your adventures.

Tips for Maintaining a Clean RV Water Tank
Ensuring that your RV’s water tank remains clean and free from contaminants is essential for maintaining a safe and enjoyable camping experience. In addition to regularly sanitizing your RV water tank, there are several tips you can follow to maintain a clean water system.
1. Use a Water Filter
Installing a water filter in your RV’s water system is an effective way to remove impurities and sediment that can accumulate in the tank over time. A quality water filter can help improve the taste and quality of the water you use for drinking and cooking, providing you with peace of mind and a healthier camping experience.
2. Regularly Flush the Water Lines
Flushing the water lines in your RV is an important maintenance task that helps remove any stagnant water and potential debris. By periodically flushing the water lines, you can minimize the risk of bacterial growth and ensure a fresh and clean water supply throughout your RV.
3. Avoid Letting Water Sit in the Tank for Long Periods
Allowing water to sit in your RV water tank for an extended period can lead to the growth of bacteria and mold. Whenever possible, try to use up the water in your tank and refill it regularly to keep the water fresh. Additionally, drain and sanitize the tank if your RV will be in storage for an extended period.
4. Monitor the Quality of the Water
Regularly monitoring the quality of the water in your RV tank is crucial for identifying any potential issues early on. Keep an eye out for any strange odors, discoloration, or unusual tastes in the water. If you notice any abnormalities, take immediate action to address the problem and avoid consuming contaminated water.
By following these tips for maintaining a clean RV water tank, you can ensure that your water supply remains safe and healthy for all your camping adventures.
Conclusion
Maintaining a clean and sanitized RV water tank is crucial for the health and safety of you and your family while on the road. By regularly disinfecting your RV water tank and following proper maintenance procedures, you can ensure that the water you use for drinking, showering, and cleaning is free from harmful bacteria and contaminants.
To keep your RV water tank in top condition, make sure to sanitize it at least once a year or more frequently if your RV has been unused for an extended period. Utilize non-scented bleach or RV tank sanitizer to eliminate any unwanted odors in your water system. Additionally, consider using alternative methods such as commercial RV tank sanitizers or natural solutions like vinegar or hydrogen peroxide.
Remember, maintaining a clean water system goes beyond sanitizing the tank. Install a water filter to remove impurities, regularly flush the water lines, and avoid letting water sit in the tank for long periods. By following these tips, you can enjoy fresh, clean water on all your RV adventures, ensuring a healthy and safe experience for everyone.
FAQ
How often should I sanitize my RV water tank?
It is recommended to sanitize your RV water tank at least once a year. Some RVers choose to sanitize their water tanks every time their RV has been unused for 2-4 weeks.
What do I need to sanitize my RV water tank?
To sanitize your RV water tank, you will need a measuring cup, funnel, 5-gallon bucket or water storage container, potable water hose, non-scented bleach or RV tank sanitizer, and optionally a water tank filler.
How do I sanitize my RV water tank with bleach?
First, turn off your water heater and water pump. Then, drain the fresh water system and locate the drain valves for your RV’s plumbing lines. Calculate the amount of bleach needed and dilute it in water. Add the bleach mixture to the fresh water tank and fill it with clean water. Let the water sit for 12-24 hours before draining the tank and flushing the system.
Are there alternative methods for sanitizing an RV water tank?
Yes, some RVers prefer using commercially available RV tank sanitizers or natural alternatives such as vinegar or hydrogen peroxide.
What tips can help me maintain a clean RV water tank?
Use a water filter to remove impurities, regularly flush the water lines, avoid letting water sit in the tank for long periods, and monitor the quality of the water in your tank.