Connecting Your RV Battery: A Step-by-Step Guide
gorvlifestyle.com and its partners may earn a commission if you purchase a product through one of our links
Improperly connecting your RV battery can lead to damage and a loss of power. To avoid these issues, it’s crucial to follow a step-by-step process to ensure a proper and hassle-free connection. By understanding the correct procedures and using the right tools, you can confidently connect your RV battery and enjoy uninterrupted power during your adventures.
Key Takeaways:
- Properly connecting your RV battery is essential for avoiding damage and maintaining power.
- Identify the positive and negative connections, using red for positive and black for negative.
- Connect the positive terminal first, followed by the negative terminal, ensuring all connections are clean and secure.
- Check the circuit breaker in case of power issues and reset it if necessary.
- When disconnecting the battery, reverse the steps by disconnecting the negative terminal first, followed by the positive.
Understanding RV Converters and Battery Connection
An RV converter plays a crucial role in your RV’s electrical system by converting AC power into DC power, which is essential for powering various systems and appliances. To properly connect your RV battery to the converter, follow these steps:
- Disconnect your RV from all power sources, ensuring it is not connected to shore power or any other external power supply. This step is important for your safety during the connection process.
- Wear protective gear, including gloves and goggles, to protect yourself from any potential hazards.
- Gather the necessary equipment for the battery connection, including a deep-cycle battery, battery cables, wire strippers, and a battery terminal cleaner.
- Locate the RV converter, which is typically found in the electrical control panel or near the battery compartment.
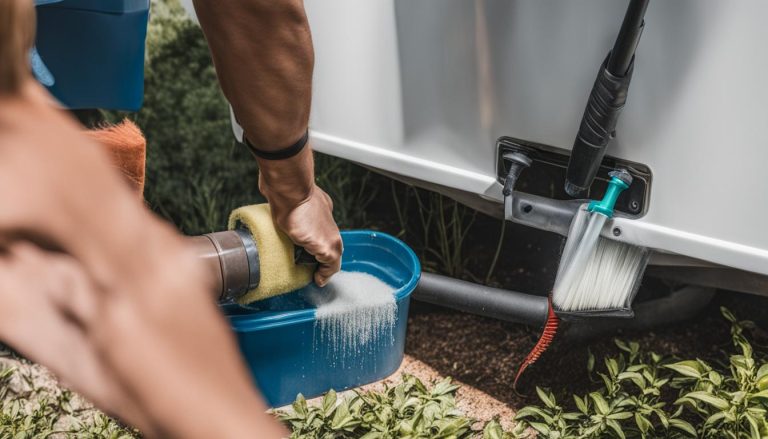
- Before connecting the battery, clean the battery terminals using a battery terminal cleaner to ensure a clean and secure connection.
- Attach the positive cable to the positive terminal of the converter and the negative cable to the negative terminal. It’s crucial to connect the cables correctly to avoid any electrical issues.
- Tighten the connections securely but not excessively. Over-tightening can damage the terminals or cables.
- Once the connections are secure, perform a visual inspection to ensure there are no loose connections or exposed wires.
- Always refer to the RV manufacturer’s manual for specific instructions and guidelines related to your RV’s converter and battery connection.
Following these steps will help ensure a proper and safe connection between your RV battery and converter, enabling your RV’s electrical system to function efficiently.
Example of a Properly Connected RV Battery and Converter:
| Component | Connection |
|---|---|
| Positive terminal of the converter | Positive cable |
| Negative terminal of the converter | Negative cable |
Note: The table above demonstrates a basic example of how the RV battery is connected to the converter. Actual connections might vary depending on your RV’s specific electrical system.
Now that you understand the importance of RV converters and how to connect your RV battery to the converter, you can ensure a reliable power supply for your RV’s electrical needs.
Connecting RV Batteries in Parallel for Increased Capacity
Connecting RV batteries in parallel is a smart way to boost your RV’s battery capacity and improve overall performance. By connecting the positive terminals together and the negative terminals together, you create a larger battery “bank” with more available power. This setup offers numerous benefits, including increased battery capacity, enhanced performance, and longer battery life.
To successfully connect RV batteries in parallel, follow these steps:
- Choose batteries with the same voltage rating. This ensures compatibility and prevents imbalanced charging.
- Gather the necessary tools: battery cables, wire cutters, and a wrench or socket set.
- Disconnect all power sources and electrical systems connected to the batteries for safety.
- Connect the positive terminals of the batteries using the battery cables.
- Connect the negative terminals of the batteries using the battery cables.
- Inspect all connections to ensure they are secure and properly tightened.
Connecting your RV batteries in parallel gives you the advantage of increased power capacity, which is especially beneficial during extended camping trips or when running multiple appliances simultaneously. Moreover, it promotes better load distribution across the batteries, leading to efficient charging and longer battery life.
Remember: Always prioritize safety. Ensure that you are following proper guidelines and precautions during the battery connection process.
Parallel Connection vs. Series Connection
It’s important to note the difference between parallel connection and series connection when it comes to RV batteries. While parallel connection increases capacity, series connection increases voltage. Based on your specific power needs and RV setup, you’ll need to decide which connection method is most suitable.
Here’s a quick comparison:
| Parallel Connection | Series Connection |
|---|---|
|
|
Depending on your power requirements, you may need to consult with a professional or refer to your RV manufacturer’s guidelines to determine the best battery connection method for your specific setup.
Keep your RV batteries properly connected and maintained to ensure a reliable power source throughout your adventures.

Ensuring Safety during Battery Connection
Safety is paramount when connecting your RV battery. Before starting the connection process, ensure that the RV is disconnected from shore power to prevent electrical shock. Use protective gloves and goggles for added safety. Familiarize yourself with the RV’s electrical system by referring to the manufacturer’s manual or seeking professional guidance. Always prioritize safety and follow the necessary precautions to avoid accidents or damage during the process.
| Safety Tips for RV Battery Connection |
|---|
|
Proper safety measures are crucial during RV battery connection to prevent accidents and ensure a smooth and hassle-free process. By following the necessary precautions, you can confidently set up and maintain your RV battery, enjoying your adventures on the road without any worries.

Choosing the Right Batteries for Parallel Connection
When connecting RV batteries in parallel, it’s essential to select batteries with the same voltage rating. Mixing batteries with different voltage ratings can lead to imbalanced charging and potential damage. To ensure a successful parallel connection, opt for high-quality deep-cycle batteries that offer sufficient capacity to meet your RV’s power demands.
Deep-cycle batteries are designed to discharge power over a longer period, making them ideal for RV setups. They provide a reliable and consistent source of power for your appliances and systems. Additionally, deep-cycle batteries have thicker lead plates, allowing them to withstand multiple charging and discharging cycles.
When choosing batteries for parallel connection, consider the following factors:
- Voltage Rating: Ensure all batteries have the same voltage rating to maintain a balanced power distribution across the entire battery bank.
- Capacity: Select batteries with sufficient capacity to meet your RV’s power requirements. Higher-capacity batteries will provide longer-lasting power.
- Brand and Quality: Opt for reputable brands known for their reliable performance and durability. High-quality batteries will offer better longevity and performance.
- Compatibility: Check for compatibility with your RV’s charging system and electrical setup. Consult the manufacturer’s recommendations or seek professional advice if necessary.
Investing in the right batteries for parallel connection ensures optimal power performance and a longer lifespan for your RV’s electrical system. Take the time to thoroughly research and choose batteries that align with your specific needs.
RV Battery Comparison
Here is a comparison of popular deep-cycle batteries suitable for parallel connection:
| Battery Brand | Voltage Rating | Capacity (Ah) | Price |
|---|---|---|---|
| Brand A | 12V | 100Ah | $200 |
| Brand B | 12V | 120Ah | $250 |
| Brand C | 6V | 220Ah | $300 |
Remember, these are general examples, and prices and specifications may vary. Consult the manufacturer’s specifications and review customer feedback to make an informed decision.
“Choosing the right batteries for parallel connection is crucial to ensure a balanced power distribution and maximize your RV’s electrical performance.”
By selecting batteries with the same voltage rating, ample capacity, and reputable quality, you can enjoy a reliable and efficient power supply for your RV adventures.
Necessary Equipment for Battery Connection
When it comes to connecting a battery to your RV, having the right equipment is essential for a successful setup. Here are the necessary tools and materials you’ll need:
- A deep-cycle battery: A reliable and long-lasting battery specifically designed for RV applications.
- Battery cables: These cables will connect your battery to the RV’s electrical system, ensuring a proper flow of power.
- Wire strippers: Used to remove the insulation from the ends of the battery cables, allowing for clean and secure connections.
- Battery terminal cleaner: Helps maintain the integrity of the battery terminals by removing corrosion and buildup.
- A wrench or socket set: Necessary for tightening the connections securely and ensuring a stable electrical connection
With these tools in hand, you’ll be well-equipped to handle the battery setup and installation process. Remember, using high-quality equipment and following proper installation procedures are vital for a reliable and efficient RV battery system.
Necessary Equipment for Battery Connection
| Equipment | Description |
|---|---|
| Deep-cycle battery | A reliable and long-lasting battery specifically designed for RV applications. |
| Battery cables | Cables that connect the battery to the RV’s electrical system, ensuring a proper flow of power. |
| Wire strippers | Tools used to remove the insulation from the ends of battery cables for clean and secure connections. |
| Battery terminal cleaner | A cleaning solution or tool that helps remove corrosion and buildup from battery terminals. |
| Wrench or socket set | Tools for tightening connections securely and ensuring a stable electrical connection. |
Step-by-Step Guide to Battery Connection
Properly connecting your RV battery is essential for optimal performance and reliability. Follow these simple steps to ensure a successful battery connection:
1. Begin by disconnecting your RV from all power sources and turning off all electrical systems. This will prevent any potential electrical shock or damage during the connection process.
2. Using a battery terminal cleaner, carefully clean the battery terminals to remove any dirt, corrosion, or oxidation. Clean and tight connections are crucial for a reliable and efficient battery setup.
3. Attach the positive cable of the battery to the positive terminal of the converter, and the negative cable to the negative terminal. Take care to connect the cables securely but not excessively tight, as overtightening can lead to damage.
4. Once the connections are made, double-check all the connections for tightness and security. Ensure that the cables are properly attached and that there is no movement or looseness.
Remember to always consult your RV manufacturer’s manual for specific instructions and guidelines regarding your RV’s battery connection. Following these steps will help you connect your RV battery safely and effectively, ensuring smooth operations and a worry-free travel experience.
FAQ
How do I connect my RV battery?
Start by identifying the positive and negative connections, using red for positive and black for negative. Connect the positive terminal first, followed by the negative terminal. Ensure all connections are clean and tight. Refer to the manufacturer’s manual for specific instructions.
What is an RV converter and how do I connect the battery to it?
An RV converter converts AC power into DC power to power various systems and appliances in your RV. To connect the battery to the converter, clean the battery terminals, attach the positive cable to the positive terminal of the converter, and the negative cable to the negative terminal. Tighten the connections securely. Always refer to the manufacturer’s manual for specific instructions.
How do I connect RV batteries in parallel?
To connect RV batteries in parallel, choose batteries with the same voltage rating. Disconnect all power sources and electrical systems connected to the batteries. Connect the positive terminals of the batteries and then the negative terminals. Inspect the connections to ensure they are secure.
Is safety important when connecting my RV battery?
Yes, safety is paramount when connecting your RV battery. Ensure the RV is disconnected from power, wear protective gear, and follow the necessary precautions to avoid accidents or damage.
Can I connect batteries with different voltage ratings in parallel?
It is crucial to choose batteries with the same voltage rating when connecting them in parallel. Mixing batteries with different voltage ratings can lead to imbalanced charging and damage.
What equipment do I need to connect my RV battery?
Gather a deep-cycle battery, battery cables, wire strippers, a battery terminal cleaner, and a wrench or socket set.
What are the step-by-step instructions for connecting my RV battery?
Start by disconnecting the RV from power sources and turning off electrical systems. Clean the battery terminals, attach the positive cable to the positive terminal of the converter, and the negative cable to the negative terminal. Tighten the connections securely but not excessively. Double-check all connections for tightness and security.