Efficient Guide: How to Clean RV AC Easily
gorvlifestyle.com and its partners may earn a commission if you purchase a product through one of our links
Maintaining your RV’s air conditioner is crucial for a comfortable journey. Understanding the components of your RV’s AC system, such as the shroud, AC unit, air distribution assembly, air filter, and thermostat, is important before you start the cleaning process. Follow the step-by-step guide to cleaning and maintaining your RV AC, including safety precautions, filter inspection and cleaning, shroud inspection and cleaning, deep cleaning the coils, checking the seal, and thermostat maintenance. Don’t forget general usage and maintenance tips, as well as common mistakes to avoid. Regular maintenance ensures a cool retreat from the summer heat and extends the lifespan of your RV’s air conditioner.
Key Takeaways:
- Cleaning and maintaining your RV’s air conditioner is important for comfort and longevity.
- Understand the components of your RV’s AC system before starting the cleaning process.
- Follow the step-by-step guide for a thorough cleaning, including filter inspection and cleaning, shroud inspection and cleaning, deep cleaning the coils, checking the seal, and thermostat maintenance.
- Regular maintenance and proper usage are essential for optimal AC performance.
- Avoid common mistakes to ensure efficient airflow and cooling.
Step 1: Safety Precautions
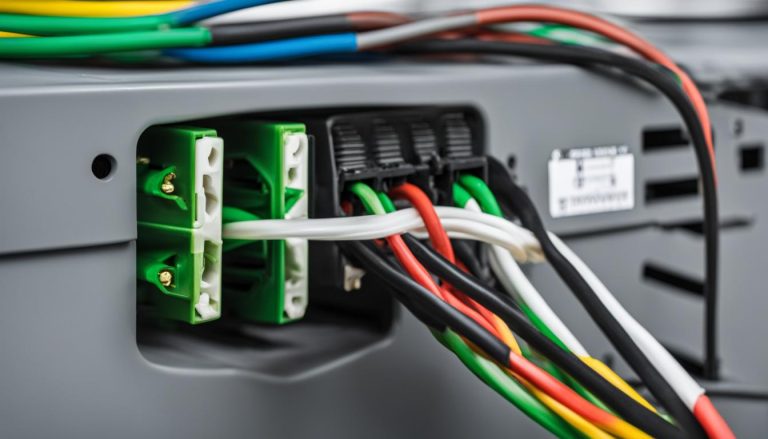
Before you start cleaning your RV AC, it’s essential to prioritize safety and protect both yourself and the unit from potential electrical hazards. Follow these safety precautions:
- Disconnect from Power: Before beginning any work on your RV AC, disconnect it from any power source to prevent electrical shocks.
- Wear Gloves: Throughout the cleaning process, make sure to wear gloves to protect your hands from cleaning agents and any sharp or rough AC parts. Safety should always come first.
By taking these necessary safety measures, you can ensure a secure and hazard-free RV AC cleaning process.
Remember, safety precautions are essential when cleaning your RV AC. Always disconnect the unit from power and wear protective gloves to keep yourself and the AC unit safe.
| Safety Precautions |
|---|
| 1. Disconnect from Power |
| 2. Wear Gloves |
Step 2: Filter Inspection and Cleaning
Now that you understand the importance of maintaining your RV’s air conditioner, it’s time to move on to step 2: filter inspection and cleaning. The air filter plays a crucial role in keeping your AC system running smoothly and efficiently. Clogged or dirty filters can restrict airflow and reduce cooling performance, so regular cleaning is essential.
To start, locate the air filter which is typically found under a removable panel on the air distribution box. Once you’ve located it, inspect the filter for any tears, excessive dirt, or clogging. A clean filter should have a light layer of dust, while a dirty filter may appear gray or brown.
Pro tip: If the filter is excessively dirty or torn, it’s best to replace it with a new one to ensure optimal performance.
To clean the filter, you’ll need warm water and a mild detergent. Gently remove the filter and rinse it thoroughly under running warm water. If there are any stubborn dirt particles, use a soft brush to gently brush them away. Avoid using harsh chemicals or scrubbing too vigorously, as this can damage the filter.
Once the filter is clean, allow it to dry completely before reinstalling it. It’s important to ensure that the filter is completely dry to prevent the growth of mold or mildew.
Pro tip: If you’re cleaning the filter outdoors, make sure to shield it from direct sunlight to avoid any potential damage.
Remember, a clean and properly functioning filter will not only improve the efficiency of your RV’s air conditioner but also provide cleaner air for a more comfortable journey. Regularly inspect and clean the filter to maintain optimal performance throughout your travels.
| Benefits of Cleaning RV AC Filter | Common Mistakes to Avoid |
|---|---|
|
|
Step 3: Shroud Inspection and Cleaning
Climb onto the RV roof and inspect the shroud for cracks, damages, or wear. Clean the shroud by wiping it down with a damp cloth to remove dirt and debris. Consider replacing the shroud if it shows significant damage to maintain efficiency.
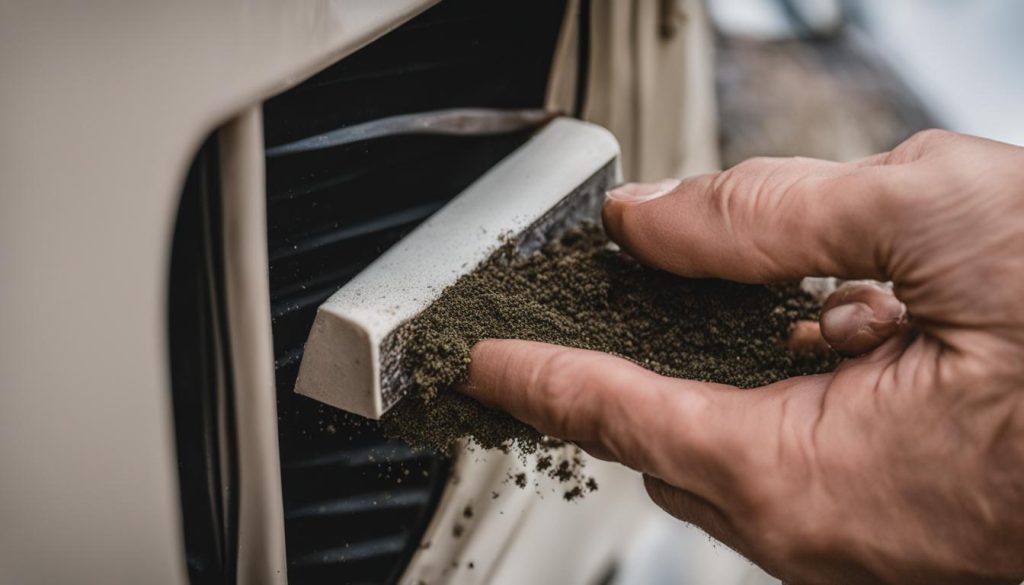
Regularly inspecting and cleaning the shroud of your RV’s AC unit is essential for keeping it in optimal condition. Over time, dirt, dust, and debris can accumulate on the shroud, hindering the unit’s performance. By inspecting the shroud for cracks, damages, or signs of wear, you can address any issues before they worsen.
To clean the shroud, start by wiping it down with a damp cloth. This will help remove surface dirt and debris. Be thorough in wiping all areas of the shroud, paying extra attention to areas where dirt may have accumulated. If there are stubborn stains or grime, you can use a mild detergent mixed with water to clean those areas. However, avoid using harsh chemicals or abrasive cleaners as they can damage the shroud.
After cleaning, allow the shroud to dry completely before reinstalling it. This will prevent moisture buildup and potential mold growth. Additionally, while inspecting and cleaning the shroud, take note of any significant damage. If you notice cracks, holes, or excessive wear, it may be time to replace the shroud. A damaged shroud can affect the overall efficiency of your RV’s AC system and lead to costly repairs down the line.
Step 4: Deep Cleaning the Coils
Now that you’ve inspected and cleaned the air filter and shroud, it’s time to move on to the next crucial step: deep cleaning the coils. Dust and debris can accumulate on the coils over time, reducing the efficiency of your RV’s air conditioner. Follow these steps to ensure your coils are clean:
- Remove the shroud by carefully unscrewing or unclipping it. This will expose the coils.
- Gently brush off any visible debris using a soft brush. Be careful not to bend or damage the delicate fins of the coils.
- Apply a coil cleaner specifically designed for RV air conditioners. Follow the product’s instructions on how to apply and let it sit on the coils for the recommended duration.
- Rinse the coils thoroughly with water to remove any residue from the cleaner. It’s best to use a gentle stream of water or a spray bottle to avoid applying too much pressure.
Deep cleaning the coils not only improves the efficiency of your RV’s air conditioner but also ensures the longevity of the unit. By removing built-up dirt and debris, you allow the air conditioner to cool more effectively, providing you with a comfortable indoor environment during your travels.
| Benefits of Deep Cleaning the Coils | How It Helps |
|---|---|
| Improved cooling efficiency | Removes obstructions for better airflow |
| Prevents mold and bacteria growth | Eliminates moisture-trapping debris |
| Reduces energy consumption | Allows the AC unit to work more efficiently |
| Extends the lifespan of the AC unit | Reduces strain on the system and prevents potential breakdowns |
Regularly deep cleaning the coils of your RV’s air conditioner is an essential part of maintenance. It ensures your AC unit operates at its best, providing you with a cool and comfortable environment no matter where your adventures take you.
Step 5: Checking the Seal
To ensure optimal performance of your RV AC, it is crucial to regularly inspect the seal between the AC unit and your RV’s roof. This step helps maintain an efficient seal, preventing any air leaks that can compromise the cooling capacity of your AC unit. Follow these simple steps to check the seal:
- Start by grabbing a flashlight to illuminate the area where the AC unit connects to the roof.
- Thoroughly examine the seal, looking for any signs of damage, gaps, or wear.
- If the unit feels loosened, gently tighten it to ensure a secure fit and prevent any potential air leakage.
- If you notice a worn-out gasket or a seal that cannot be fixed by tightening, consider replacing it with a new one to maintain the efficiency of the seal.
Remember, a properly sealed AC unit helps optimize cooling performance, ensuring a comfortable environment inside your RV.
Now let’s take a look at a table summarizing the maintenance steps for cleaning your RV AC:
| Step | Action |
|---|---|
| Step 1 | Safety Precautions |
| Step 2 | Filter Inspection and Cleaning |
| Step 3 | Shroud Inspection and Cleaning |
| Step 4 | Deep Cleaning the Coils |
| Step 5 | Checking the Seal |
| Step 6 | Thermostat Maintenance |
By following these maintenance steps, you can ensure your RV AC operates efficiently, keeping you cool during your adventures on the road.
Step 6: Thermostat Maintenance
To ensure optimal performance of your RV’s air conditioner, don’t forget to give some attention to the thermostat. Follow these simple maintenance tips to keep your thermostat in top shape:
- Test the thermostat: Turn on the AC and adjust the temperature to make sure the thermostat responds correctly. Verify that it accurately regulates the temperature according to your settings.
- Dust off regularly: Dust accumulation can affect the thermostat’s functionality. Regularly clean the thermostat by gently wiping it with a soft cloth to remove any dust or debris that may hinder its performance.
- Consider replacement if needed: If the thermostat doesn’t regulate the temperature properly or fails to respond to adjustments, it may be time to consider replacing it. A faulty thermostat can lead to uncomfortable temperature fluctuations inside your RV.
By maintaining your thermostat, you can ensure a comfortable and consistent indoor climate during your travels. Proper thermostat care is just as important as cleaning other components of your RV’s air conditioning system.
FAQ
Is it necessary to clean my RV’s AC?
Yes, it is crucial to clean your RV’s air conditioner regularly for optimal performance and comfort during your travels. Cleaning the AC helps to remove dirt, debris, and mold, allowing for efficient airflow and extending the lifespan of the unit.
How often should I clean my RV’s AC?
It is recommended to clean your RV’s AC at least once every season or more frequently if you frequently use your RV or travel to dusty or humid areas. Regular maintenance ensures that your AC functions properly and provides a cool retreat from the summer heat.
What safety precautions should I take before cleaning my RV’s AC?
Before cleaning your RV’s AC, ensure your safety by disconnecting the RV from any power source. This step protects you from electrical issues. Additionally, remember to wear gloves throughout the cleaning process to protect your hands from cleaning agents and AC parts.
Where is the air filter located in my RV’s AC system?
The air filter is typically located under a removable panel on the air distribution box. This box can usually be found inside your RV, near the AC unit.
How do I clean the air filter of my RV’s AC?
To clean the air filter, remove it from the air distribution box and inspect it for tears, excessive dirt, or clogging. Rinse the filter with warm water and a mild detergent, using a soft brush for stubborn dirt. Allow the filter to dry completely before reinstalling it to prevent mold and ensure efficient airflow.
Can the shroud of my RV’s AC be cleaned?
Yes, the shroud of your RV’s AC can be cleaned. Climbing onto the RV roof, inspect the shroud for cracks, damages, or wear. Clean the shroud by wiping it down with a damp cloth to remove dirt and debris. If the shroud shows significant damage, consider replacing it to maintain the efficiency of your AC.
How do I clean the coils of my RV’s AC?
To clean the coils, remove the shroud to expose them. Gently brush off any visible debris using a soft brush. Apply a coil cleaner following the product’s instructions. Rinse the coils thoroughly with water to remove any residue. Cleaning the coils improves the efficiency of your AC.
What should I check regarding the seal of my RV’s AC?
Using a flashlight, inspect the seal between the AC unit and the RV’s roof. If the unit seems loose, tighten it to ensure a secure fit. If the gasket appears worn out, consider replacing it to maintain an efficient seal.
How do I maintain the thermostat of my RV’s AC?
Test the thermostat by turning on the AC and adjusting the temperature. Dust off the thermostat regularly to ensure it functions correctly. If the thermostat doesn’t regulate the temperature or respond to adjustments, consider replacing it to maintain a comfortable interior temperature.


