RV Fresh Water Tank Cleaning Guide
gorvlifestyle.com and its partners may earn a commission if you purchase a product through one of our links
Properly cleaning and maintaining your RV’s fresh water tank is essential for a safe and enjoyable camping experience. Regular cleaning ensures that your water is free from contaminants and provides peace of mind when using it for drinking, showering, and cooking. This comprehensive guide will walk you through the step-by-step process of cleaning your RV’s fresh water tank, including the tools you’ll need and best practices for maintaining a spotless tank.
Key Takeaways:
- Follow a step-by-step guide for cleaning your RV’s fresh water tank to ensure proper maintenance and cleanliness.
- Regularly clean and sanitize your RV’s water tank to prevent the growth of bacteria and maintain water quality.
- Use essential tools, such as a measuring cup, funnel, and non-scented bleach, for effective and efficient water tank cleaning.
- Maintain your RV’s fresh water tank by practicing best practices, including regular inspection and flushing of the system.
- Troubleshoot common issues like foul odors, sediment, leaks, and low water pressure to ensure a problem-free water system in your RV.
Why is Cleaning Your RV Fresh Water Tank Important?
Properly maintaining your RV’s fresh water tank is essential for a safe and enjoyable camping experience. Regular cleaning not only ensures the availability of clean and safe water but also offers several benefits to both you and your RV. Let’s explore the importance of cleaning your RV fresh water tank and the advantages it brings.
1. Prevent Bacteria Growth: Regular cleaning helps prevent the growth of bacteria, mold, and mildew in your RV water tank. These microorganisms can contaminate the water supply and pose serious health risks to you and your travel companions. By keeping the tank clean, you ensure that the water remains free from harmful contaminants.
“Properly cleaning and maintaining your RV’s fresh water tank is essential for a safe and enjoyable camping experience.”
2. Maintain Water Quality: Cleaning your RV water tank removes sediment, debris, and accumulated minerals, ensuring that your water remains fresh and of good quality. This prevents unpleasant tastes, odors, and discoloration that can develop over time. Clean water enhances the overall camping experience, especially when using it for drinking, cooking, and bathing.
3. Ensure a Safe Water Supply: By regularly cleaning your RV water tank, you ensure a safe water supply for you and your family. Whether you’re staying at a campground or boondocking in remote locations, having clean water is vital. It gives you peace of mind, knowing that you’re consuming and using water that is free from contaminants.
“Cleaning your RV’s fresh water tank is crucial for several reasons.”
4. Avoid Foul Odors and Tastes: Over time, stagnant water in the tank can develop foul odors and tastes. These unpleasant odors and tastes can permeate into your drinking water, making it unappetizing and less enjoyable. Regular cleaning eliminates these issues, ensuring that your drinking water remains fresh and palatable.
5. Prolong the Lifespan of Your RV Water Tank: Proper maintenance and cleaning help prolong the lifespan of your RV water tank. By removing sediment, minerals, and contaminants, you prevent corrosion and damage that can lead to leaks and expensive repairs. Regular cleaning is a cost-effective measure that protects your investment and extends the life of your water tank.
How Often Should You Clean Your RV Fresh Water Tank?
The frequency of cleaning your RV’s fresh water tank depends on various factors such as usage, storage conditions, and water quality. As a general rule, it is recommended to clean your tank at least once every six months. Regular cleaning helps maintain the integrity of your water system and ensures a safe and enjoyable camping experience.
Recommended Cleaning Schedule for Fresh Water Tank:
- Every 6 months: It is advisable to clean your RV fresh water tank thoroughly every six months. This helps prevent the buildup of bacteria, mold, and other contaminants that may affect the quality of your water.
- After long periods of non-use: If your RV’s water tank has been sitting unused for an extended period, it is essential to clean and sanitize it before using it again. Stagnant water can promote the growth of bacteria and lead to foul odors and tastes in your water.
Signs that Indicate Tank Cleaning is Needed:
- Foul odors or tastes in the water: If you notice a strong smell or unpleasant taste in your RV’s water, it may be an indication that your fresh water tank requires cleaning.
- Visible sediment or debris in the tank: Any visible particles or sediment in the water or at the bottom of your tank are signs that it needs to be cleaned thoroughly.
Regular inspection and maintenance will help you determine when to sanitize your RV’s water tank. If you notice any of the above signs or have concerns about your water quality, it is best to clean your fresh water tank to ensure clean and safe water during your travels.
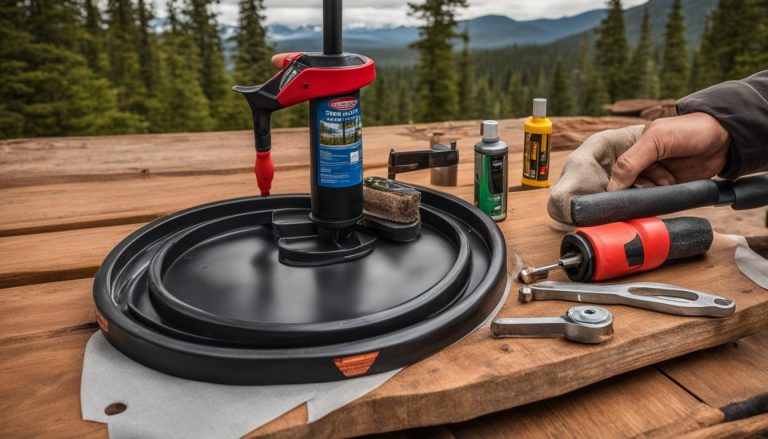
Tools and Supplies Needed for RV Fresh Water Tank Cleaning
Before embarking on the process of cleaning your RV’s fresh water tank, it’s important to gather the essential tools and supplies. Having the right equipment will ensure an effective and thorough cleaning, as well as maintain the integrity of your RV’s water system.
Here are the tools and supplies you’ll need:
- Measuring cup: Use a measuring cup to accurately add the cleaning solution to your water tank.
- Funnel: A funnel will help you pour the cleaning solution into the tank without any spills or mess.
- 5-gallon bucket or water storage container: This container will be used to collect and dispose of the water from the tank.
- Potable water hose: A potable water hose is essential for filling and flushing the tank with clean water.
- Non-scented bleach or RV tank sanitizer: Choose a non-scented bleach or RV tank sanitizer to kill bacteria and sanitize the tank.
- Water tank filler (optional): A water tank filler can make the filling process easier by providing a direct connection from the water source to the tank.

With these tools and supplies on hand, you’ll be well-equipped to clean and sanitize your RV’s fresh water tank effectively. Remember to follow the manufacturer’s instructions when using cleaning products and always prioritize safety and cleanliness.
Step-by-Step Guide for Cleaning Your RV Fresh Water Tank
Properly cleaning and sanitizing your RV’s fresh water tank is crucial to ensure a safe and clean water supply. Follow these step-by-step instructions to maintain the integrity and quality of your RV’s water tank:
- First, turn off the water heater and water pump to prevent any accidents or water flow during the cleaning process.
- Drain the entire water system by opening all faucets, including both hot and cold water taps, as well as the showerhead. This step will help remove any existing water from the tank and plumbing lines.
- Calculate the amount of bleach needed based on the size of your RV’s water tank. The general recommendation is to use ¼ cup of bleach for every 15 gallons of water tank capacity. Use a measuring cup or similar tool to accurately measure the bleach.
- Add the calculated amount of bleach directly into the fresh water tank. You can use a funnel to ensure a spill-free process.
- Fill the water tank completely with fresh water. Connect a potable water hose to a clean water source and use it to fill the tank. This step allows the bleach solution to circulate throughout the entire system, disinfecting every component.
- Turn on the water pump and open all faucets, including the shower, to let the water flow through the system. This will distribute the bleach solution and clean the plumbing lines.
- Allow the RV to sit for 12 to 24 hours with the bleach solution in the tank. This extended period ensures that the disinfection process is thorough and effective.
- After the required time has passed, drain the entire system again by opening all faucets and draining the tank completely. This step ensures that all traces of bleach are removed from the system.
- Flush the water system by refilling the tank with fresh water and opening all faucets once again, allowing the clean water to flow through the plumbing lines. Repeat this process until there are no signs of bleach smell or taste in the water.
- Finally, refill the fresh water tank with clean water and ensure that the system is ready for use. Test the water by running it through faucets and ensuring its odor-free and tasteless.
Additional Tips:
- Wearing gloves and safety goggles is recommended when working with bleach to protect your skin and eyes.
- Use non-scented bleach or RV-specific tank sanitizers to avoid leaving any unwanted scents or flavors in your water.
- Regularly cleaning and sanitizing your RV’s fresh water tank is essential for maintaining a clean water supply. Consider establishing a cleaning schedule every six months or as needed based on usage and water quality.
By following these step-by-step instructions, you can ensure a clean and safe water supply for all your RV adventures.
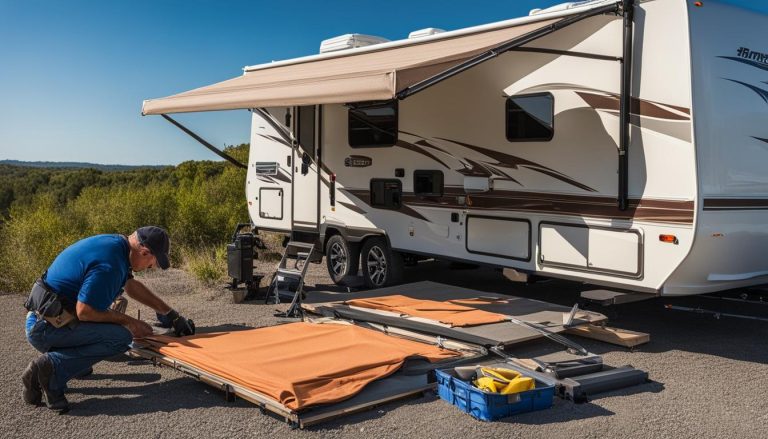
Best Practices for Maintaining Your RV Fresh Water Tank
To keep your RV’s fresh water tank clean and in optimal condition, it’s important to follow these best practices:
- Regular Inspection: Take the time to inspect your RV’s water tank regularly for any signs of damage or contamination. Look for cracks, leaks, or signs of mold or mildew.
- Keep it Debris-Free: Use a water filter to keep your tank and plumbing lines free from debris. This will help prevent clogs and ensure clean water flow throughout your RV.
- Avoid Harsh Cleaning Agents: When cleaning your RV’s water tank, avoid using harsh chemicals or cleaning agents that can damage the tank or leave residue. Stick to RV-safe cleaning products or natural alternatives.
- Flush the System: Before each trip, flush your RV’s water system with clean water. This will help remove any leftover sediment or contaminants and ensure fresh, clean water during your travels.
- Drain the Tank: If you’re not using your RV for an extended period, it’s essential to drain the water tank. Stagnant water can lead to bacterial growth and odors. Make sure to open all faucets and drains to completely empty the tank.
By following these preventive measures, you can ensure the cleanliness and functionality of your RV’s water tank, avoiding common issues and maintaining a fresh water supply throughout your travels.
“Regular inspection, keeping it debris-free, avoiding harsh cleaning agents, flushing the system, and draining the tank are vital steps in maintaining a clean and functioning RV water tank.”

| Best Practices for Maintaining Your RV’s Fresh Water Tank | Benefits |
|---|---|
| Regular inspection | Prevents damage and contamination |
| Keeping it debris-free | Ensures clean water flow and prevents clogs |
| Avoiding harsh cleaning agents | Protects the tank from damage and residue buildup |
| Flushing the system | Removes sediment and contaminants for clean water |
| Draining the tank | Prevents bacterial growth and foul odors |
Troubleshooting Common Issues with RV Fresh Water Tanks
RV fresh water tanks may encounter various issues over time. It’s important to be aware of these common problems and know how to address them to maintain a fully functional water system in your RV.
Foul Odors in RV Water
If you detect foul odors in your RV’s water, it could be a result of bacteria growth or contaminated water. To fix this issue:
- Sanitize the tank using a non-scented bleach or RV tank sanitizer.
- Flush the entire system, including the pipes, faucets, and showerheads, to remove any residual contaminants.
Removing Sediment from the Water Tank
Sediment or debris in the water tank can cause clogging or affect the quality of your water. Here’s how you can remove sediment from your RV’s water tank:
- Regularly clean and flush your water tank to prevent sediment buildup.
- Consider using a water filter to minimize the amount of debris that enters the tank.
Dealing with Tank Leaks in RV
Tank leaks can be a frustrating problem. If you notice a leak in your RV’s water tank, follow these steps:
- Identify the source of the leak by inspecting the tank and connections.
- If it’s a minor leak, you may be able to fix it temporarily with a water tank repair kit.
- For larger or more complex leaks, it’s recommended to consult a professional for proper repair or replacement.
Addressing Low Water Pressure in RV
If you’re experiencing low water pressure in your RV, it can be frustrating. Here’s what you can do to address this issue:
- Check for any kinks or blockages in the water hose or plumbing system.
- Clean or replace the water filter to ensure proper water flow.
- If the issue persists, consult a professional to diagnose and fix any underlying problems with the water pressure system.
By troubleshooting these common issues with RV fresh water tanks, you can ensure a smooth and problem-free water system, allowing you to enjoy your camping adventures without any water-related concerns.
Enjoy Fresh and Clean Water on Your RV Adventures
When you’re on the road in your RV, having access to fresh and clean water is essential for a safe and enjoyable camping experience. By following proper cleaning and maintenance techniques, you can ensure that you and your family have a reliable and safe water supply while on your adventures.
One of the main benefits of clean water in your RV is the peace of mind it brings. You can confidently use the water for drinking, cooking, and showering, knowing that it is free from contaminants and bacteria. Maintaining a hygienic water system also helps you stay healthy and avoid any potential waterborne illnesses.
Ensuring water quality on the road is crucial not only for your health but also for the overall comfort of your camping trip. By regularly cleaning and maintaining your RV’s water tank, you can prevent foul odors and tastes from developing over time. Enjoying safe water supply in your RV allows you to fully relax and enjoy your time in nature.
So, take the necessary steps to maintain the cleanliness of your RV’s water system. Regularly clean your fresh water tank, use proper sanitizing techniques, and follow best practices for maintaining the tank’s hygiene. By doing so, you can enjoy the benefits of clean water in your RV and have a worry-free and refreshing camping experience.
FAQ
How often should I clean my RV’s fresh water tank?
It is recommended to clean your tank at least once every six months. However, certain signs indicate that cleaning is necessary, such as foul odors or tastes in the water, visible sediment or debris in the tank, or if the tank has been unused for an extended period.
What tools and supplies do I need for cleaning my RV’s fresh water tank?
You will need a measuring cup, funnel, 5-gallon bucket or water storage container, potable water hose, non-scented bleach or RV tank sanitizer, and a water tank filler (optional).
How do I clean and sanitize my RV’s fresh water tank?
First, turn off the water heater and water pump and drain the system. Calculate the amount of bleach needed and add it to the tank. Fill the tank with fresh water and pump it through the system, allowing the bleach solution to circulate. Let the water sit for 12-24 hours to sanitize the tank. Drain the tank and flush the system with clean water. Finally, refill the tank and ensure it is ready for use.
How can I prevent common issues with my RV’s fresh water tank?
Regularly inspect the tank for any signs of damage or contamination. Keep the tank and plumbing lines free from debris by using a water filter. Avoid using harsh cleaning agents that can damage the tank. Flush the system with clean water before each trip and drain the tank when not in use for an extended period.
What should I do if I experience foul odors or tastes in my RV’s water?
Sanitize the tank and flush the system to address bacteria growth or contaminated water. Regular cleaning and using a water filter can prevent sediment or debris from affecting water quality.
How can I troubleshoot common issues with my RV’s fresh water tank?
If you encounter leaks or low water pressure, it is best to seek professional assistance. They can identify and fix the problem accurately. Troubleshoot foul odors by sanitizing the tank and flushing the system.
Why is cleaning my RV’s fresh water tank important?
Cleaning the tank helps prevent the growth of bacteria, mold, and mildew, ensuring safe and contaminant-free water. It also eliminates foul odors and tastes and prolongs the lifespan of the water tank.
How can I enjoy fresh and clean water on my RV adventures?
By following proper cleaning and maintenance techniques, you can ensure a safe and pleasant camping experience. Regularly clean and sanitize your water tank, inspect for damage, use a water filter, and flush the system before each trip.