RV Fresh Water Tank Cleaning Guide
gorvlifestyle.com and its partners may earn a commission if you purchase a product through one of our links
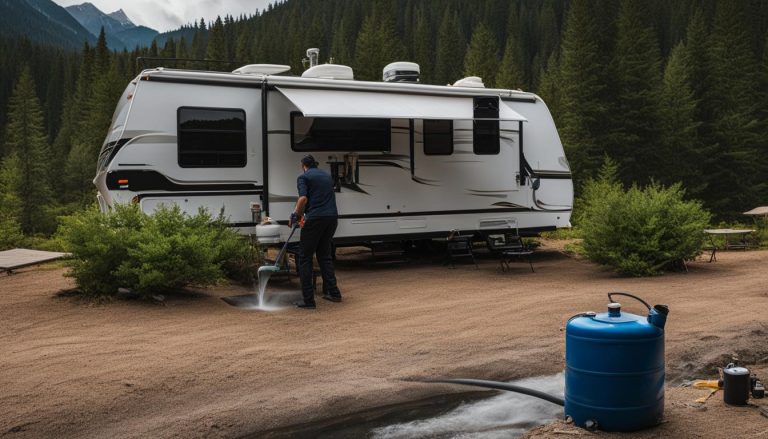
Maintaining a clean and safe fresh water tank is crucial for a successful and enjoyable RV camping experience. Your RV’s fresh water tank is responsible for providing safe water for drinking, showering, and washing dishes. Regular maintenance and sanitization of the tank are necessary to ensure the quality of the water.
Whether you choose to do the cleaning process yourself or take your RV to a service center, the steps to clean the fresh water tank are straightforward and can be completed using common household items. In this guide, we will provide you with step-by-step instructions on how to clean your RV’s fresh water tank effectively.
Key Takeaways:
- Regular maintenance of your RV’s fresh water tank is essential for clean and safe water on your camping trips.
- Sanitizing the fresh water tank should be done at least once a year, or more frequently if your RV has been unused for 2-4 weeks.
- Sanitizing supplies include a measuring cup, funnel, 5-gallon bucket or water storage container, potable water hose, non-scented bleach or RV tank sanitizer, and a water tank filler (optional).
- The process of sanitizing the fresh water tank can be done with bleach or an environmentally-friendly cleaning solution.
- Regular sanitization of the fresh water tank helps prevent the growth of bacteria, mold, and mildew, ensuring a clean water supply for your RV adventures.
How Often Should You Sanitize Your RV Fresh Water Tank?
Regular maintenance of your RV’s fresh water tank is crucial for ensuring clean and safe water during your camping trips. Most RVs have three holding tanks: the fresh water tank, gray water tank, and black water tank. Among these, the fresh water tank is responsible for providing safe water for drinking, showering, and washing dishes.
So, how often should you sanitize your RV fresh water tank? Well, it depends on various factors. Some RV manufacturers recommend sanitizing your fresh water tank after each use, but this is often interpreted differently by RVers. Many RVers choose to sanitize their fresh water system once a year, typically in the spring when they’re getting their RV ready for the camping season.
Others prefer a more proactive approach and sanitize their fresh water tank every time their RV has been unused for 2-4 weeks, ensuring a continuous supply of safe water.
Regular sanitization not only guarantees safe water but also keeps your RV’s water system in optimal condition. Sanitizing your fresh water tank removes any potential bacteria, mold, or other contaminants that may accumulate over time, providing you with clean and safe water for drinking, showering, dishwashing, and laundry on the road.
Sanitizing your RV’s fresh water tank doesn’t require any special tools and can be done with common household items. One common method is to use bleach, which is an effective cleaning solution for sanitizing the tank. Alternatively, you can opt for more environmentally-friendly cleaning solutions specifically designed for RV fresh water tank sanitization.
To summarize, sanitizing your RV fresh water tank is a routine maintenance process that helps ensure the safety of your water supply. Whether you choose to sanitize it once a year or more frequently, the important thing is to keep your water system clean and provide you and your family with a reliable source of safe water.
| Frequency | Explanation |
|---|---|
| After each use | Recommended by some RV manufacturers, but open to interpretation |
| Once a year | Common practice, usually done in spring when preparing for the camping season |
| Every 2-4 weeks of non-use | A proactive approach to ensure continuous safe water supply |
What Do You Need to Sanitize your RV Fresh Water Tank?
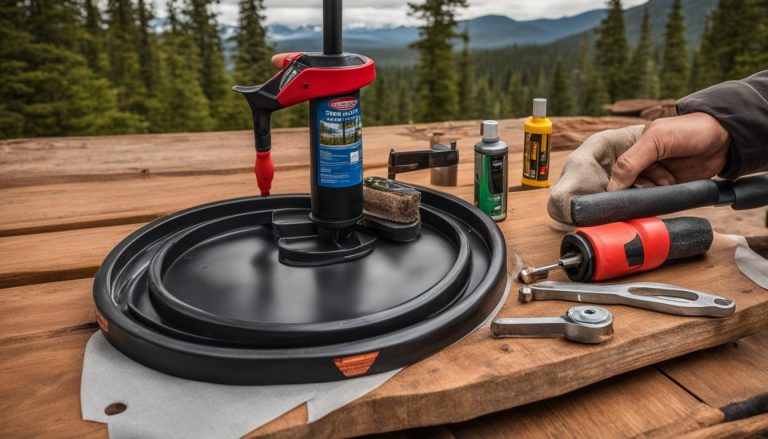
Sanitizing your RV fresh water tank is a crucial step in maintaining a clean and safe water supply for your camping adventures. Fortunately, you don’t need any special tools to get the job done. Here are the supplies you’ll need:
- A Measuring Cup: This will help you accurately mix the sanitizing solution.
- A Funnel: Use a funnel to pour the sanitizing solution into the tank without any spills or mess.
- A 5-Gallon Bucket or Water Storage Container: This will be used to prepare the sanitizing solution before adding it to the tank.
- A Potable Water Hose: You’ll need a hose to fill the fresh water tank with the sanitizing solution.
- Non-scented Bleach or RV Tank Sanitizer: Choose either non-scented bleach or an RV-specific tank sanitizer to kill any bacteria or contaminants.
- A Water Tank Filler (Optional): A water tank filler makes it easier to fill your RV’s fresh water tank without any spills or splashes.
It is important to use the correct ratio of bleach to water when sanitizing your tank. Follow the manufacturer’s instructions or use a solution of 1/4 cup of bleach per 15 gallons of water. This will ensure effective sanitization without harming your RV’s water system.
Bleach is a safe and commonly used sanitizing agent for RV fresh water tanks. It is effective in killing bacteria and maintaining a clean water system throughout your travels, including the water pump.
Here’s a summary of the supplies needed for sanitizing your RV fresh water tank:
| Supplies | Description |
|---|---|
| Measuring Cup | To accurately measure the sanitizing solution |
| Funnel | To pour the sanitizing solution into the tank |
| 5-Gallon Bucket or Water Storage Container | To prepare the sanitizing solution before adding it to the tank |
| Potable Water Hose | To fill the fresh water tank with the sanitizing solution |
| Non-scented Bleach or RV Tank Sanitizer | To kill bacteria and contaminants |
| Water Tank Filler (Optional) | To fill the fresh water tank without spills or splashes |
Having these supplies on hand will ensure a smooth and successful sanitization process for your RV’s fresh water tank, providing you with clean and safe water throughout your camping trips.
How To Sanitize RV Fresh Water Tank with Bleach
Before sanitizing your fresh water tank, it’s important to turn off the water heater and water pump to ensure safety and prevent any damage. Draining your freshwater system is also crucial to ensure thorough cleaning. Locate the fresh water tank drain and low-point drains for your RV’s plumbing lines, as these will be used during the sanitization process.
Now, let’s go step-by-step through the bleach sanitization method:
- Calculate the amount of bleach you’ll need based on the size of your fresh water tank. It’s recommended to use 1/4 cup of bleach for every 15 gallons of tank capacity.
- Dilute the bleach in water. Mix the calculated amount of bleach with a sufficient amount of water in a clean container. Ensure the bleach is thoroughly mixed with the water.
- Add the bleach mixture to your fresh water tank using a funnel. Slowly pour the bleach mixture into the tank, making sure not to spill or splash.
- Fill the tank with potable water. Use a potable water hose to fill the fresh water tank with clean water. It’s important to use water that is safe for drinking.
- Pump the bleach solution through the system. Open all faucets and showerheads in your RV to allow the bleach solution to flow through the pipes. This helps sanitize the entire water system.
- Let the water sit in the tank for 12-24 hours. This allows the bleach solution to effectively sanitize the tank and water lines. Keep in mind that the longer the water sits, the better the sanitization.
- Drain the tank and flush the system. Open the fresh water tank drain and all faucets to drain the bleach solution from the tank and flush the system with clean water. This helps remove any remaining bleach residue.
By following these step-by-step instructions, you can effectively sanitize your RV fresh water tank using the bleach method. Remember to practice caution while handling bleach and always use appropriate safety measures. You’ll enjoy clean and safe water on your RV camping adventures!
Expert Tip:
It’s a good idea to wear gloves and protective eyewear when handling bleach. Additionally, make sure to properly ventilate the area by opening windows or doors to prevent the buildup of strong bleach fumes.

| Step | Procedure |
|---|---|
| 1 | Turn off water heater and water pump. |
| 2 | Drain the freshwater system. |
| 3 | Locate fresh water tank drain and low-point drains. |
| 4 | Calculate the amount of bleach needed. |
| 5 | Dilute bleach in water and add it to the tank. |
| 6 | Fill the tank with potable water. |
| 7 | Pump the bleach solution through the system. |
| 8 | Let the water sit in the tank for 12-24 hours. |
| 9 | Drain the tank and flush the system. |
Why Sanitize Your RV Fresh Water Tank?
Regular sanitization of your RV fresh water tank is crucial to maintain a clean and safe water supply during your camping adventures. Failure to sanitize your tank can lead to the growth of harmful bacteria, mold, and mildew, compromising not only the quality of your water but also your health.
Water used to fill the tank may not always be clean, especially when drawing from natural sources or questionable campground hookups. Without proper sanitization, these contaminants can multiply and flourish, posing a potential risk to you and your family.
By dedicating time to sanitize your RV fresh water tank, you eliminate the threat of bacteria, mold, and mildew growth. This proactive approach ensures that your water remains safe, clean, and free from harmful organisms that can cause illnesses and ruin your camping experience.
Sanitizing your RV’s fresh water tank guarantees a clean water supply for drinking, cooking, showering, and other daily activities on the road.
Investing the effort to sanitize your tank at regular intervals gives you peace of mind, knowing that you are providing your family with the best and safest water possible. Don’t let the potential health risks of untreated water dampen your RV travels.
Protect Your Health and Enjoy Clean Water
Sanitizing your RV fresh water tank is a simple process that yields significant benefits. By eliminating bacteria, mold, and mildew, you ensure clean and healthy water, promoting your well-being as you explore nature’s wonders.
To further emphasize the importance of RV water tank sanitization, consider the following:
- Ingesting or coming into contact with contaminated water can result in gastrointestinal issues, skin irritations, and other health problems.
- Waterborne diseases, such as Legionnaires’ disease and giardiasis, can be contracted through the consumption of untreated water.
- Without proper sanitization, bacteria and mold can proliferate not only in the tank but also in the water lines, faucets, and showerheads.
Take action today to protect your health and ensure a continuous supply of clean water during your RV adventures. Follow the recommended sanitization guidelines, and enjoy your travels with confidence.

| Benefits of Sanitizing Your RV Water Tank |
|---|
| Prevents bacteria, mold, and mildew growth |
| Ensures a clean and safe water supply |
| Protects your health and the well-being of your family |
| Promotes peace of mind during your camping trips |
When to Sanitize RV Fresh Water Tank Systems
Proper maintenance of your RV’s fresh water tank is crucial to ensure clean and safe water during your travels. While it is generally recommended to sanitize your tank every six months, there are certain circumstances that necessitate more frequent sanitization.
- If you notice an odd taste or smell in your fresh water, it’s a clear sign that sanitization is needed. Unpleasant odors or flavors can indicate the presence of bacteria or other contaminants.
- When your RV has been in storage for an extended period, it’s wise to sanitize the tank before using it. Stagnant water, combined with temperature changes, can create a breeding ground for bacteria and mold.
- If you suspect that the water used to fill your tank was not clean, sanitizing is necessary to ensure the water quality. Water from unknown sources or areas with questionable water supply may contain harmful microorganisms.
By following a regular sanitization schedule and paying attention to the signs mentioned above, you can maintain a high standard of water quality in your RV’s fresh water tank.
Tips for Effective RV Fresh Water Tank Sanitization:
- Use gloves and protective eyewear while handling cleaning solutions to ensure your safety.
- Follow the instructions provided by your RV manufacturer or refer to your RV’s user manual for specific sanitization guidelines.
- Consider using RV-specific tank sanitizers or environmentally-friendly cleaning solutions for a more eco-conscious approach.
- Flush your system with clean water after sanitizing to remove any remaining cleaning solution.
How to Sanitize Your RV Fresh Water Tank
To ensure clean and safe water during your camping trips, it’s important to regularly sanitize your RV’s fresh water tank. Follow these simple steps to sanitize your tank and maintain a healthy water supply:
1. Start by turning off the water heater and pump to prevent any damage during the sanitizing process. Bypass the water heater and filter to avoid any bleach mixture from entering these components.
2. Drain the entire fresh water system by removing the water heater plug and opening the low-point drains. This will ensure that all water is removed from the tank and the lines.
3. Create a bleach mixture by mixing a quarter cup of non-scented household bleach with every 15 gallons of tank capacity. Add the bleach mixture to the tank, then fill the tank with potable water. This will help to kill any bacteria or mold present in the tank.
4. Turn on the pump and open all faucets, including showerheads, to allow the bleach solution to circulate throughout the entire system. This will ensure that all parts of the system are thoroughly cleaned.
5. Let the bleach solution sit in the system for 24 hours to ensure effective sanitization. After the designated time, drain the tank and lines completely.
6. Finally, refill the tank with clean water and run all faucets again to remove any remaining bleach from the system. Ensure that there is no bleach odor or taste in the water. Once done, replace the water heater plug and turn off bypass mode to resume regular water usage.
By following these steps, you can easily sanitize your RV fresh water tank and maintain a clean water supply throughout your camping adventures.
FAQ
How often should you sanitize your RV fresh water tank?
It is generally recommended to sanitize your RV fresh water tank every six months. However, certain situations may require more frequent sanitization. This includes noticing an odd taste or smell in your fresh water, storing your RV for an extended period, or suspecting that the water used to fill your tank was not clean.
What do you need to sanitize your RV fresh water tank?
To sanitize your RV fresh water tank, you will need a measuring cup, funnel, 5-gallon bucket or water storage container, potable water hose, non-scented bleach or RV tank sanitizer, and a water tank filler (optional). These supplies can be easily obtained from your local hardware store or camping supply shop.
How to sanitize RV fresh water tank with bleach?
To sanitize your RV fresh water tank with bleach, start by turning off the water heater and pump. Bypass the water heater and filter to avoid damaging them during the cleaning process. Drain the entire fresh water system by removing the water heater plug and opening the low-point drains. Create a bleach mixture by diluting the bleach in water and add it to the tank. Fill the tank with potable water. Turn on the pump and open all faucets to circulate the bleach solution throughout the system. Let the bleach sit in the system for 24 hours, then drain the tank and lines. Refill the tank with clean water, run the faucets to remove any remaining bleach, and finish by replacing the water heater plug and turning off bypass mode.
Why sanitize your RV fresh water tank?
Sanitizing your RV fresh water tank is important to prevent the growth of bacteria, mold, and mildew in the tank and water lines. Water used to fill the tank may not always be clean, so regular sanitization ensures a clean water supply. By killing off potentially harmful organisms, you can keep your family healthy and enjoy your RV travels without worrying about water quality.
When to sanitize RV fresh water tank systems?
The frequency of sanitizing your RV fresh water tank depends on your usage and circumstances. It is generally recommended to sanitize the tank at least once a year, usually in the spring when getting your RV ready for the camping season. However, if you notice an odd taste or smell in your fresh water, it’s a sign that sanitization is needed. Additionally, if your RV has been in storage for a long period of time or you suspect that the water used to fill your tank was not clean, it is a good idea to sanitize the tank before using it.
How to sanitize RV fresh water tank?
To sanitize your RV fresh water tank, start by turning off the water heater and pump. Bypass the water heater and filter to avoid damaging them during the cleaning process. Drain the entire fresh water system by removing the water heater plug and opening the low-point drains. Create a bleach mixture by diluting the bleach in water and add it to the tank. Fill the tank with potable water. Turn on the pump and open all faucets to circulate the bleach solution throughout the system. Let the bleach sit in the system for 24 hours, then drain the tank and lines. Refill the tank with clean water, run the faucets to remove any remaining bleach, and finish by replacing the water heater plug and turning off bypass mode.